So I should apologize upfront for sucking at the process photos this time. I didn’t take as many as I really should have early on, and then eventually it became a huge time crunch and I completely bailed on the photos altogether. I’ve posted what I’ve got though, and I’ll break down a description of how everything’s built.
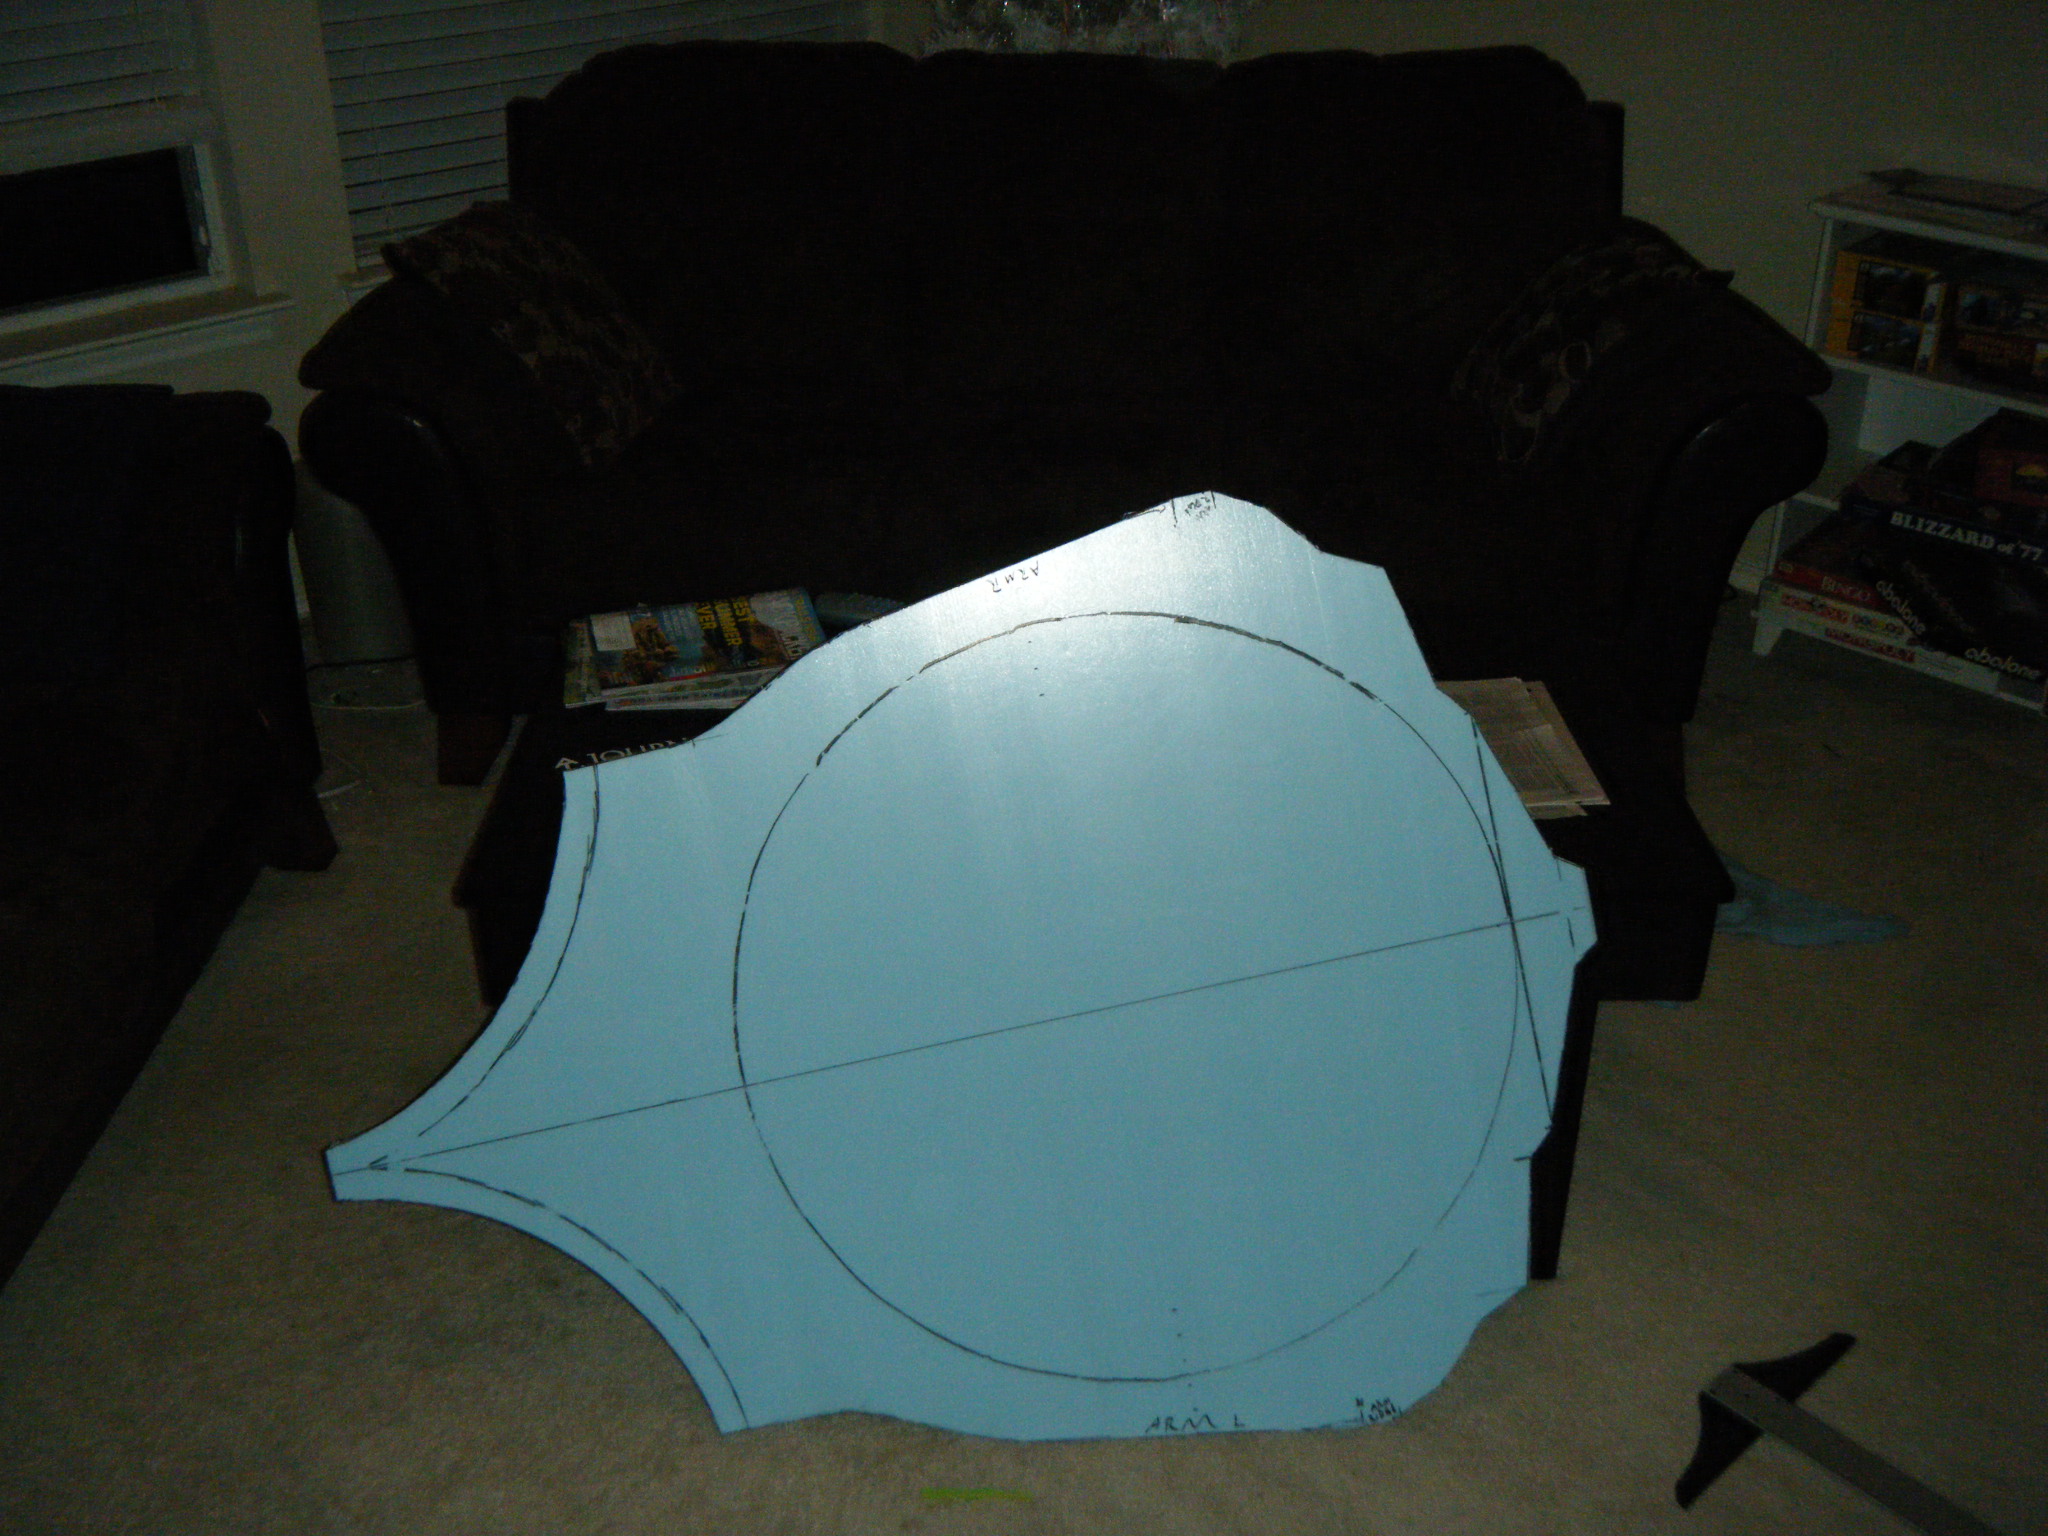
One of the hardest things to making this costume is the scale. Since I’d be entirely inside of it, all the pieces would only be scaled against each other, and I didn’t really have a good constant against which to gauge the size of all the other parts. With Pyramid Head, the size of the sword and helmet were pretty much decided by my own height and width, but with Big Daddy there was a lot of uncertainty in the mix. Some people play well with this freedom, but not me. I have a really hard time getting started when it’s not clear what the goal is, so I set out to sketch the character to scale.
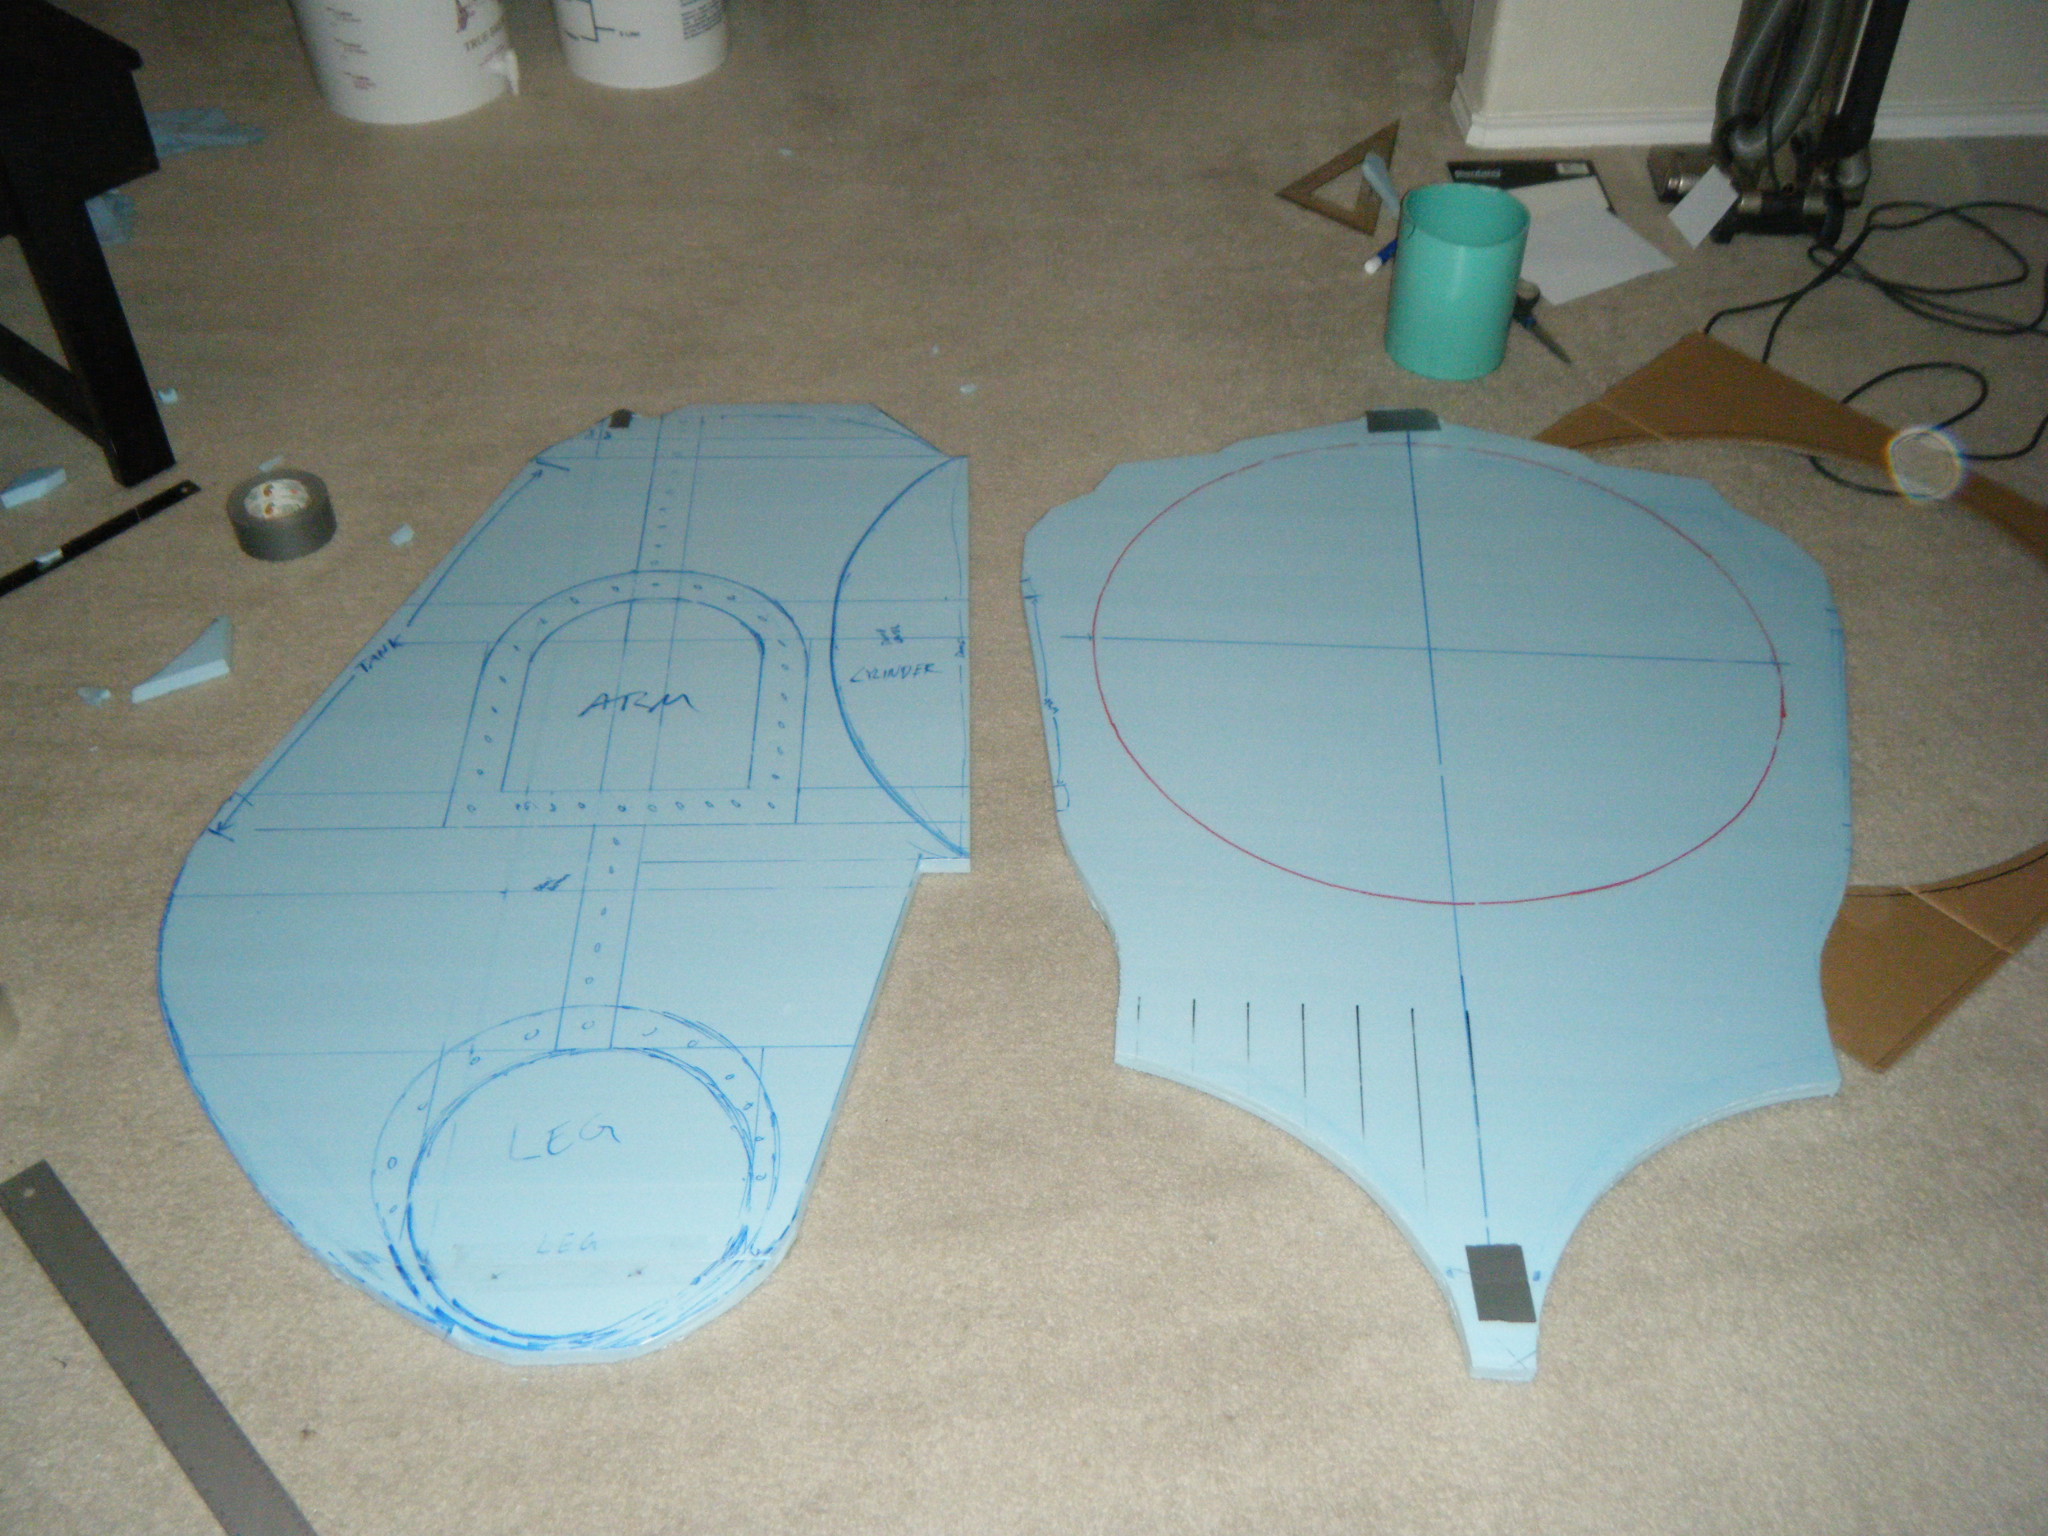
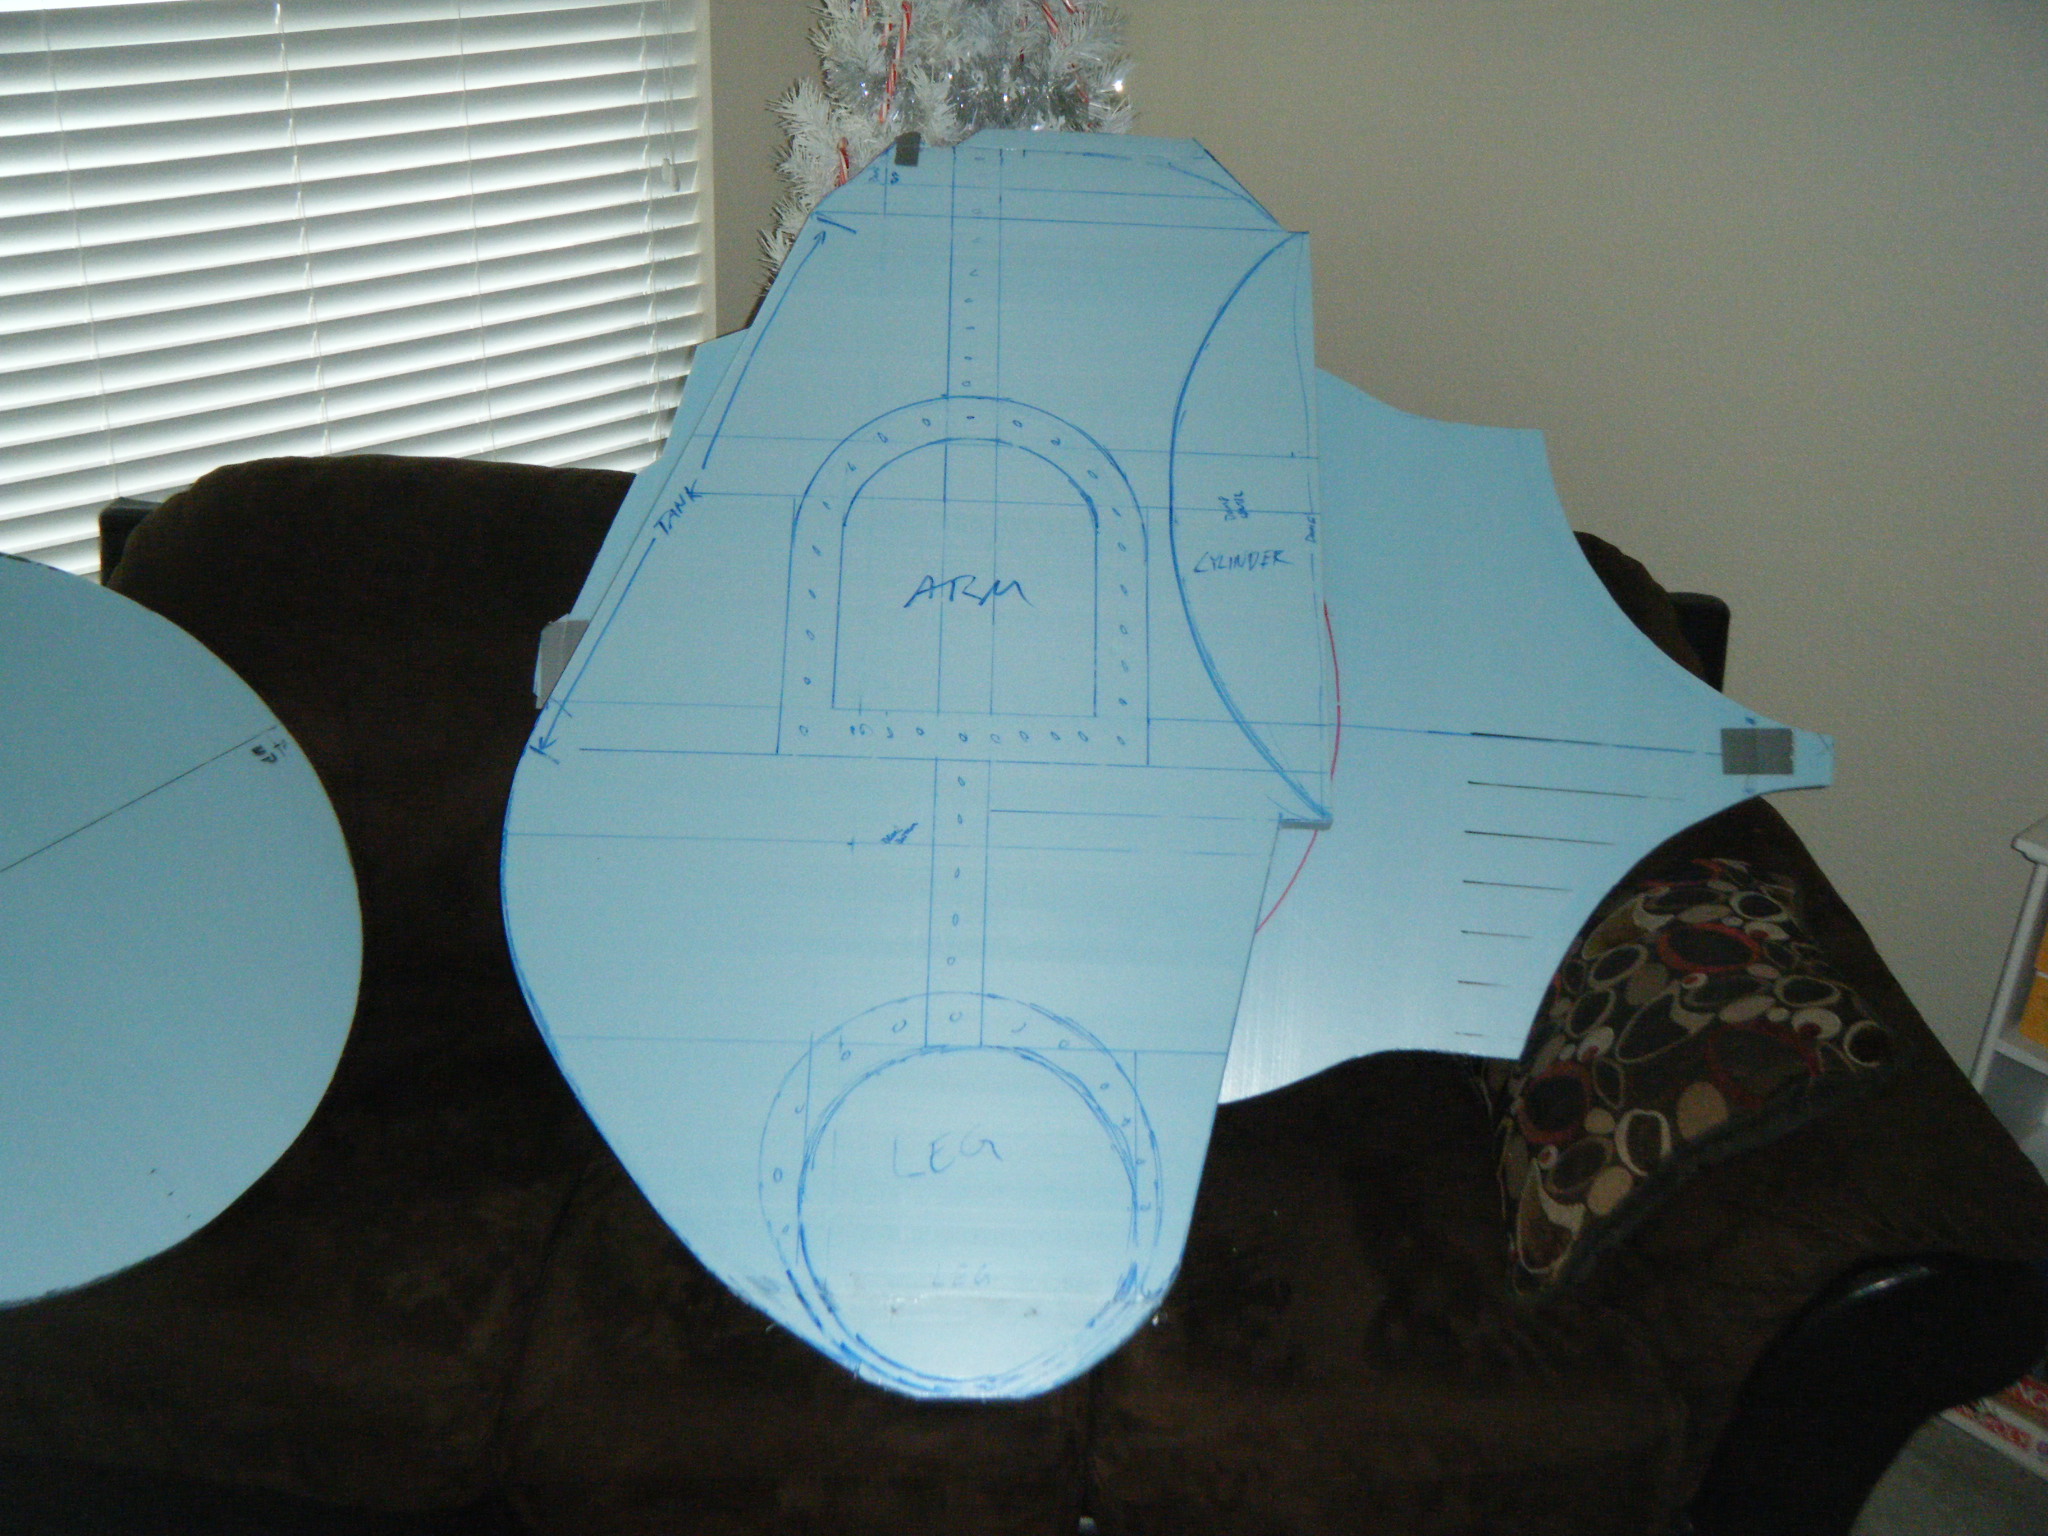
I drew a front- & side-view of the character on graph paper at a scale of 1 grid space = 1 inch. Since a piece of the main shell would have to go between my legs, I knew the shell had to be at least as tall as I am from crotch to crest, plus a couple inches breathing room. That gave me a lower bound on size. As for upper bound, I knew I wanted my forearms to be the character’s upper arms, the distance between the elbow pits of my outstretched arms would be the upper bound on width (if anyone knows the proper term for this measurement, please let me know). As it turns out, when you take into account the correct ratios of a Big Daddy, these upper and lower bounds pretty much dictate the actual dimensions of the costume, give or take a couple inches. So with a pretty decent estimate on the costume’s height and width, I sketched a pattern that I’d follow for the next three months.
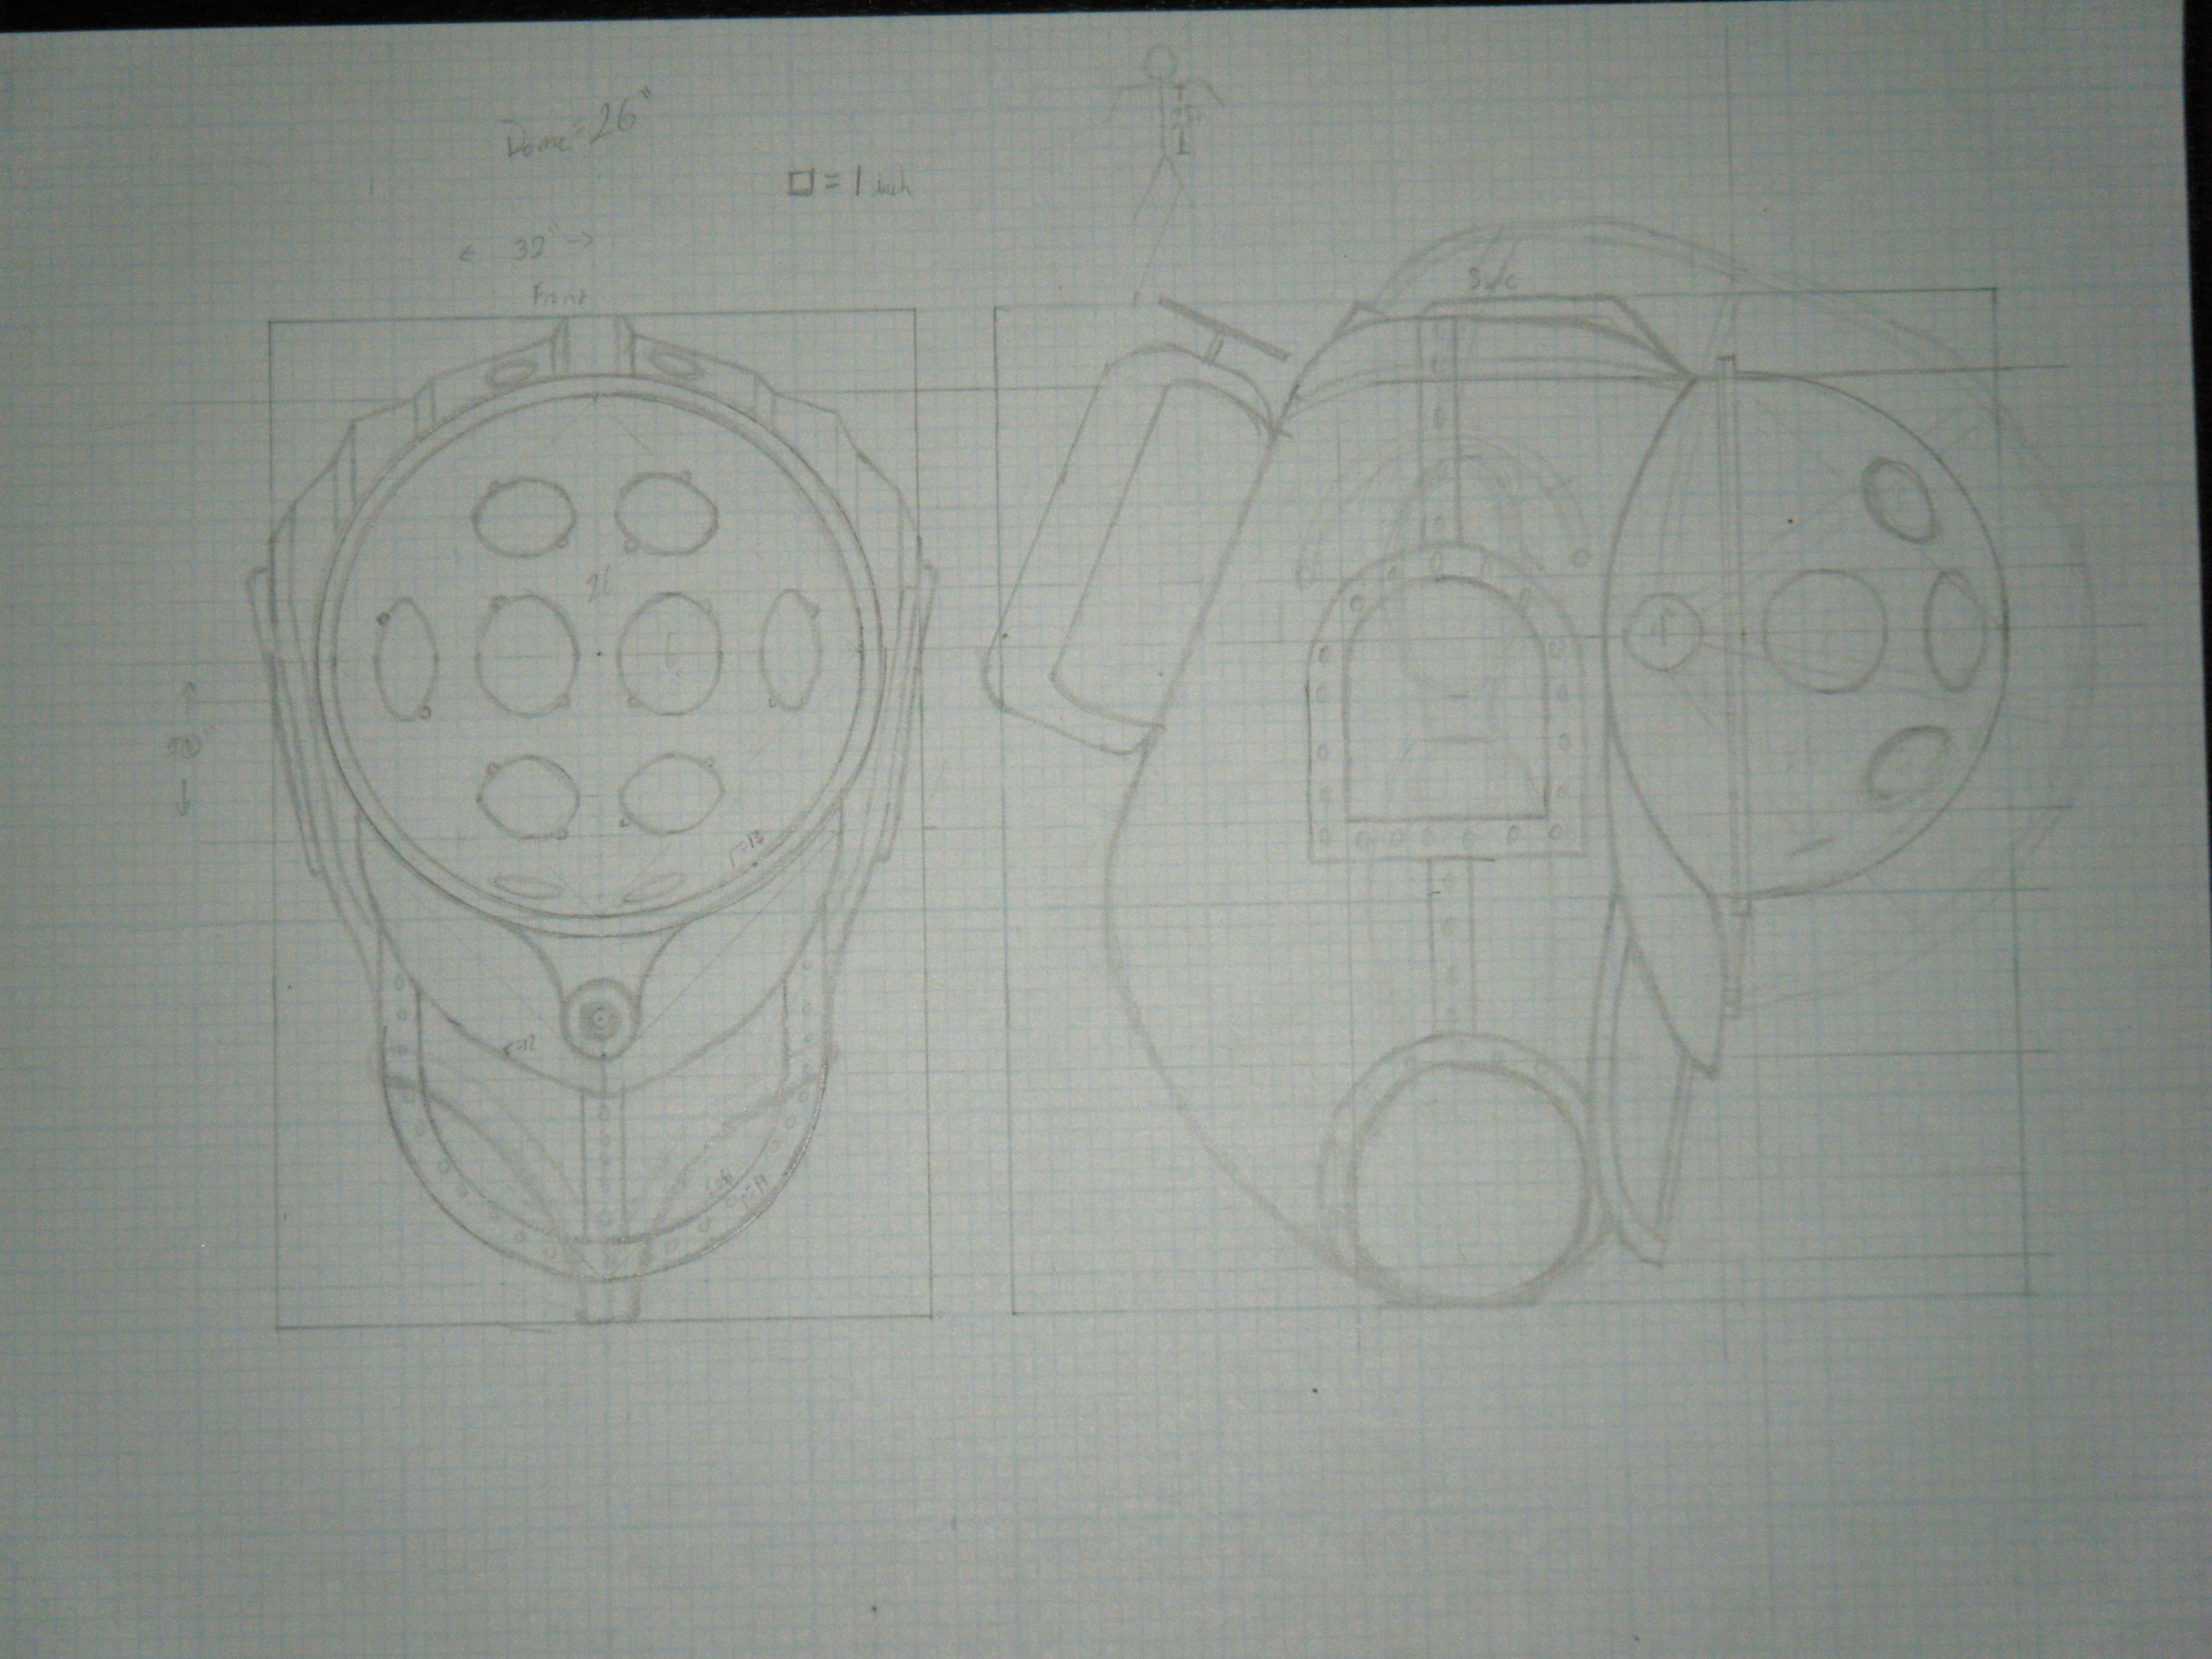
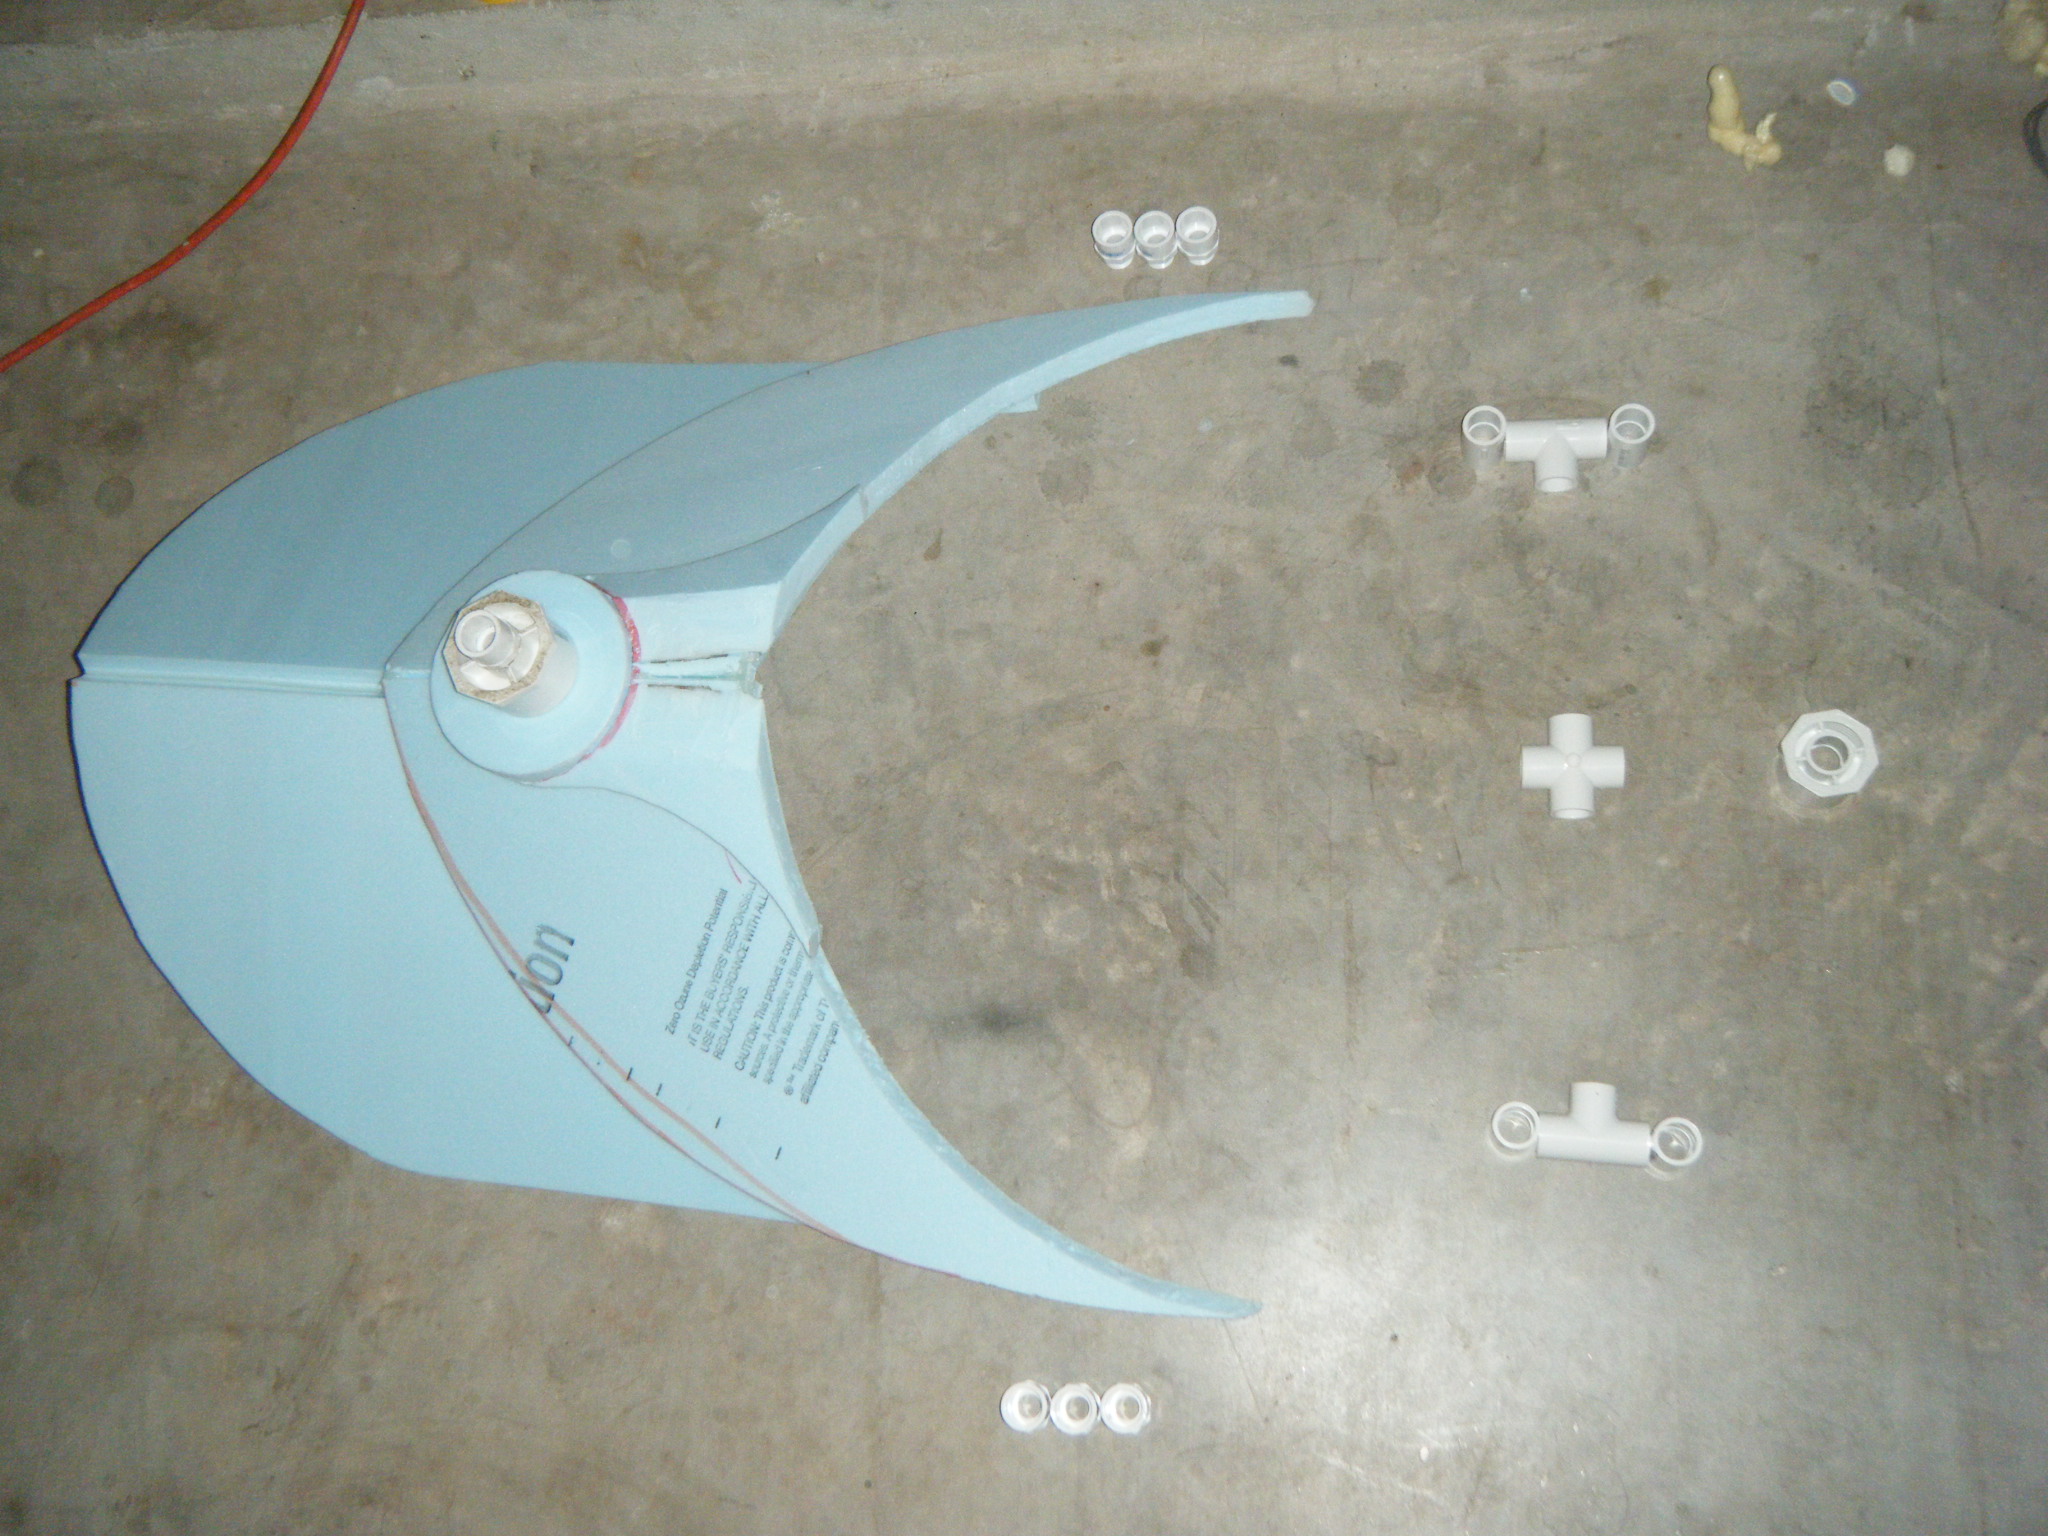
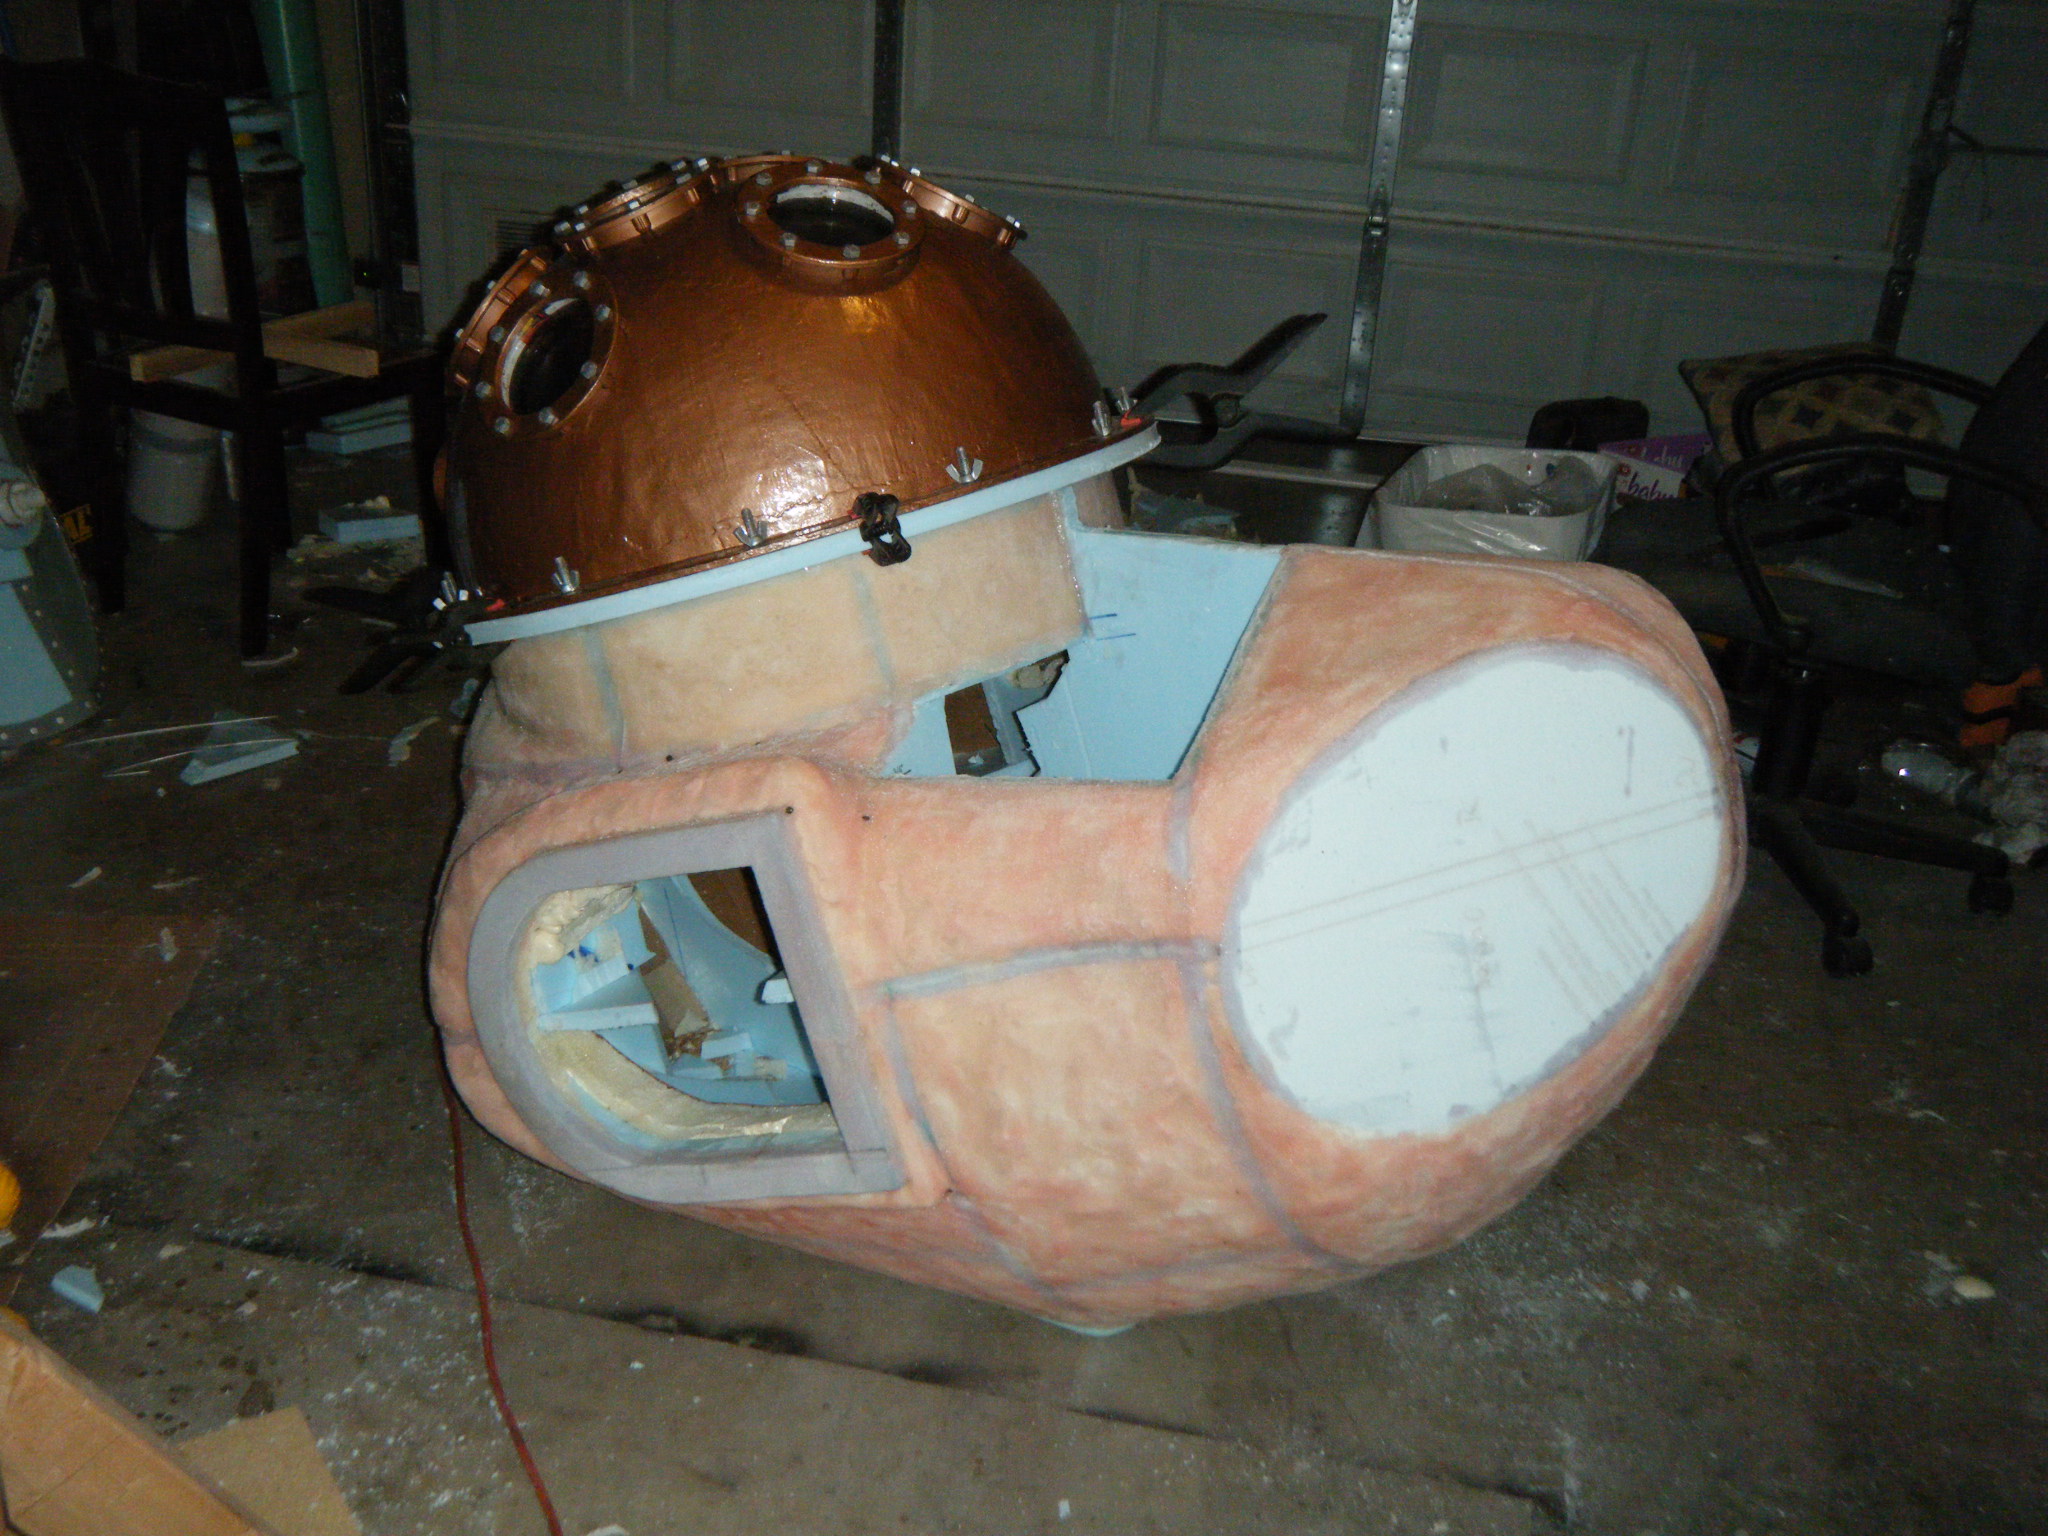
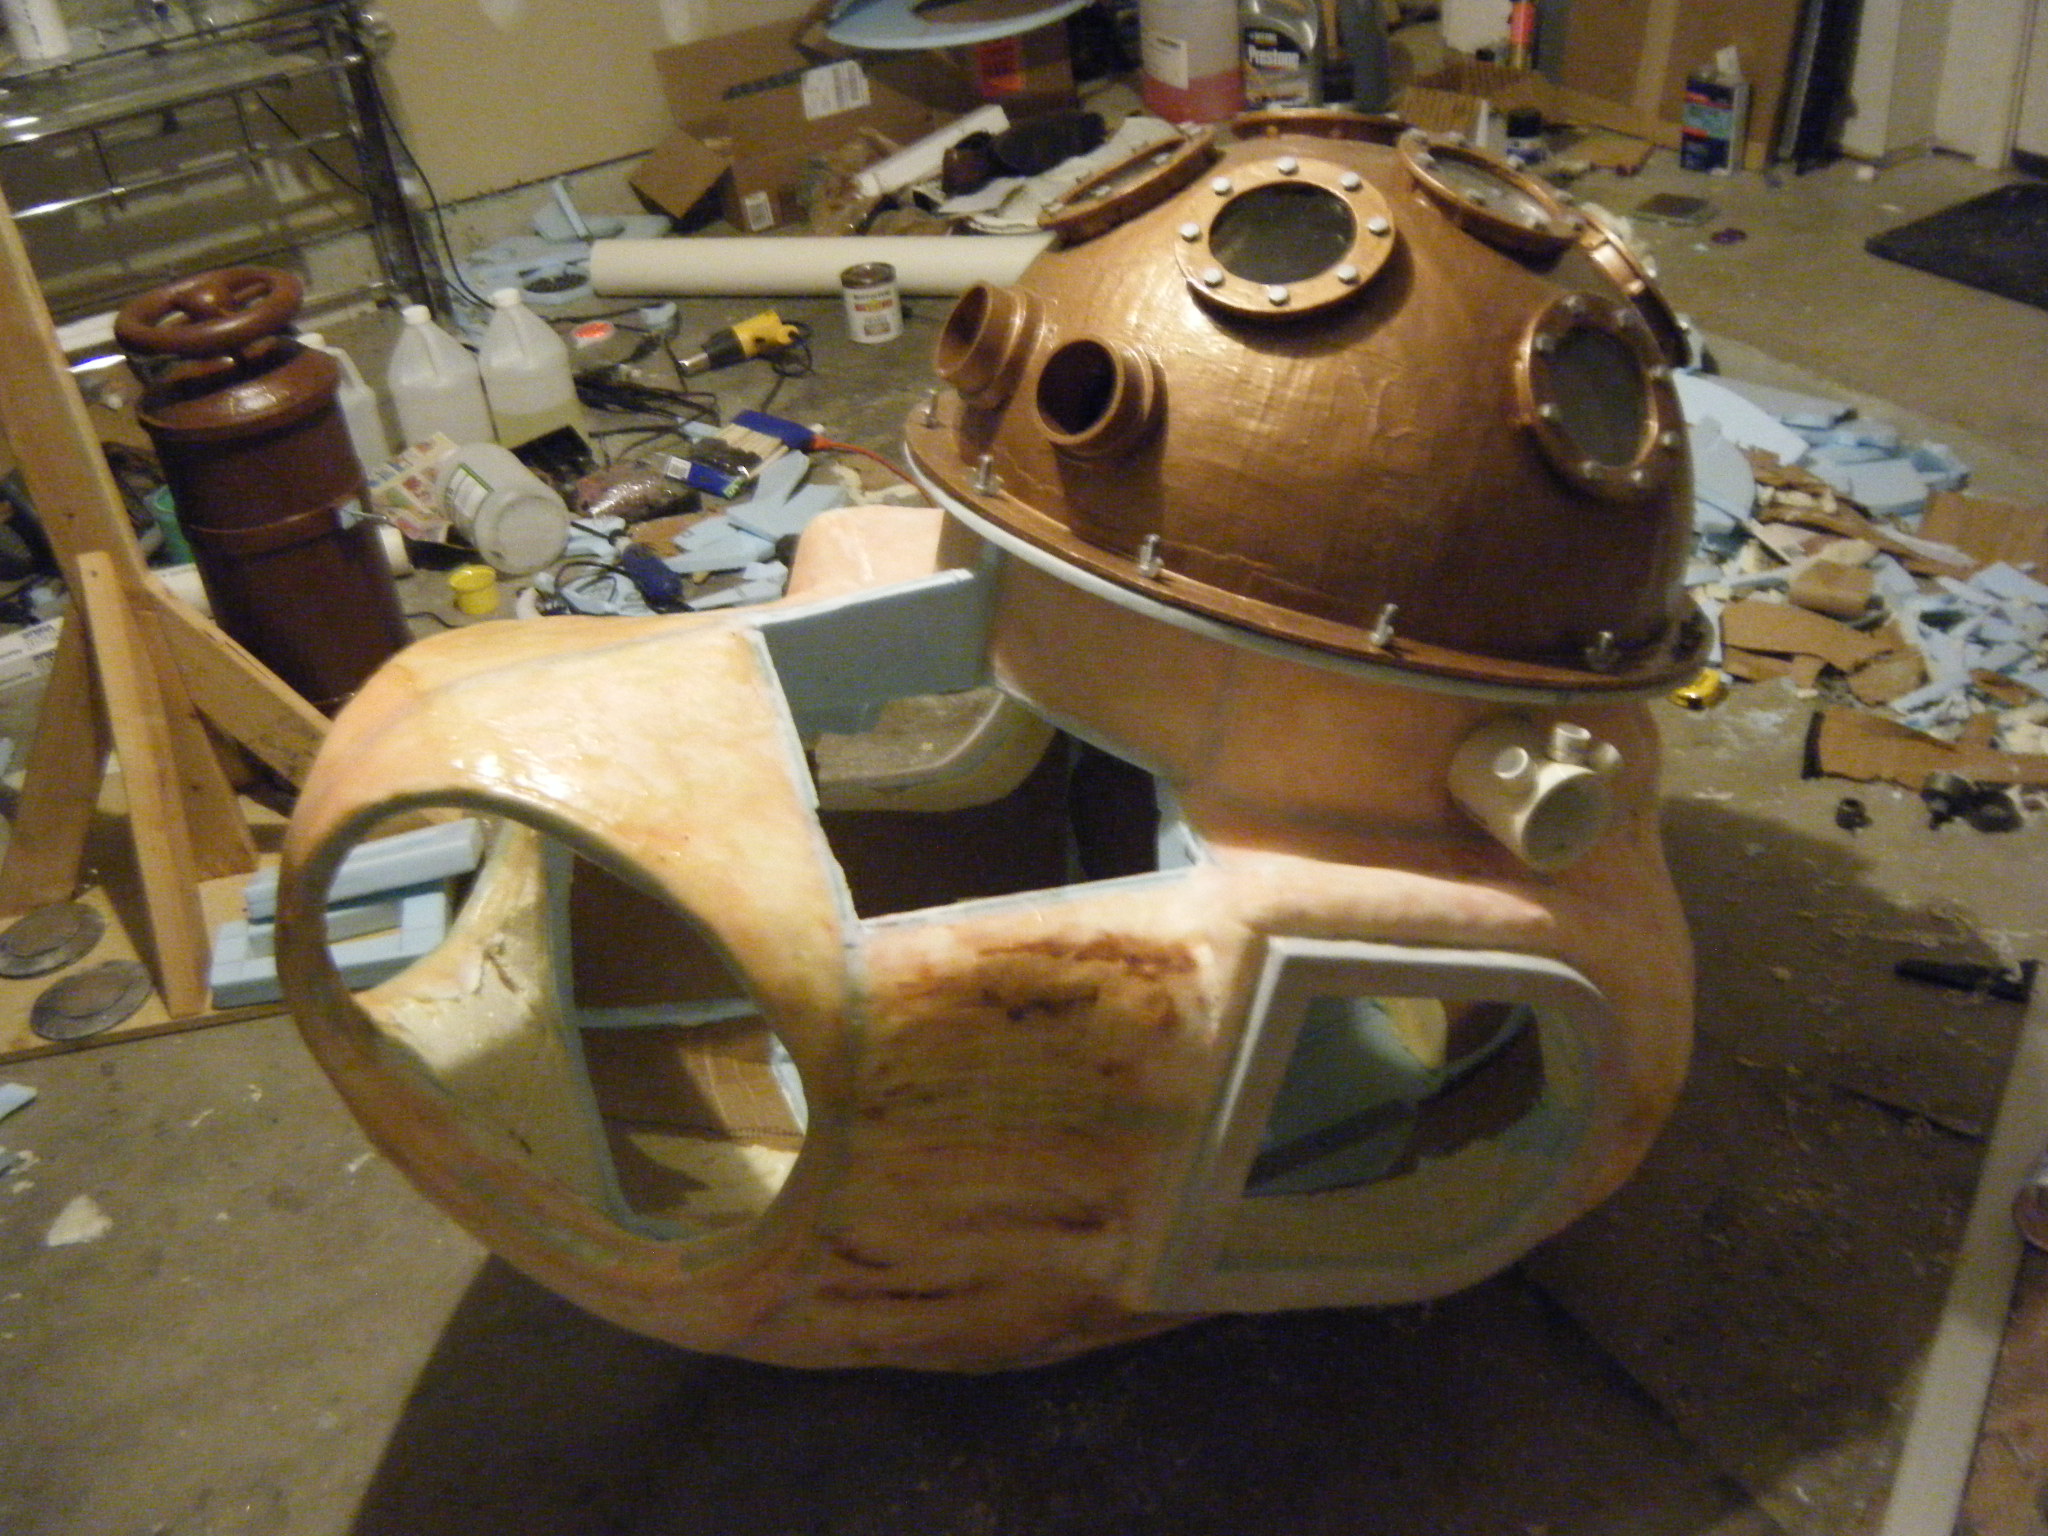
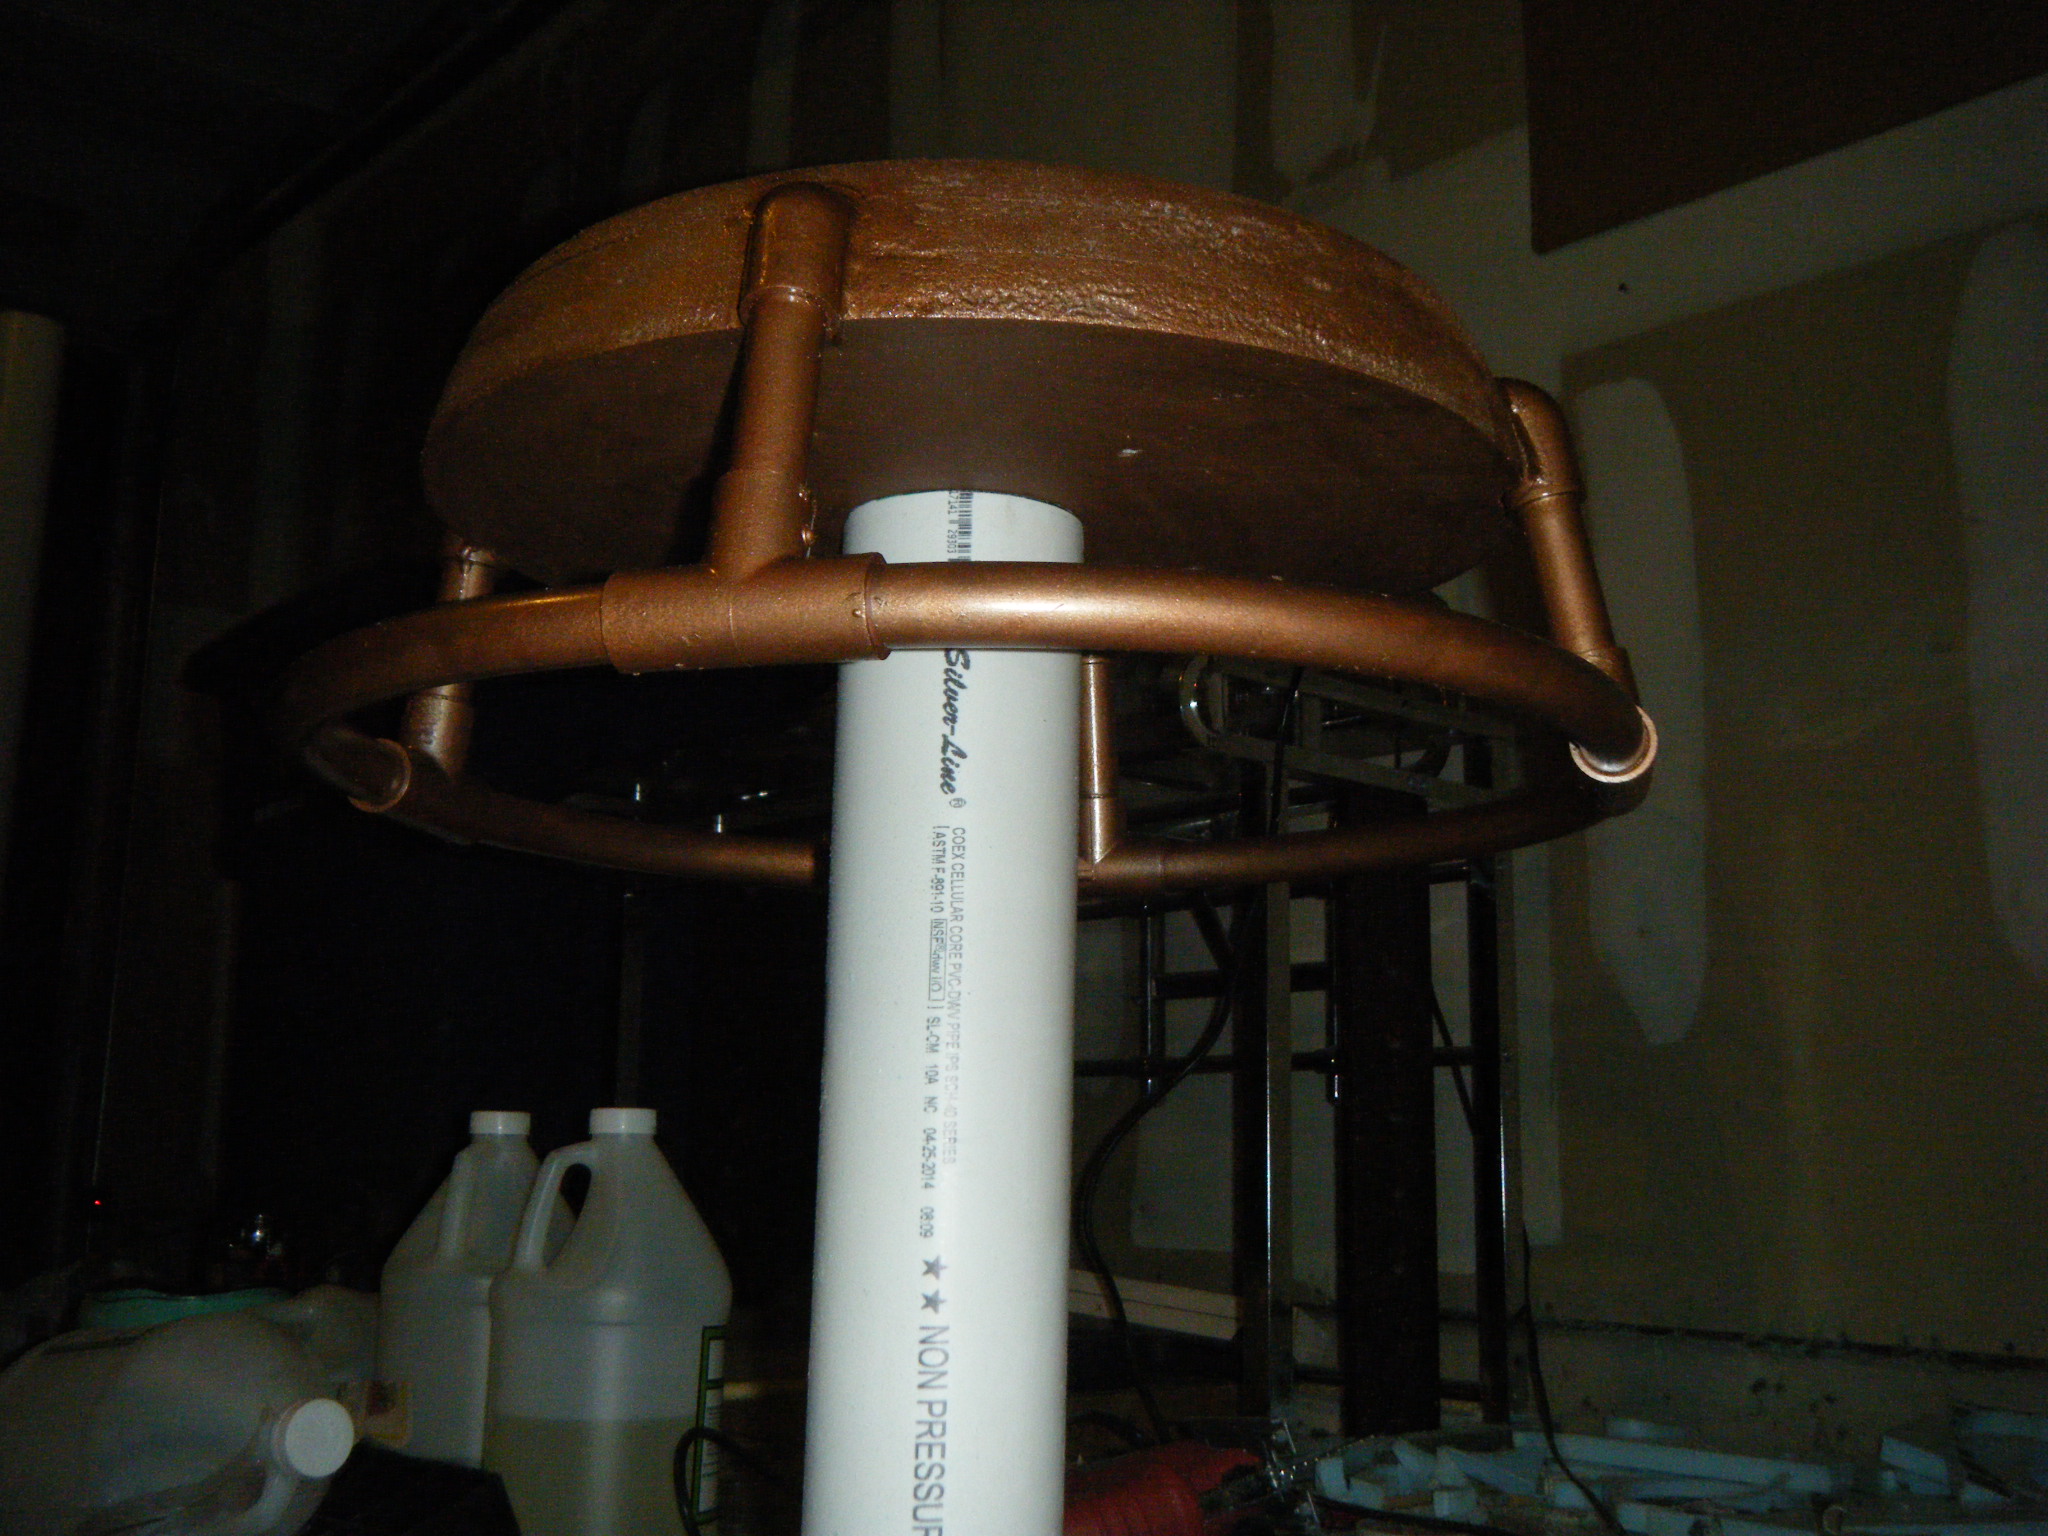
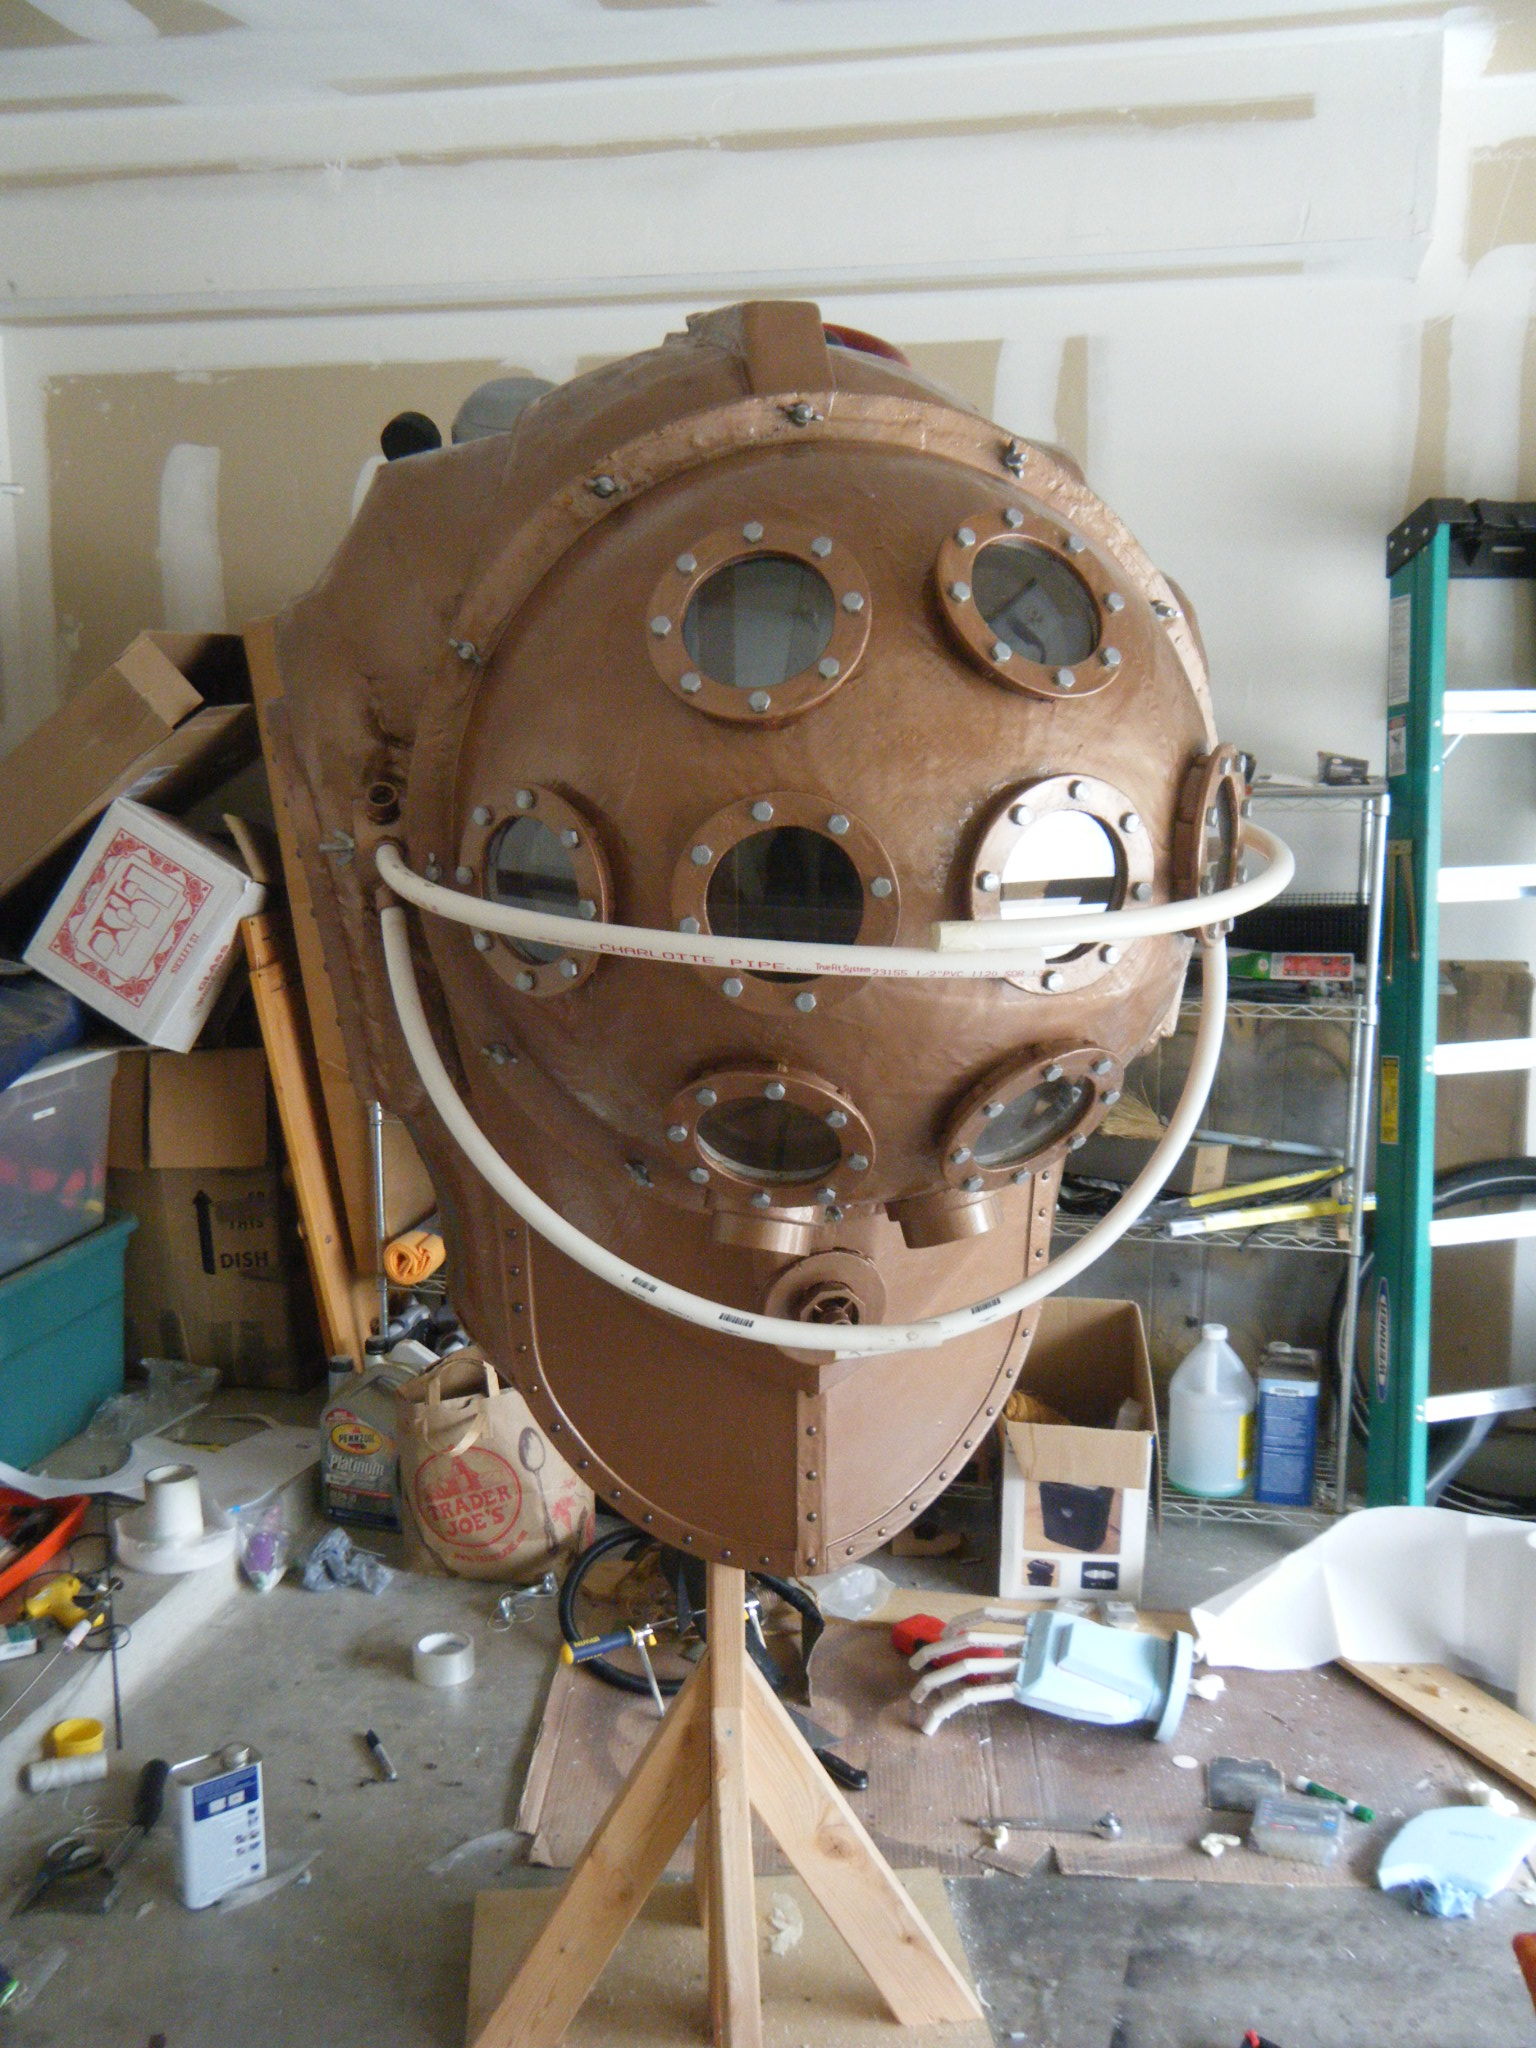
I started with the face dome, because this is kind of the grand-daddy of all costumes, and I was super intimidated. I had this deep-seated dread for starting the work, and I figured I needed to knock out something cool-lookin’ early, so I’d be inspired to finish the rest. The most defining single piece of this costume is that dome on the front with all the port-holes, so that’s what I tackled first.
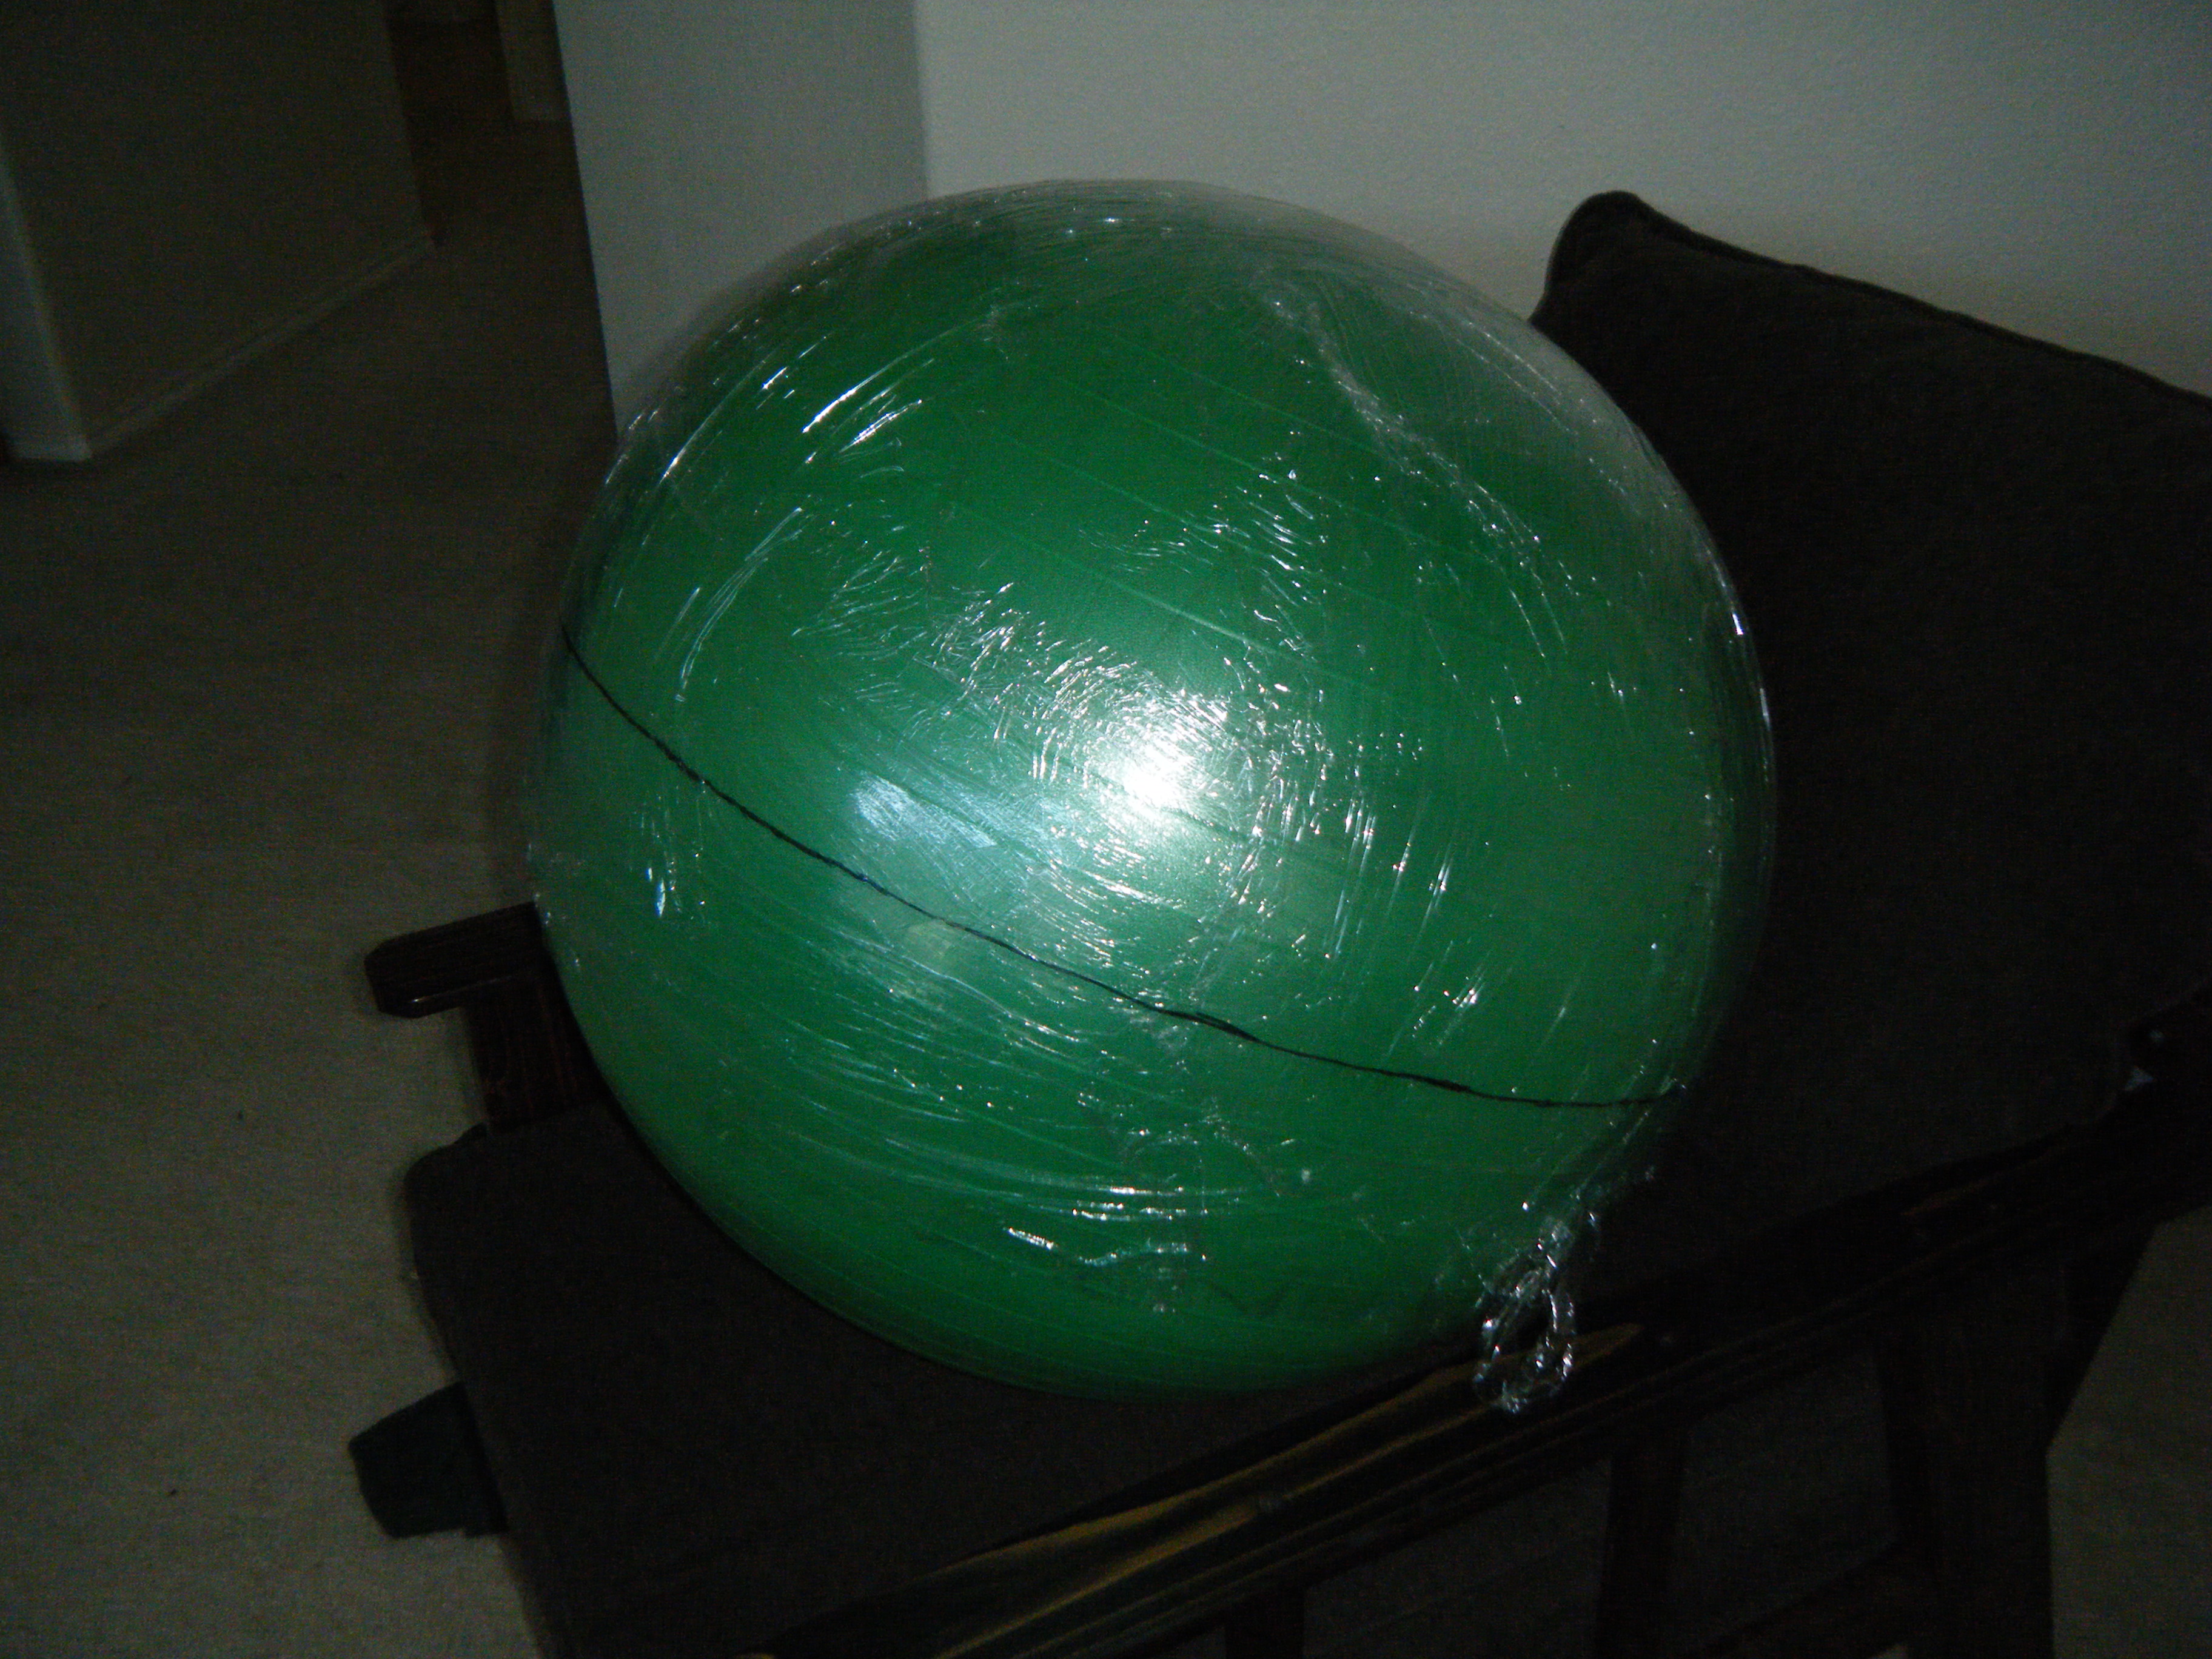
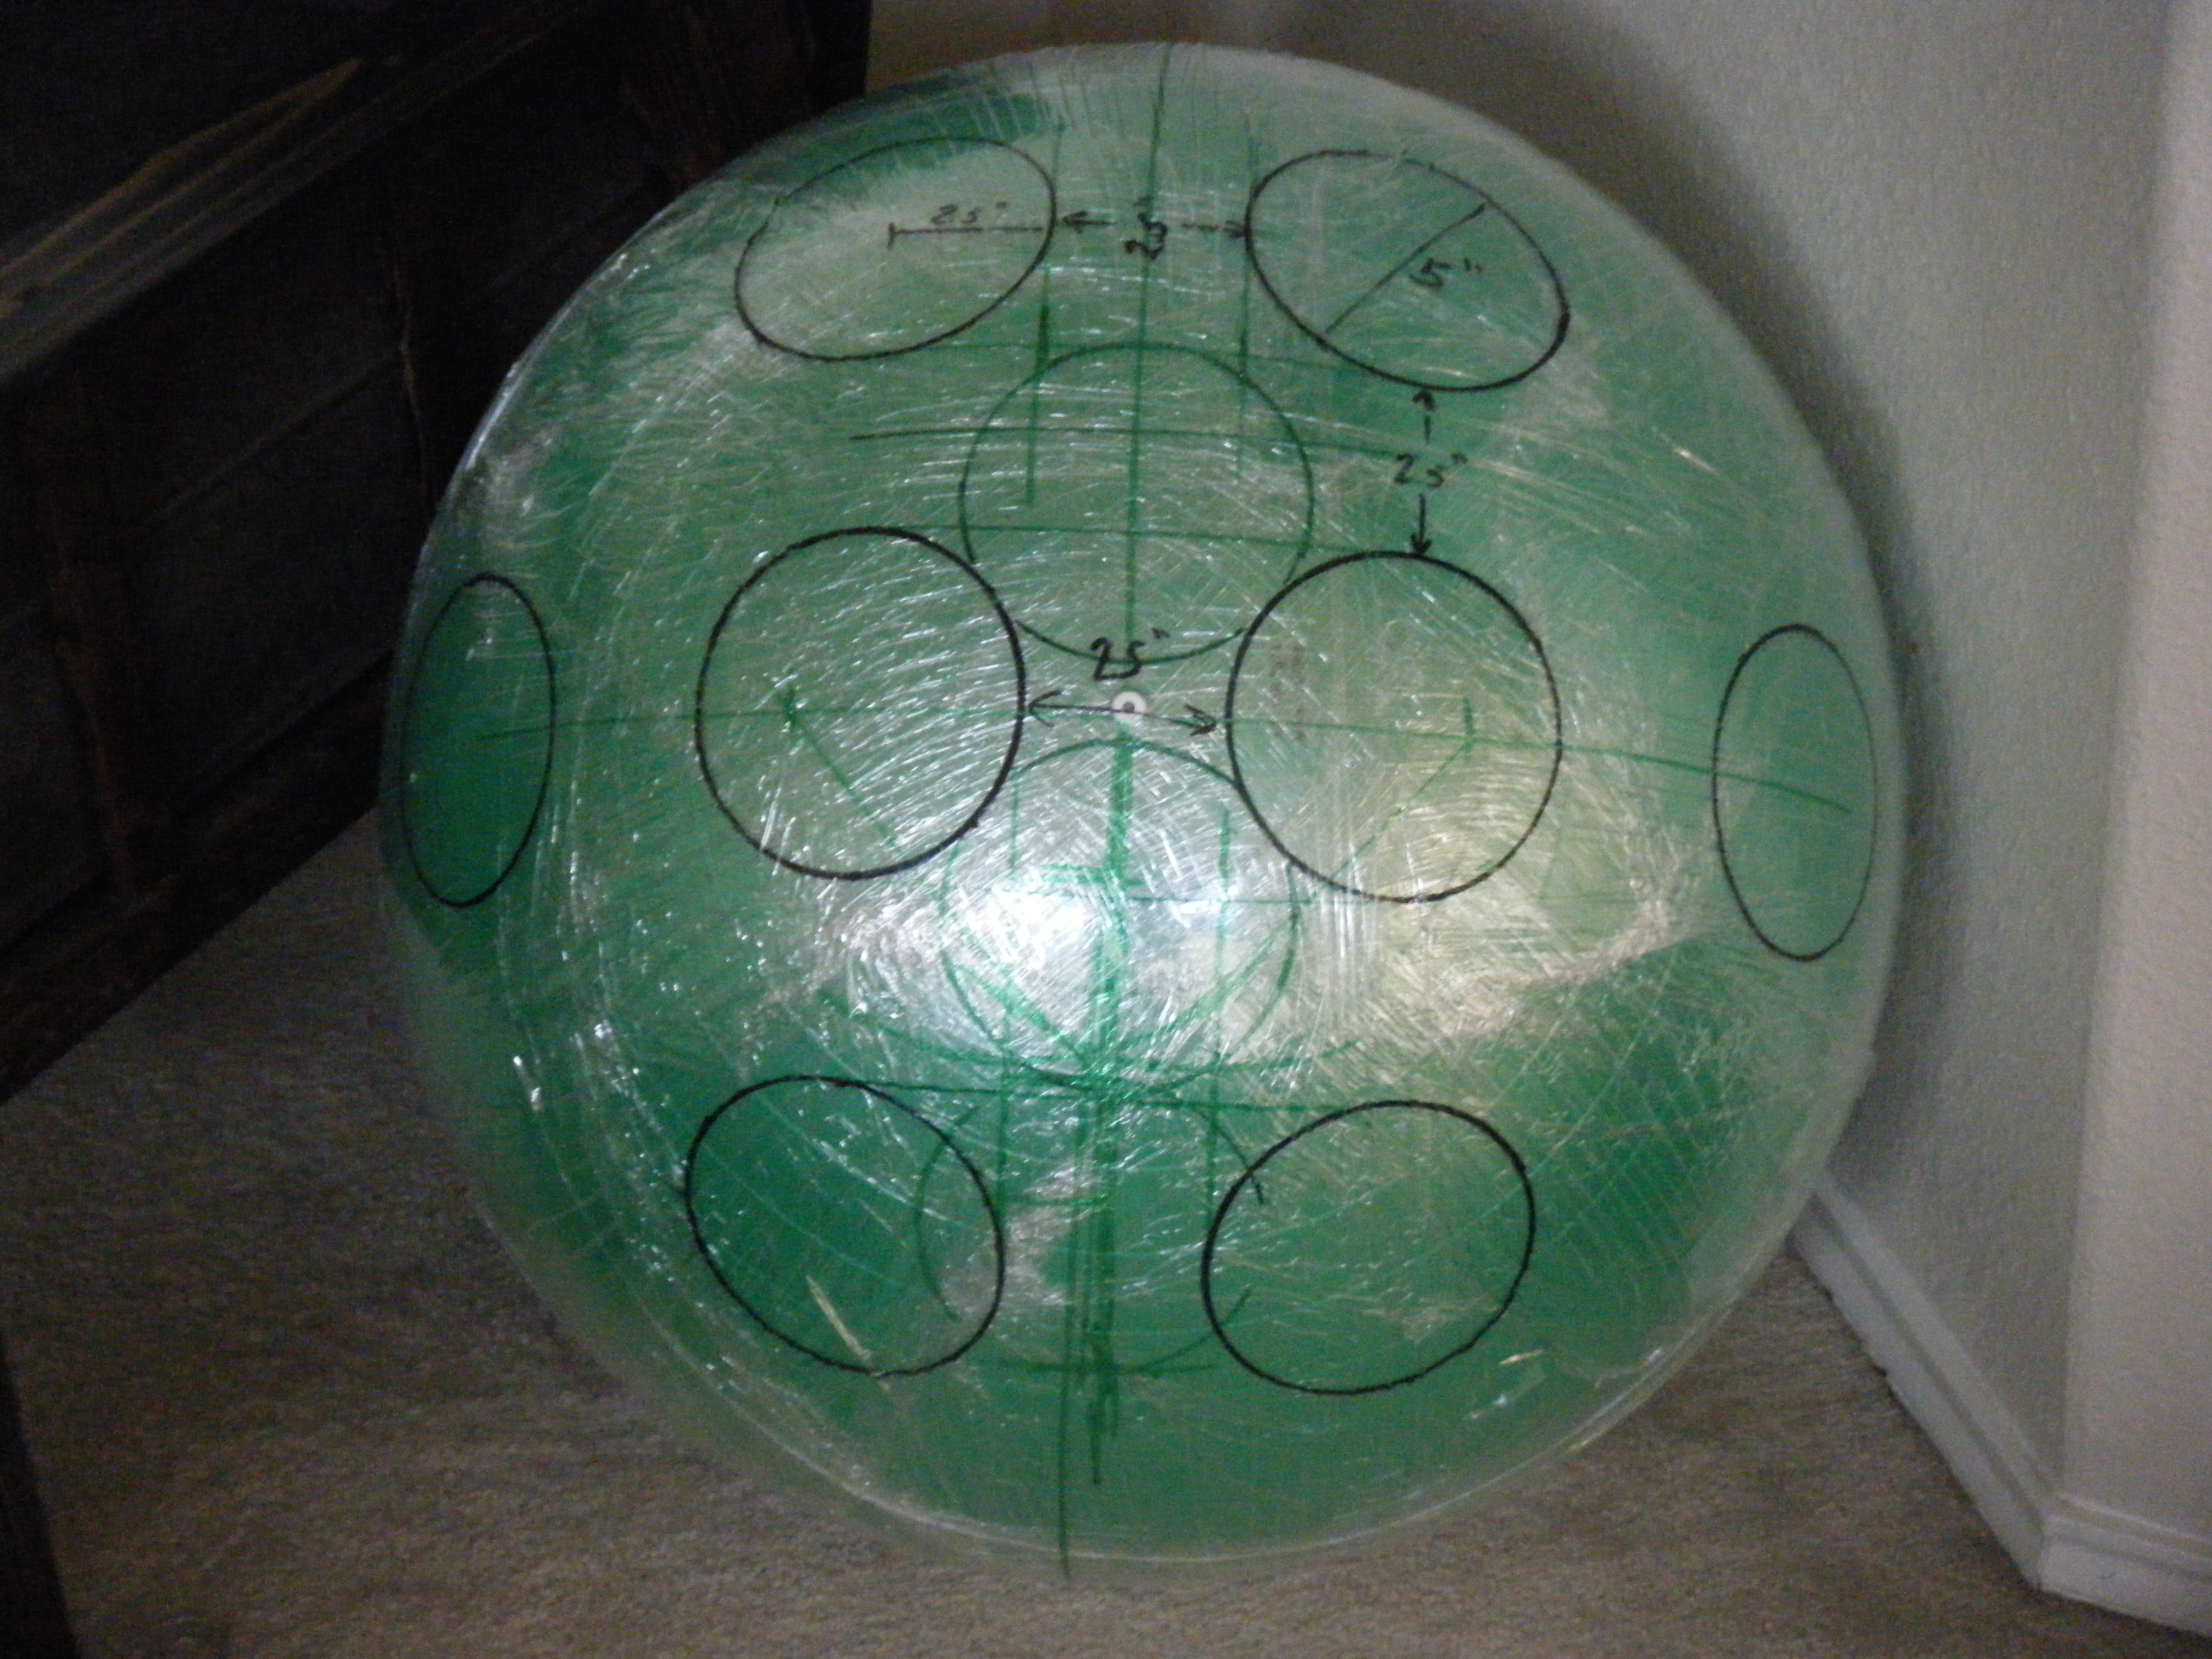
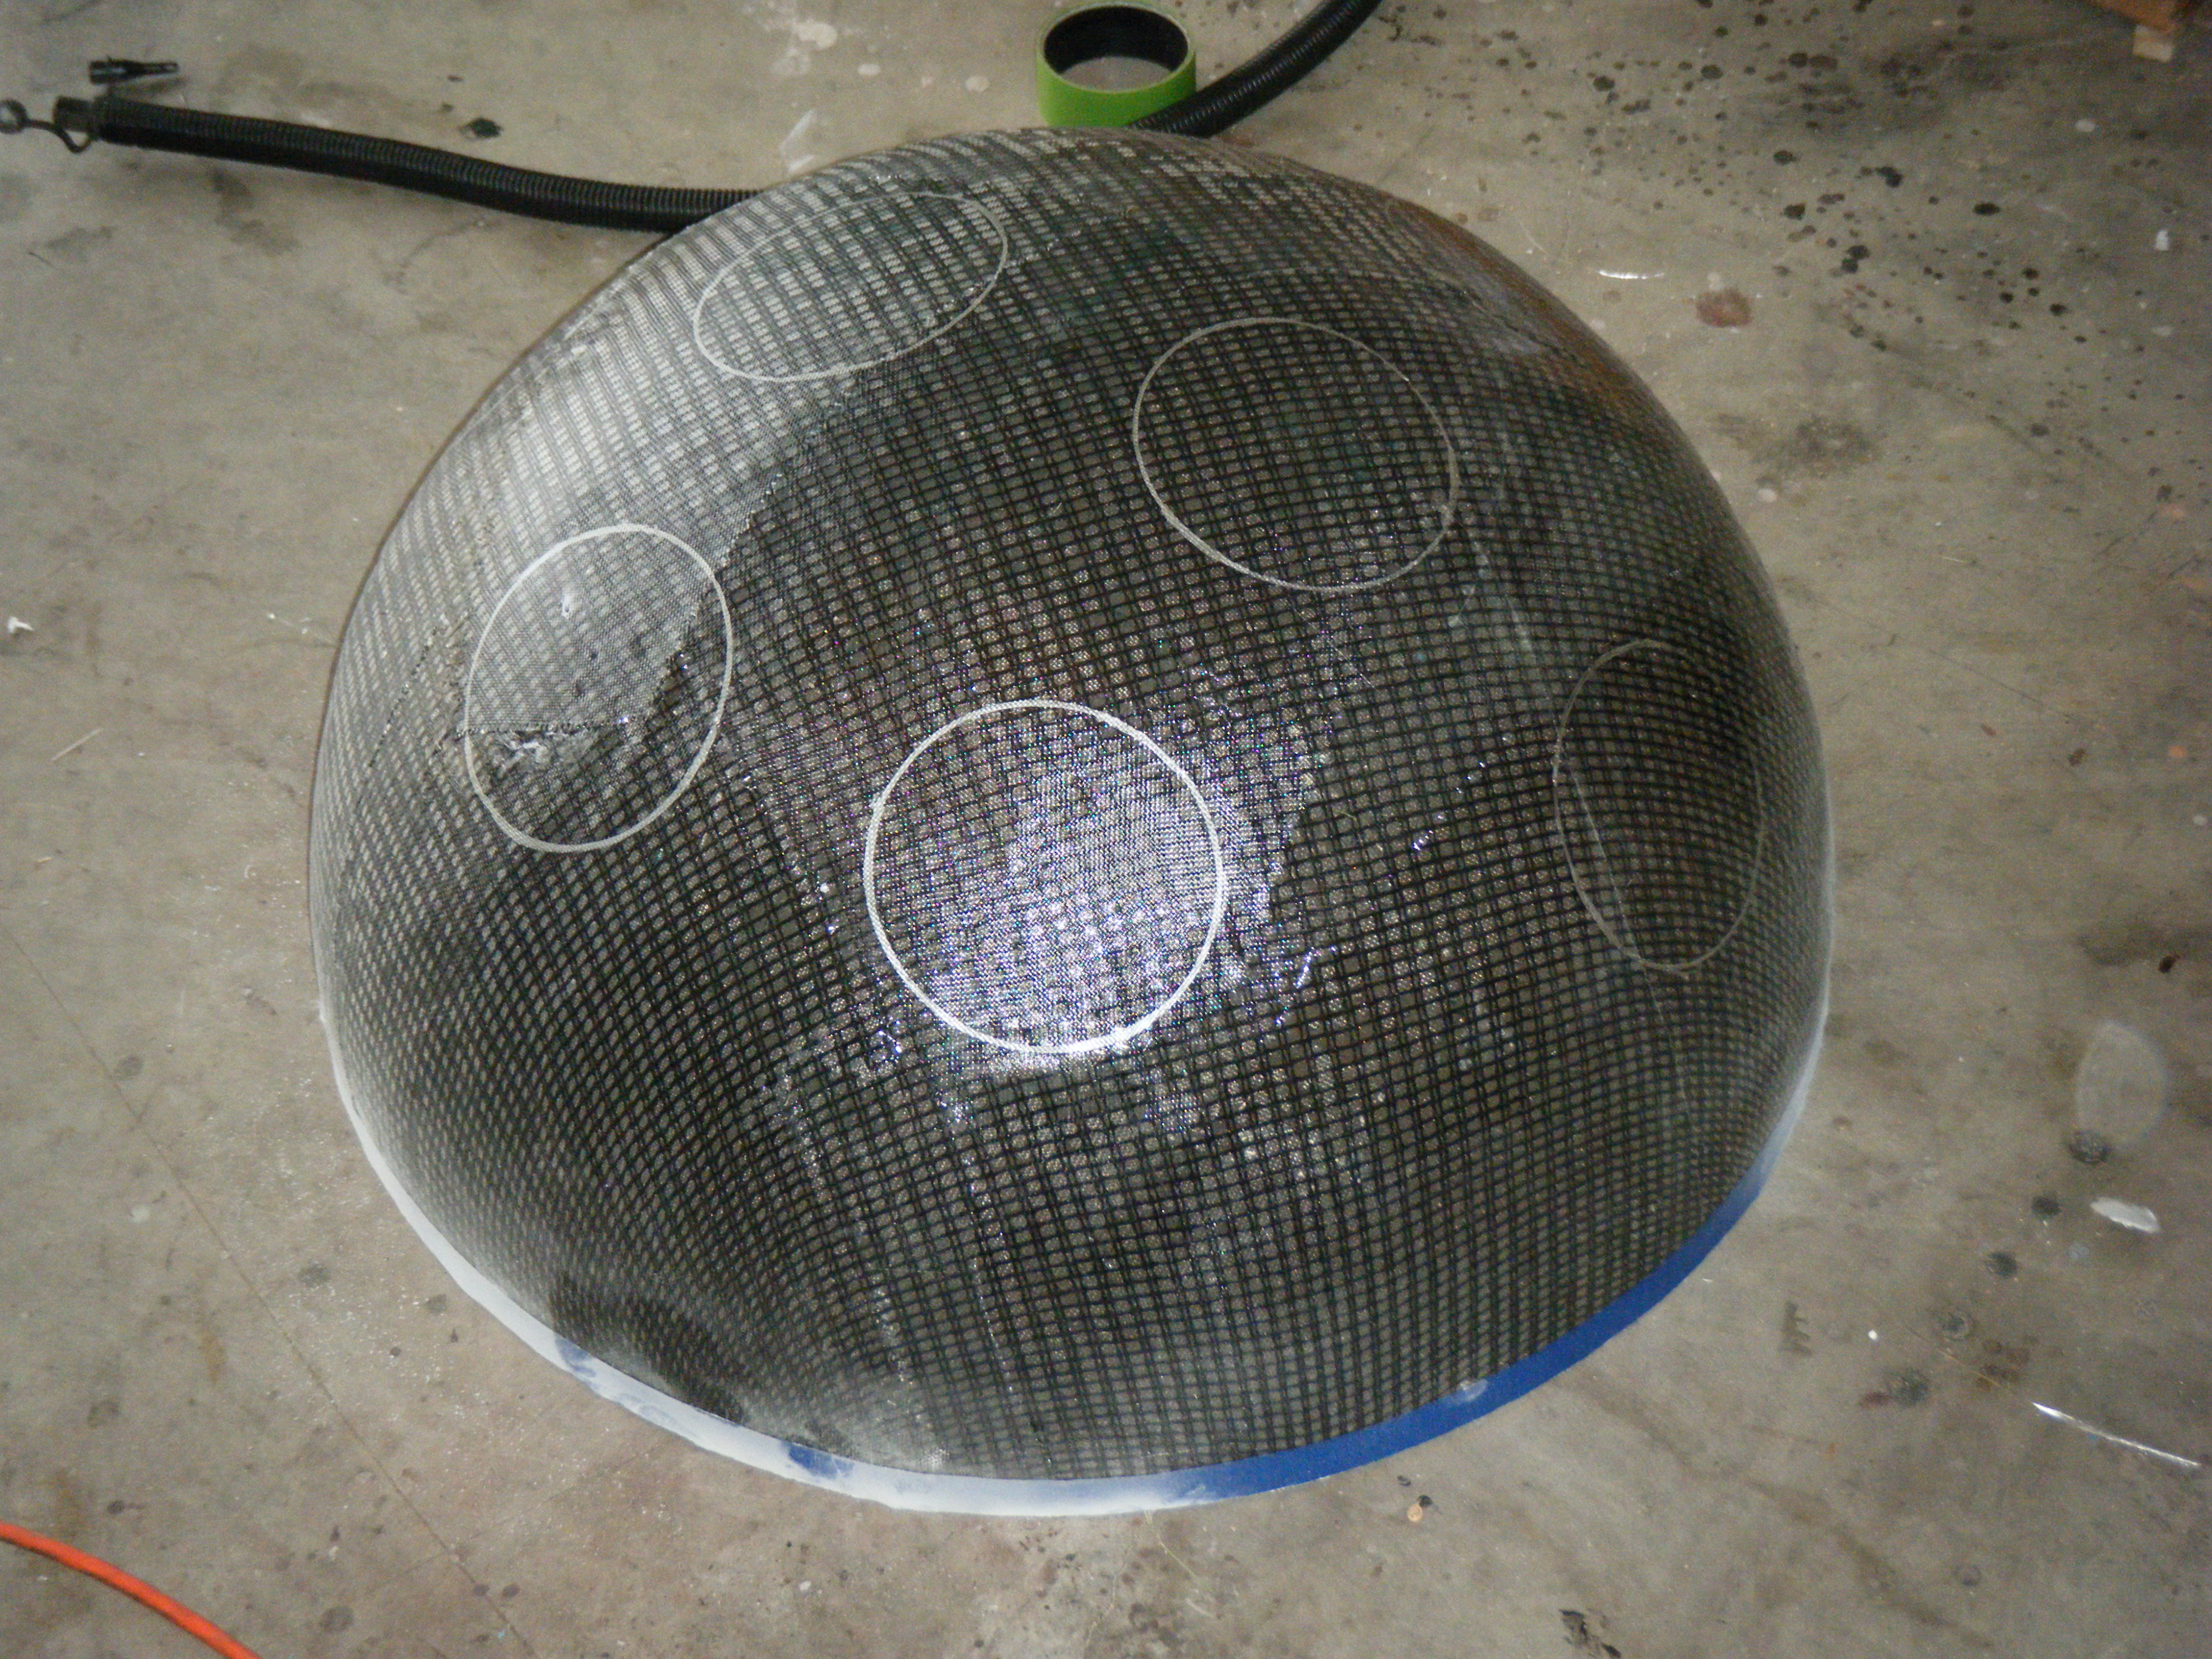
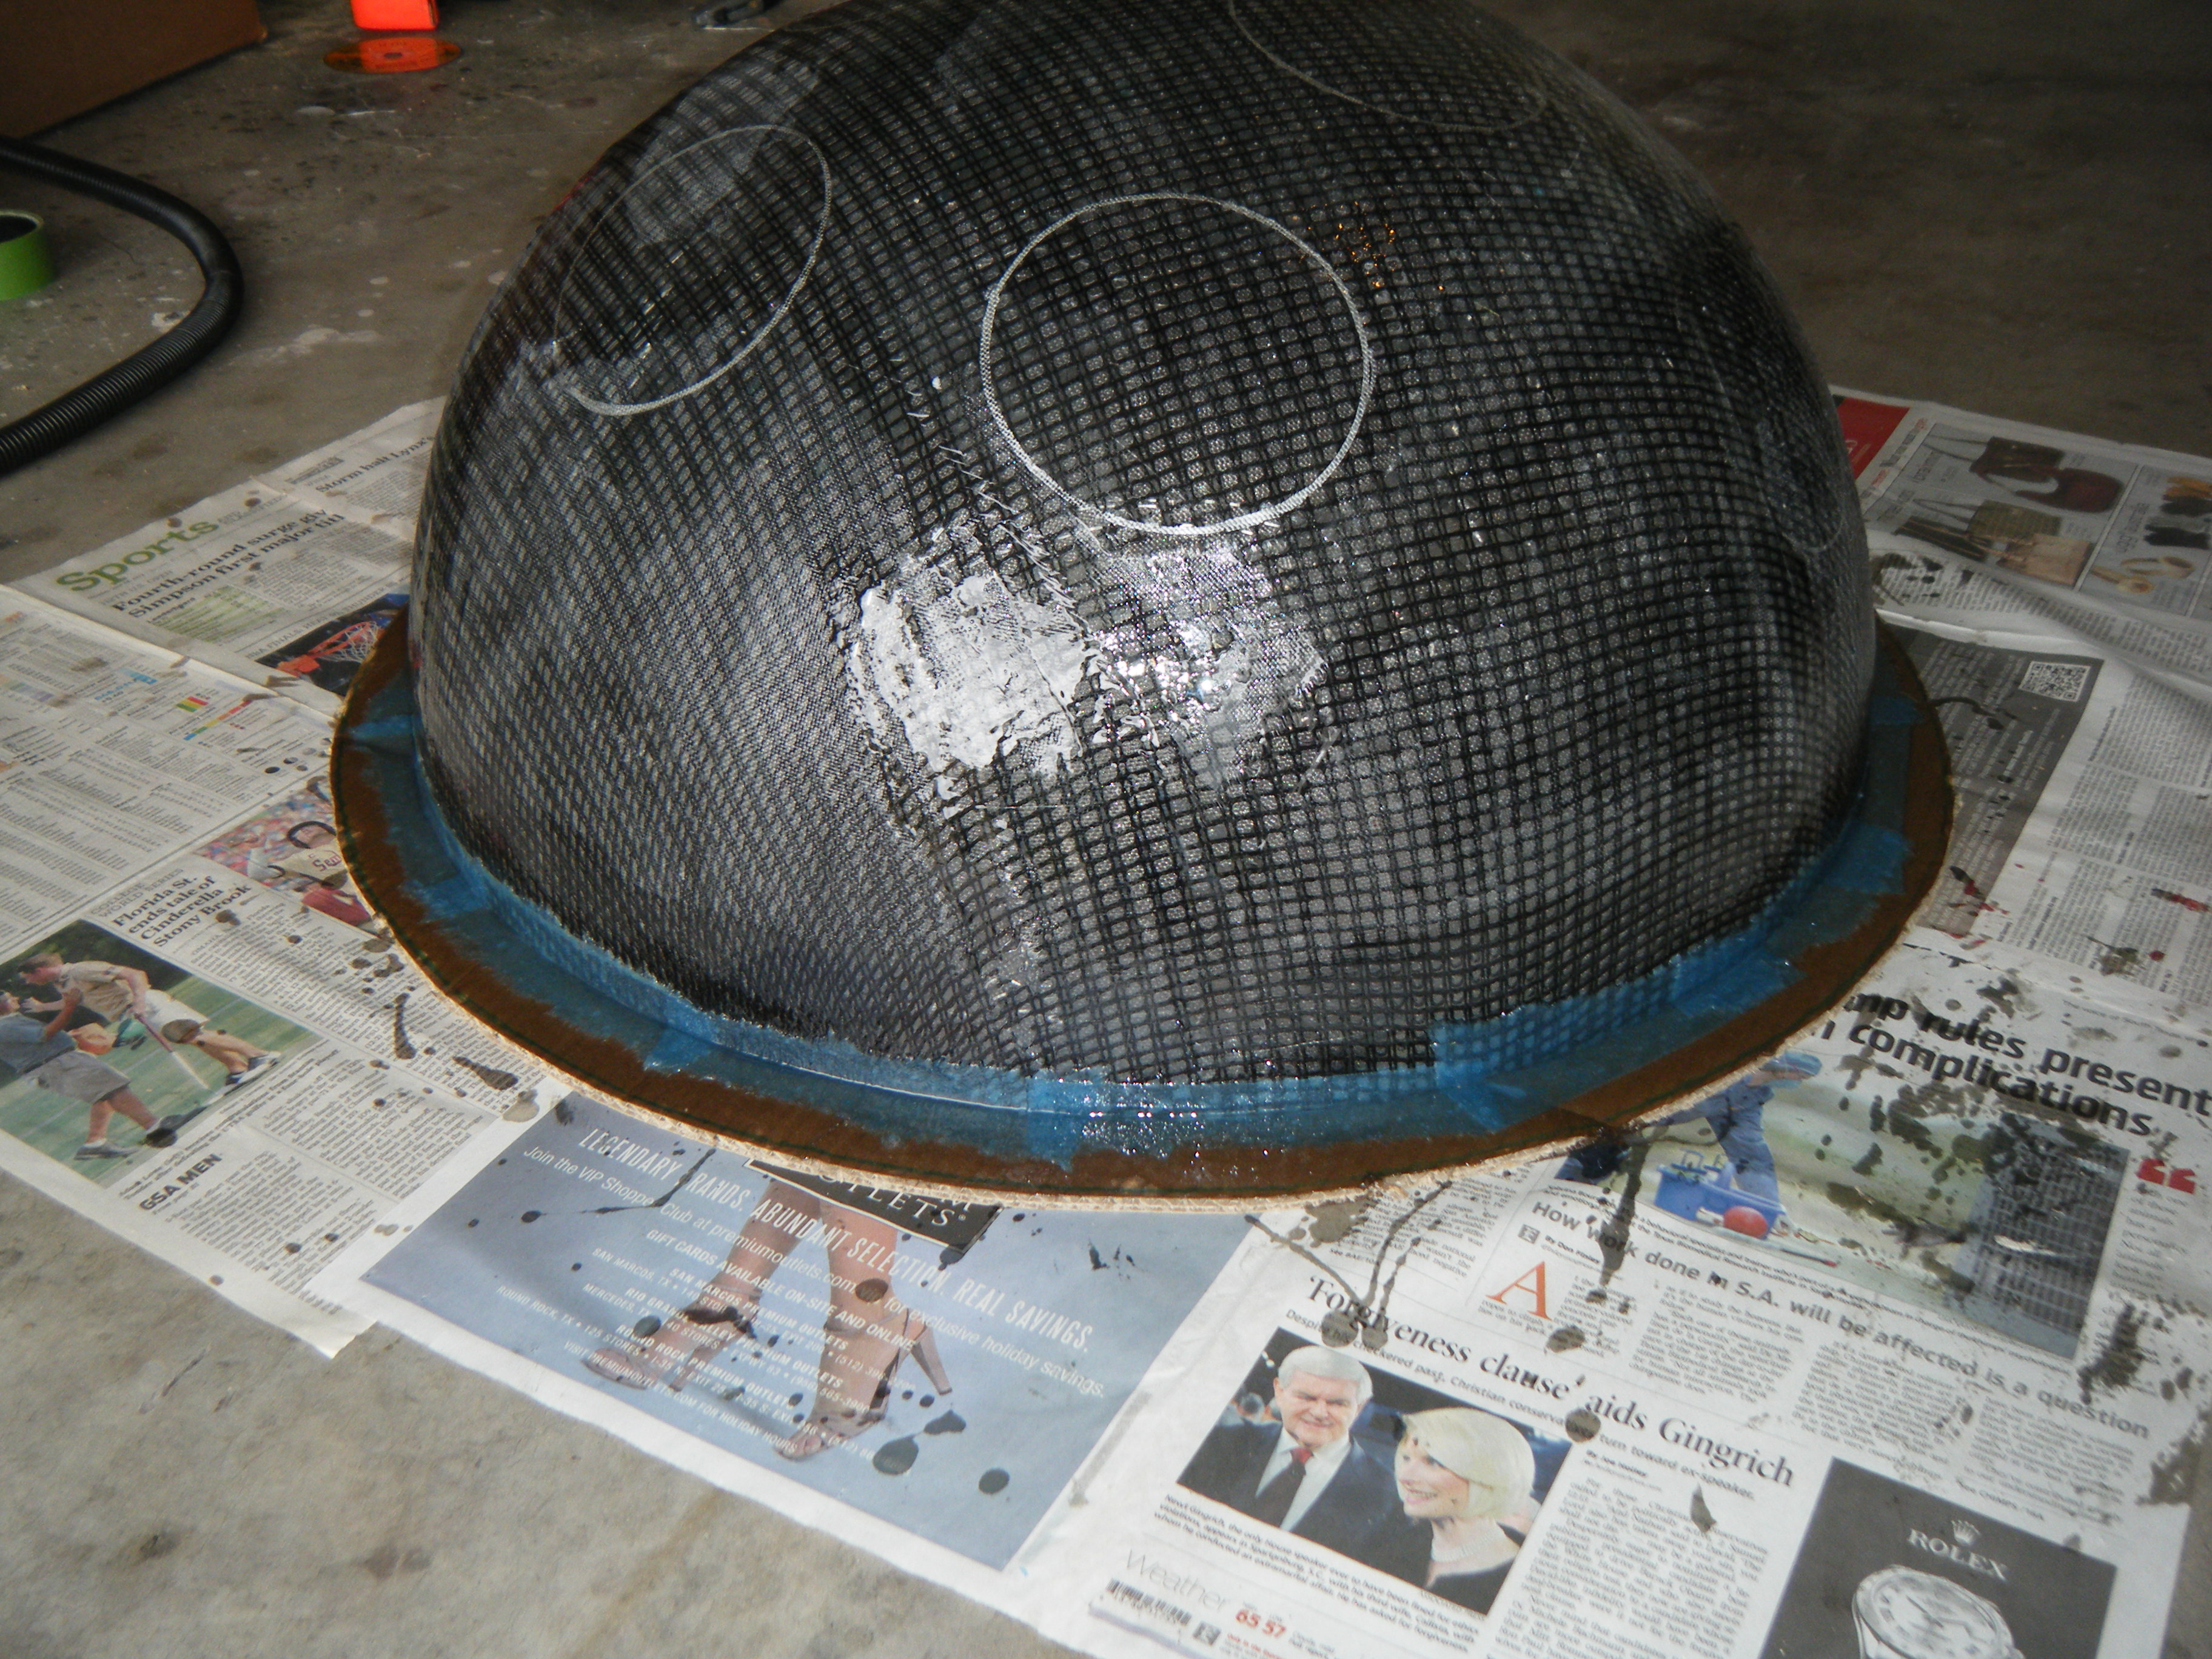
Since my sketch dictated a ~25″ diameter face dome, I bought a 26″ exercise ball, wrapped it in plastic-wrap to protect it (because I’m reselling it at work after I’m done using it as a mold), and did a layer of fiberglass and resin over top. I wasn’t sure if the solvents in polyester resin would eat through the plastic-wrap or not, so I played it safe and used epoxy marine resin. Once it cured, I deflated the exercise ball, trimmed the fiberglass piece down to a perfect hemisphere, and attached a lip of cardboard with some resin-soaked shop towels.
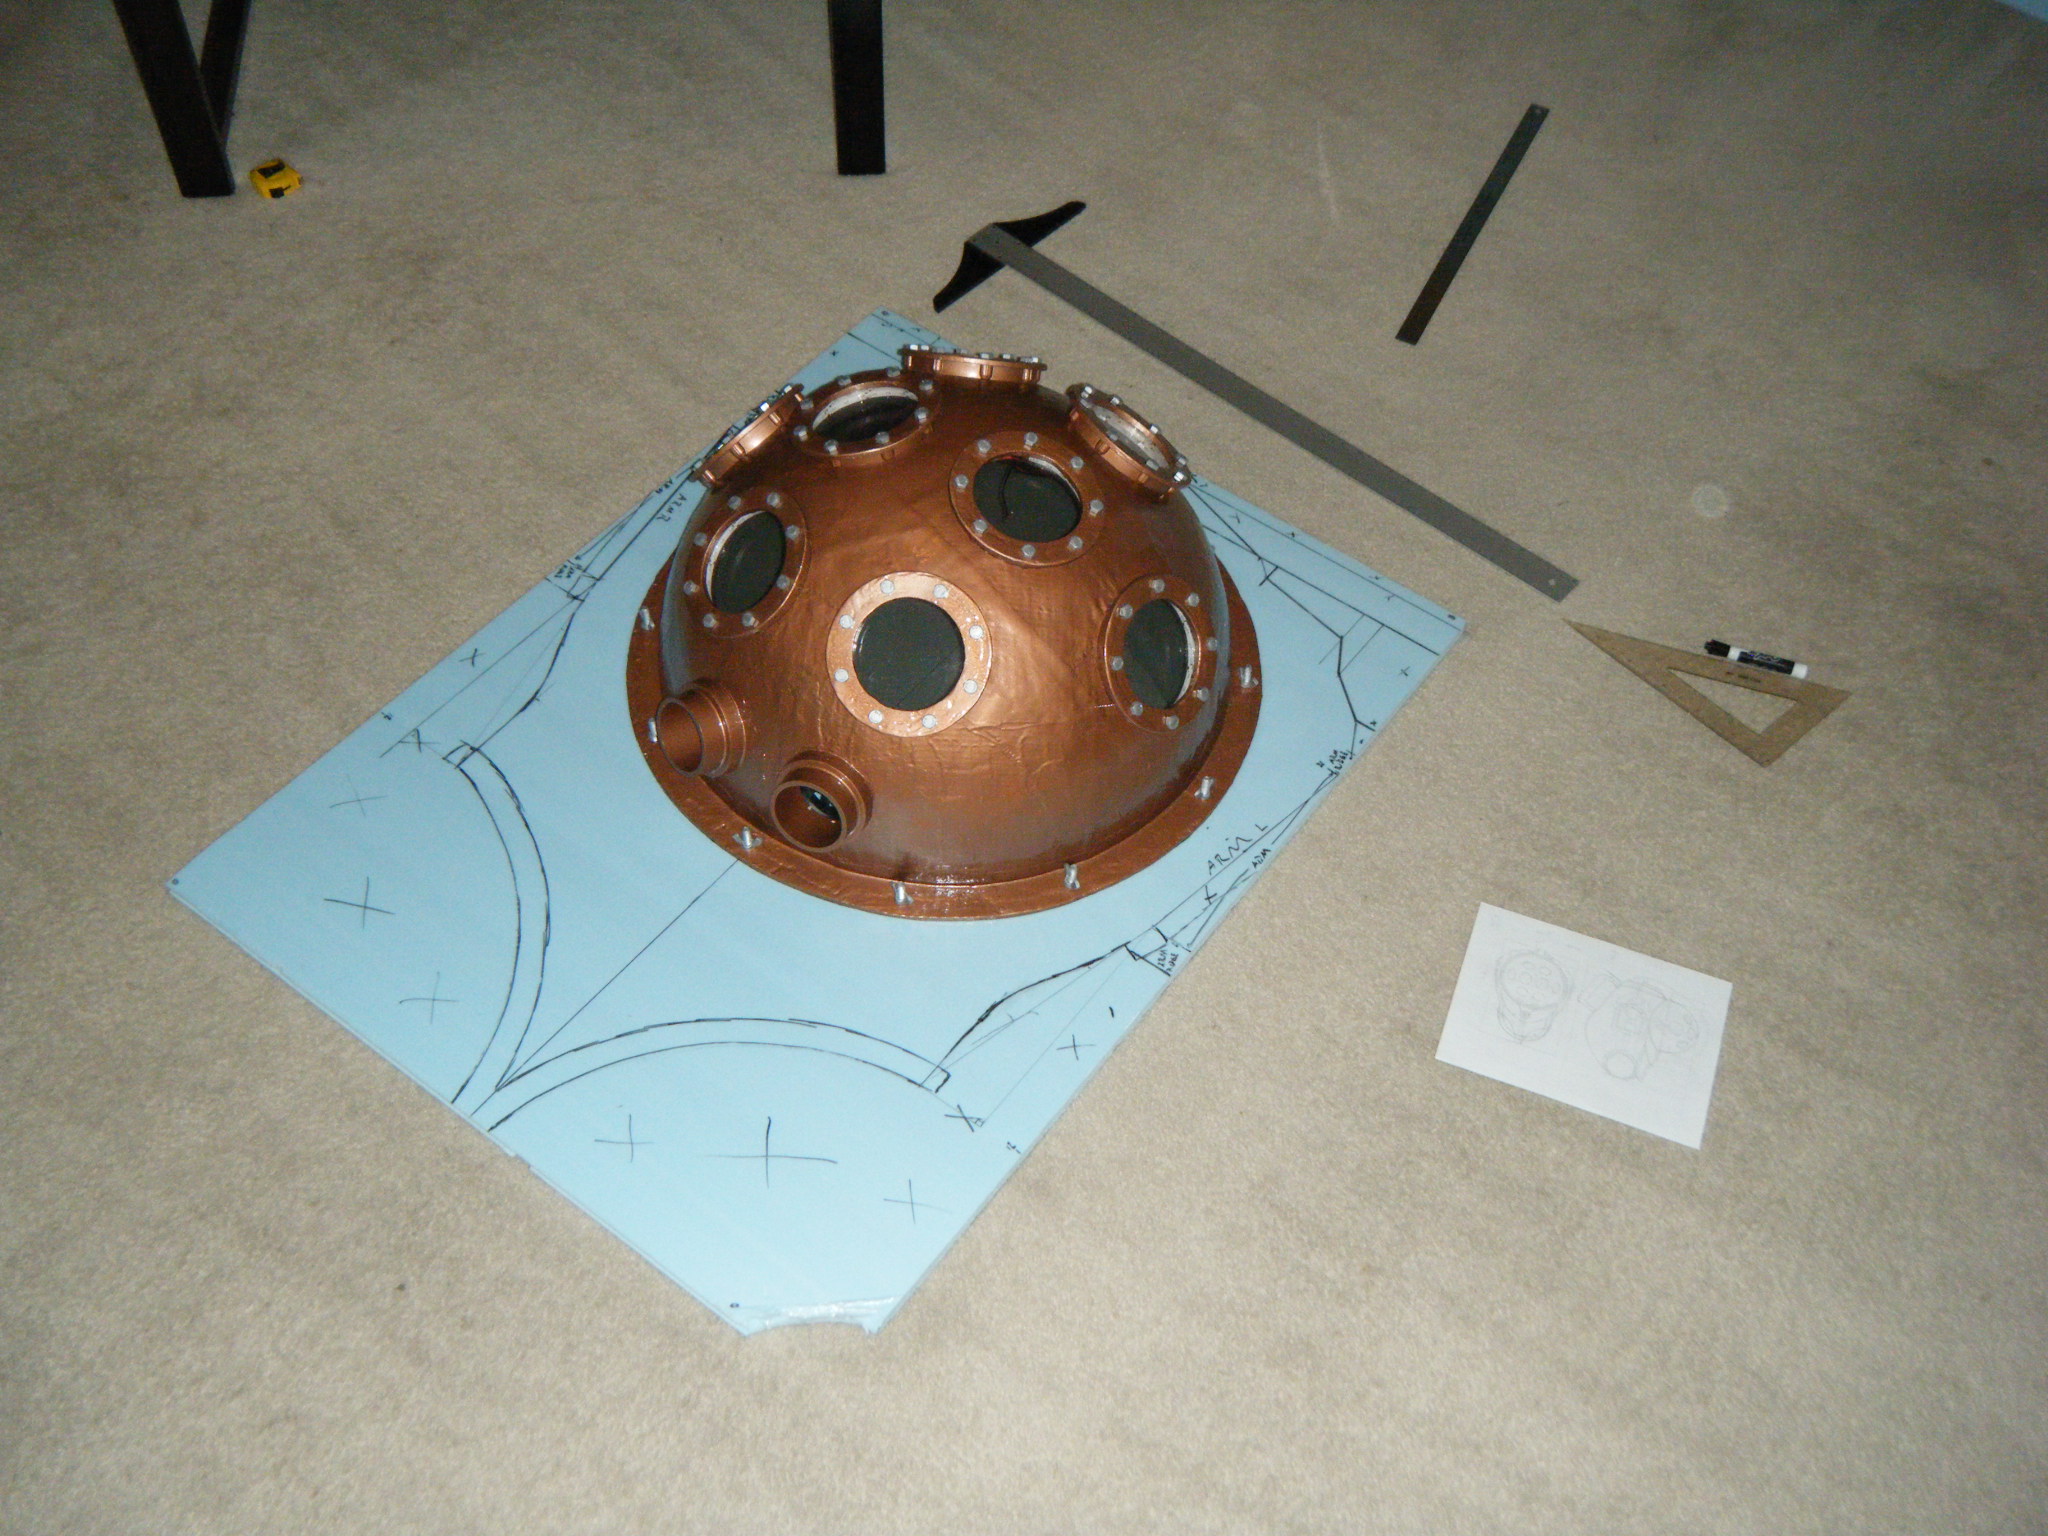
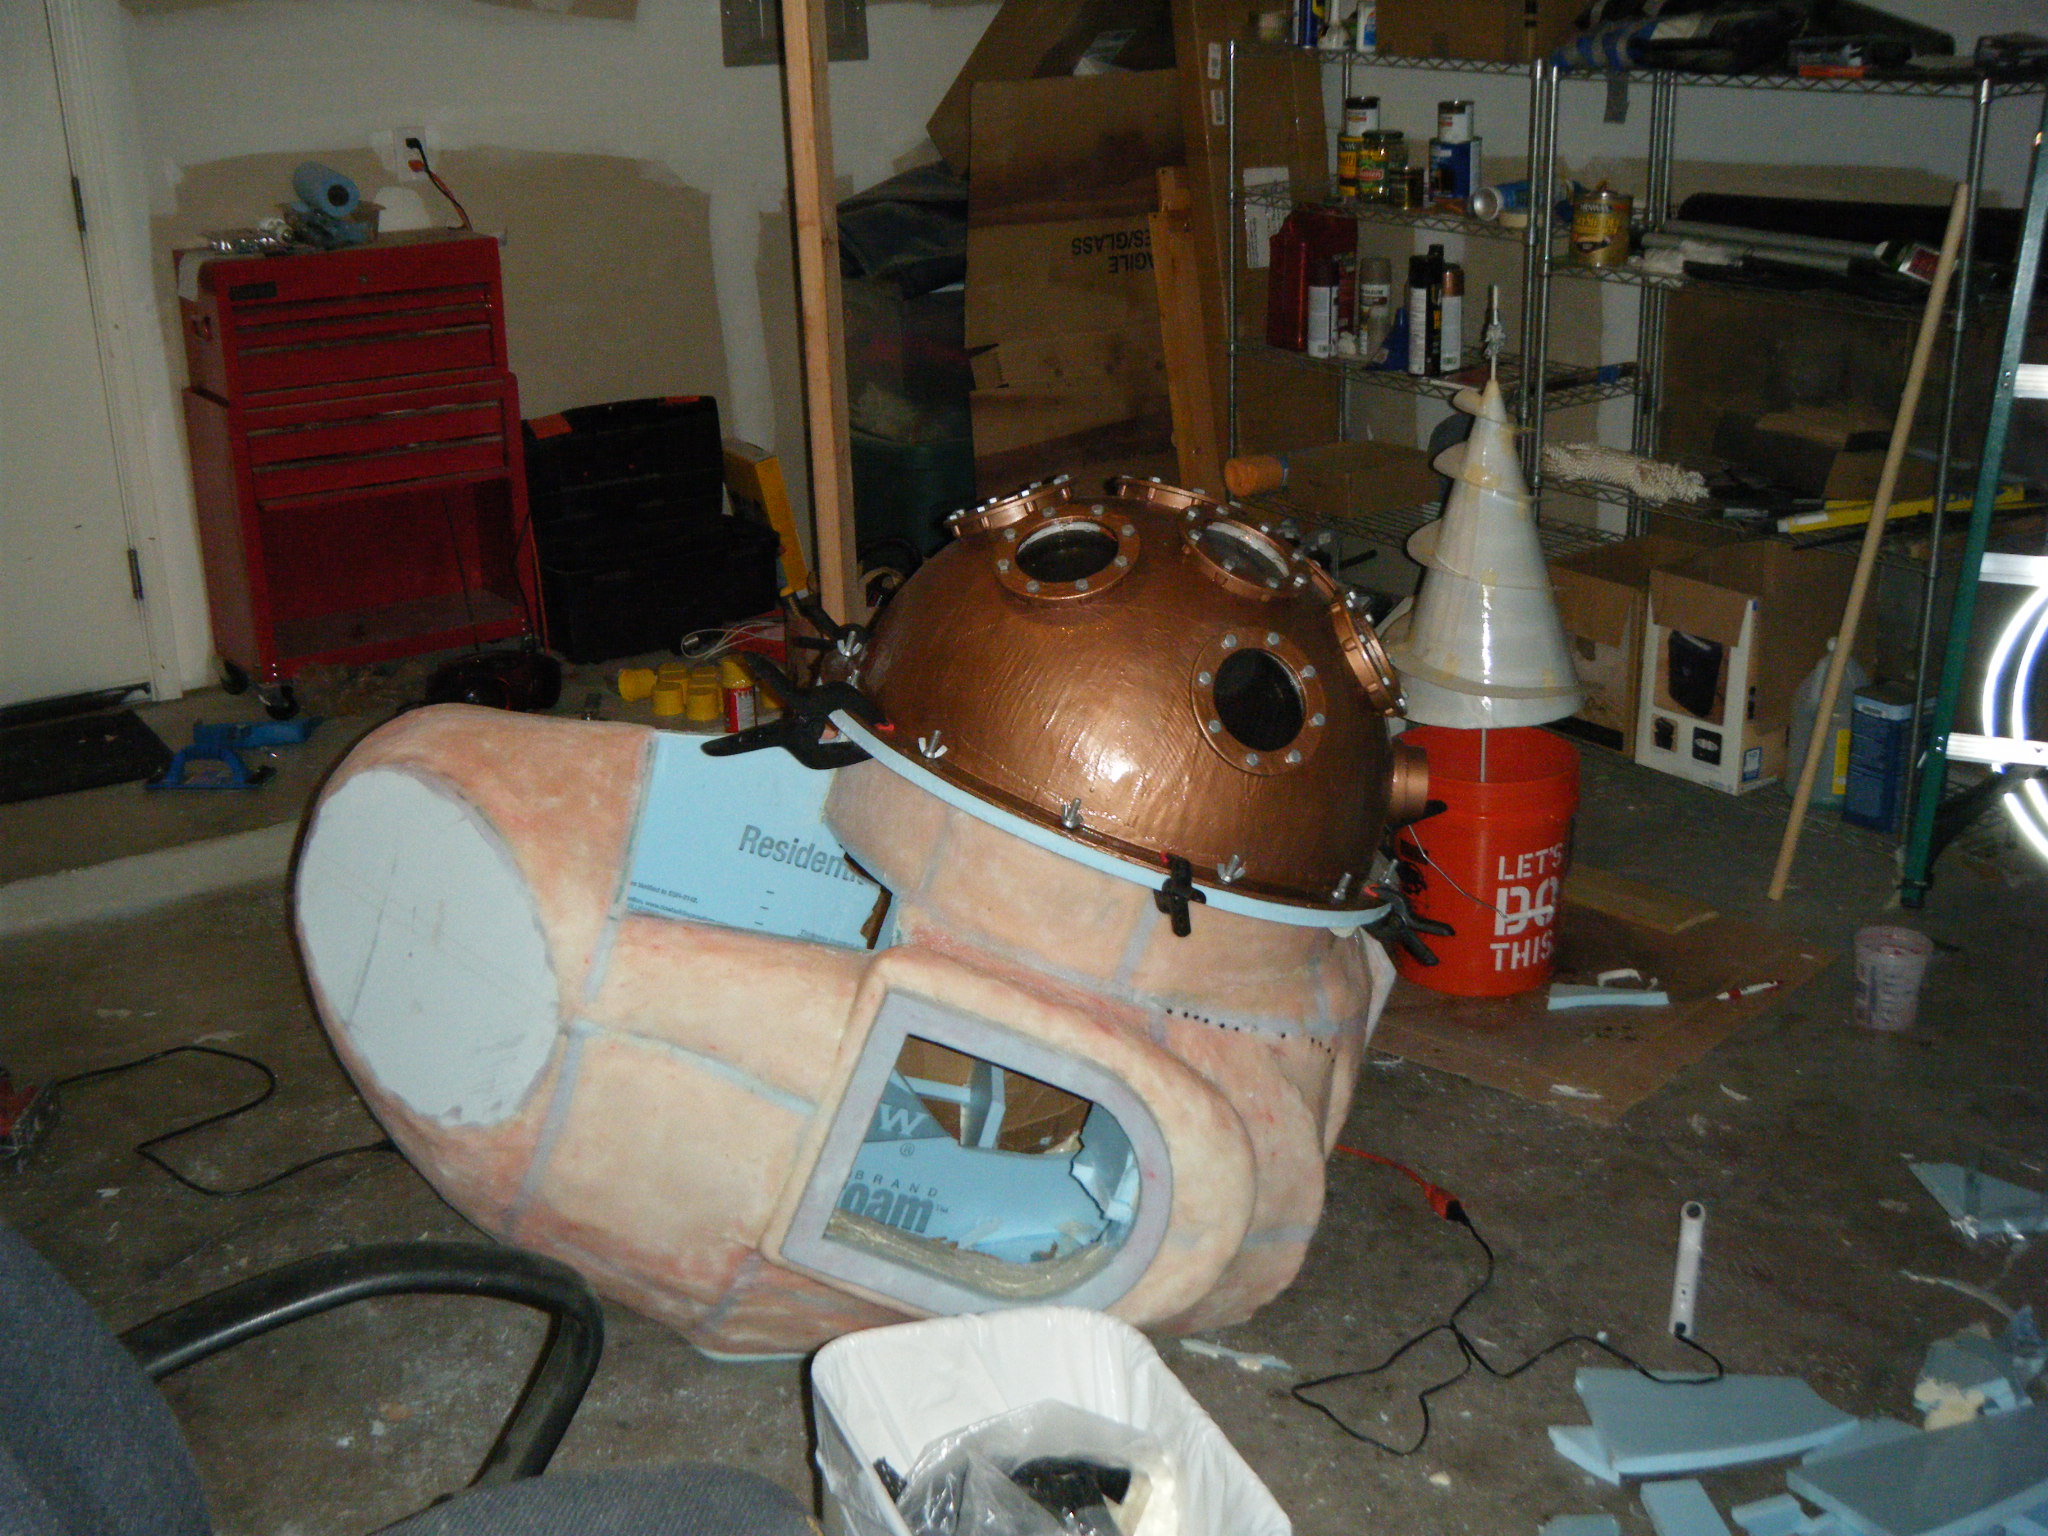
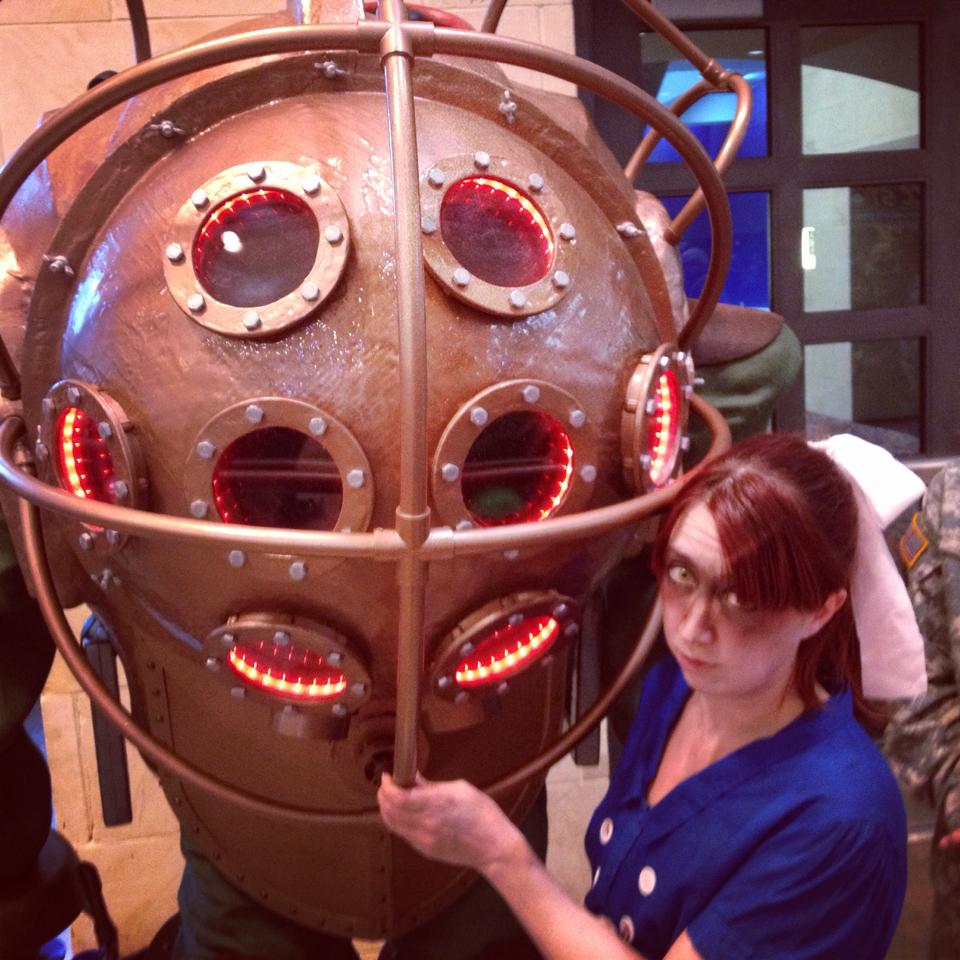
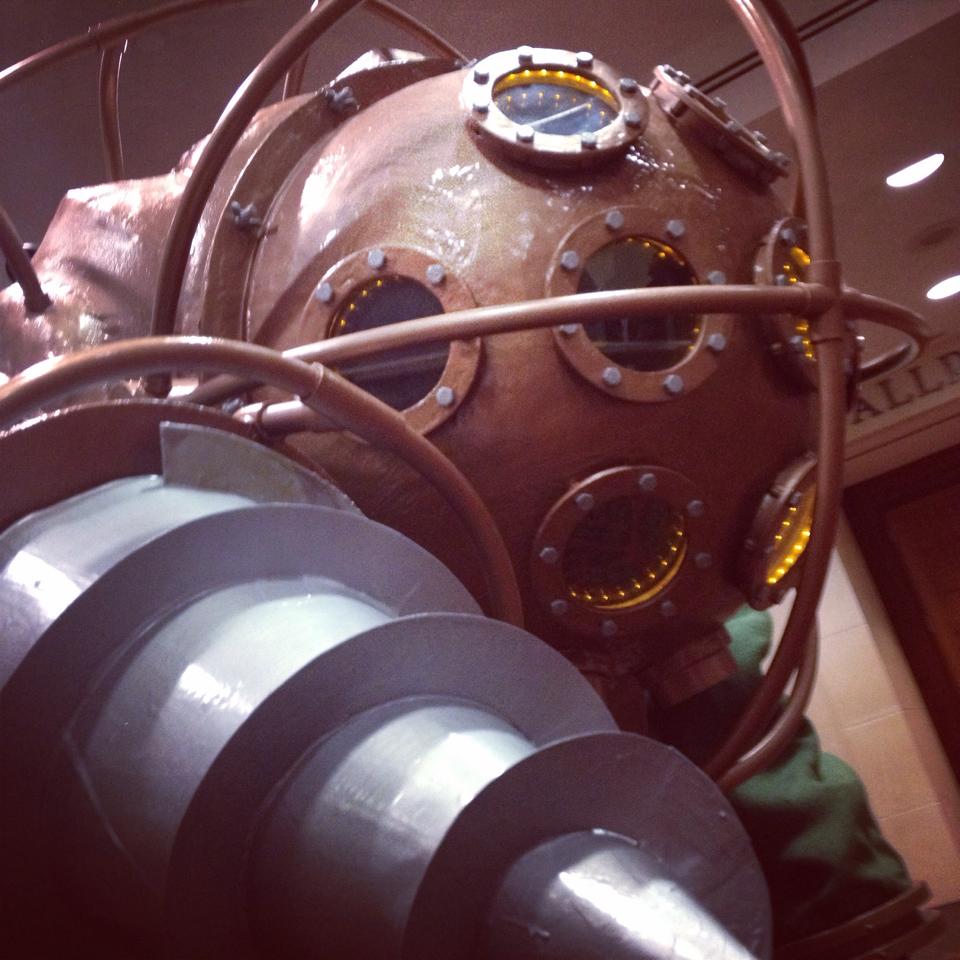
The port-holes were a colossal amount of work. I found some sewer pipe vent cover things in the PVC section at Lowe’s that have these little bumps where it looks a screw/bolt could go, so I bought 8 of those. I cut out the grille to make a hollow cylinder, added a small cardboard ring to the inside edge, resin’d the whole thing together to get a smooth single-piece appearance, and hit ’em with hammered brass spray paint. I traced these onto the 26″ fiberglass dome, cut out some holes, and glued ’em in place. I knew weight was going to be a problem, so instead of actually putting bolts in the port-holes, I took a silicone mold of some bolt heads and cast copies in resin. Hit those bolt-head copies with hammered steel spray paint, and hot-glued ’em onto the port-holes right above each nub. I then got a sheet of clear and a sheet of bronze transparent plexiglass and cut circles to fit into the port-holes. The clear pane went on the outside, and the transparent bronze on the inside, with a strip of yellow and a strip of red LEDs between the two panes. The idea was to have a light source just outside the bronze plexi to give a two-way mirror effect – I hate when you can see inside a costume. Last step was to trim off as much excess from those port-holes on the dome’s inside as possible, again to save on weight.
Once the port-holes were done, I picked a side to be the bottom and cut two more holes on that side for pipe vent things. I don’t know what they’re supposed to be on the character, but on my costume they were air intakes. I wrapped 3″ PVC pipes with some weatherstrip to make a little lip, then glued ’em in place and zip-tied some 80mm computer case fans on the inside. I planned on building the costume out of foam insulation, so every bit of ventilation I could manage would be tremendously welcome.
Last step for the face dome was to take a silicone mold of a bolt & wing nut, then cast resin copies of that, paint ’em steel, and glue ’em around the dome’s cardboard lip.

At this point I started working on everything in parallel. The arms, main body shell, chest plate, fake hand, auger, dive weights, etc. Really, everything except the legs. It was going to be awhile before I tried the costume on for size, and if at all possible, I wanted my own two feet on the ground. I don’t like how unwieldy costumes can be when you’re on stilts/platforms. So the legs waited, but everything else I started on immediately.
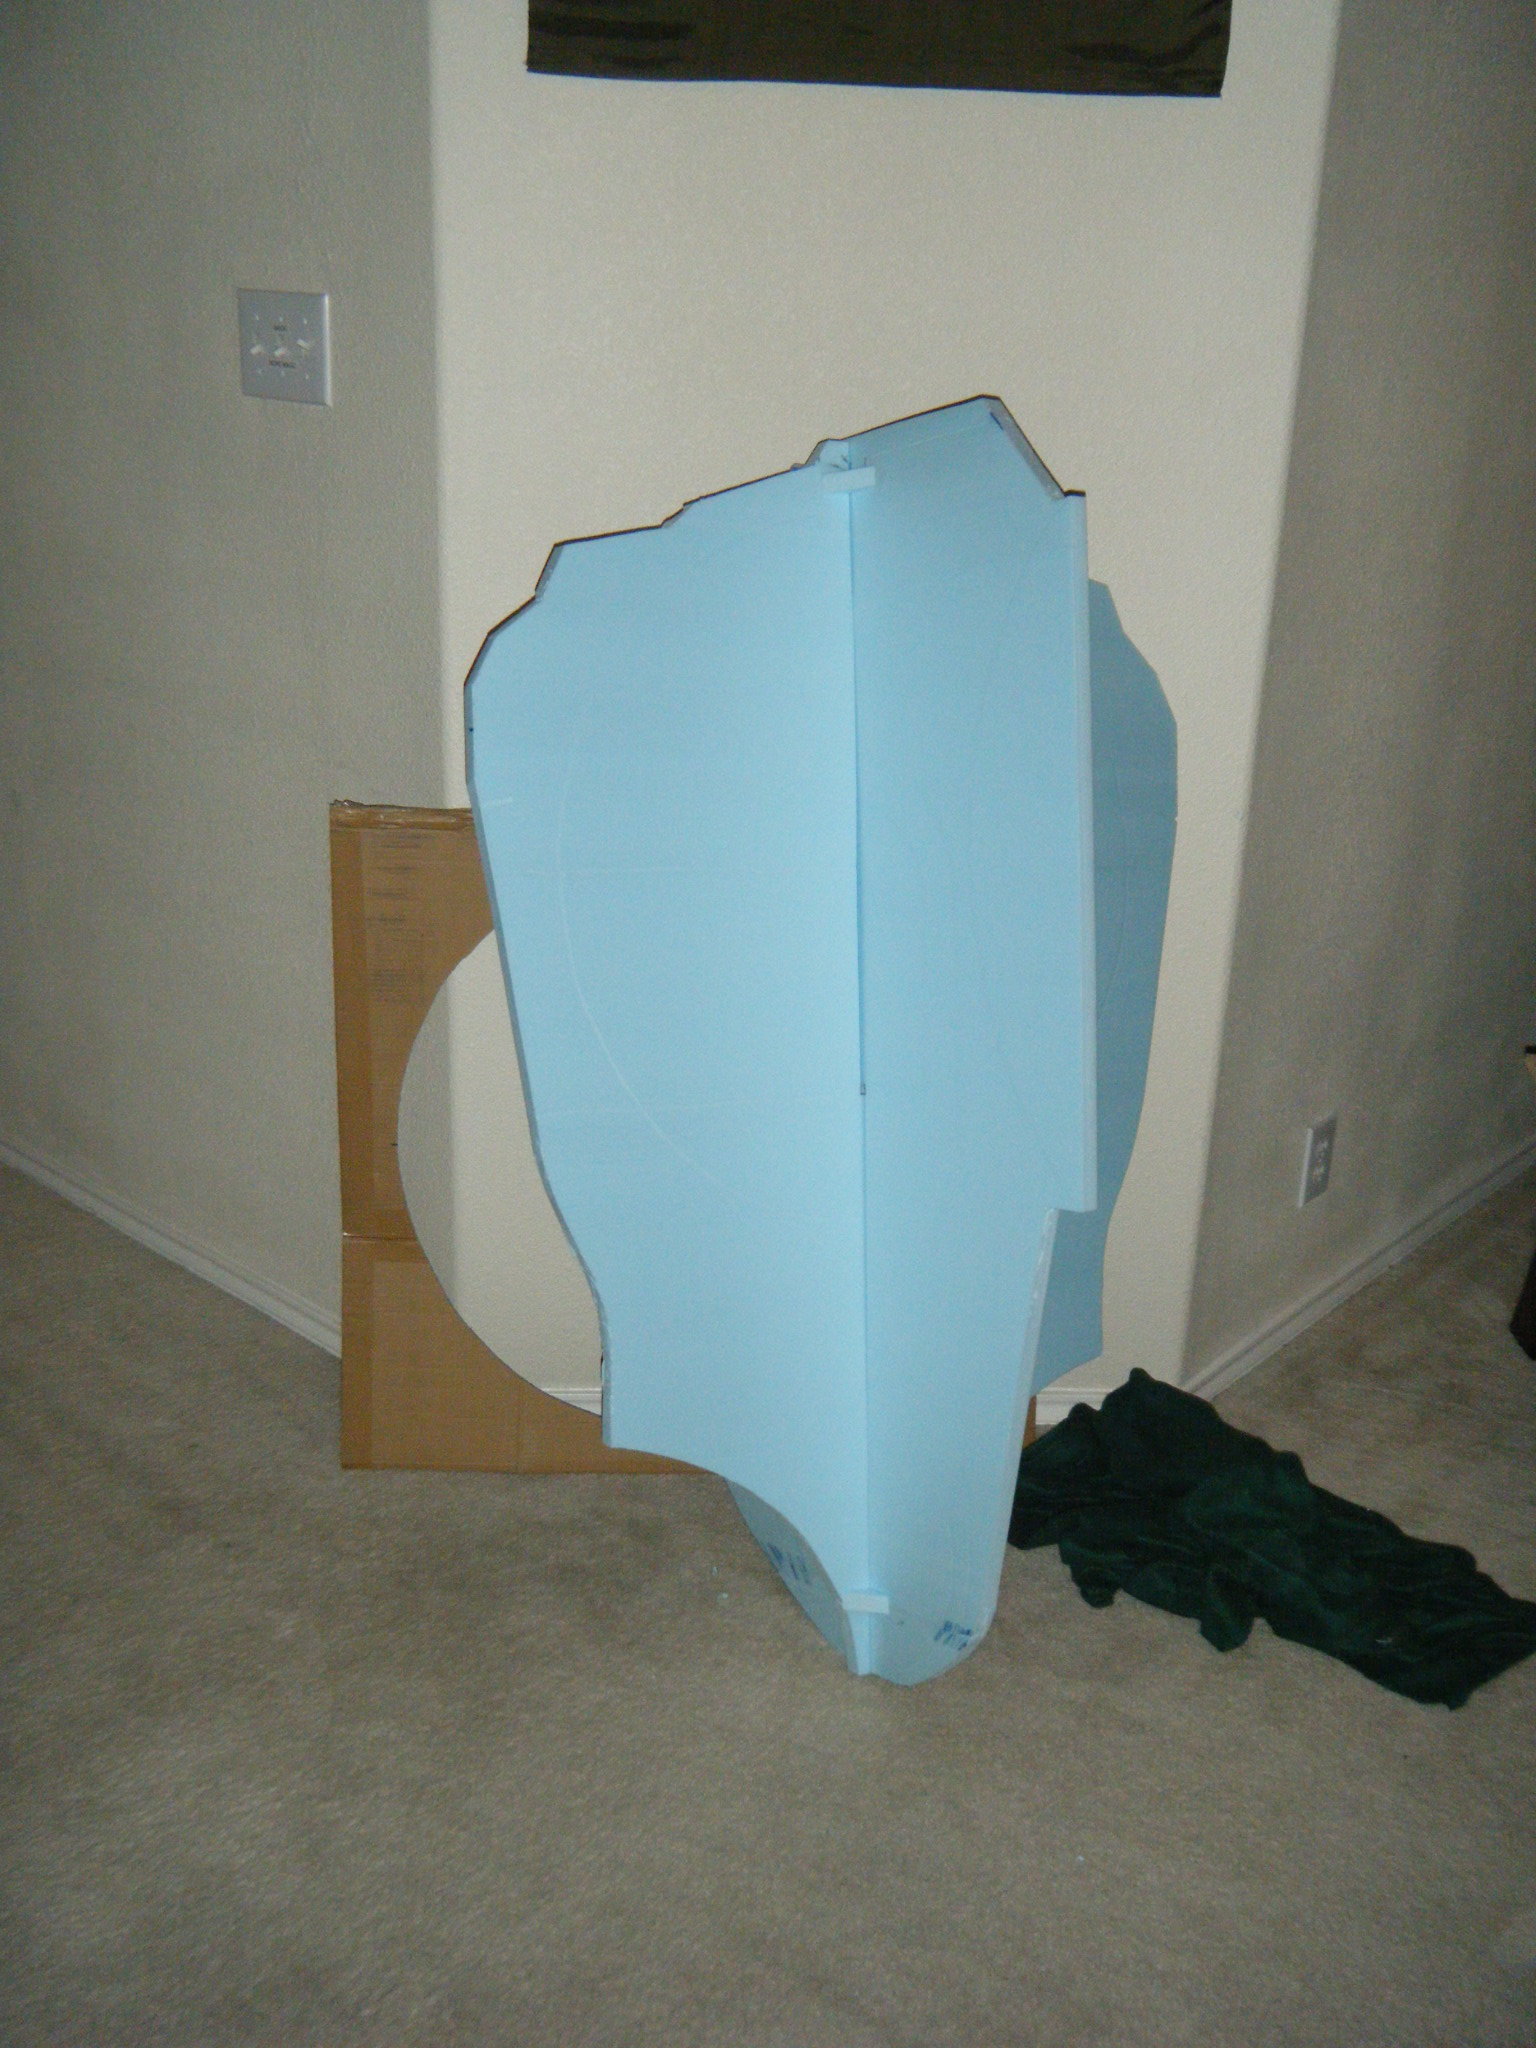
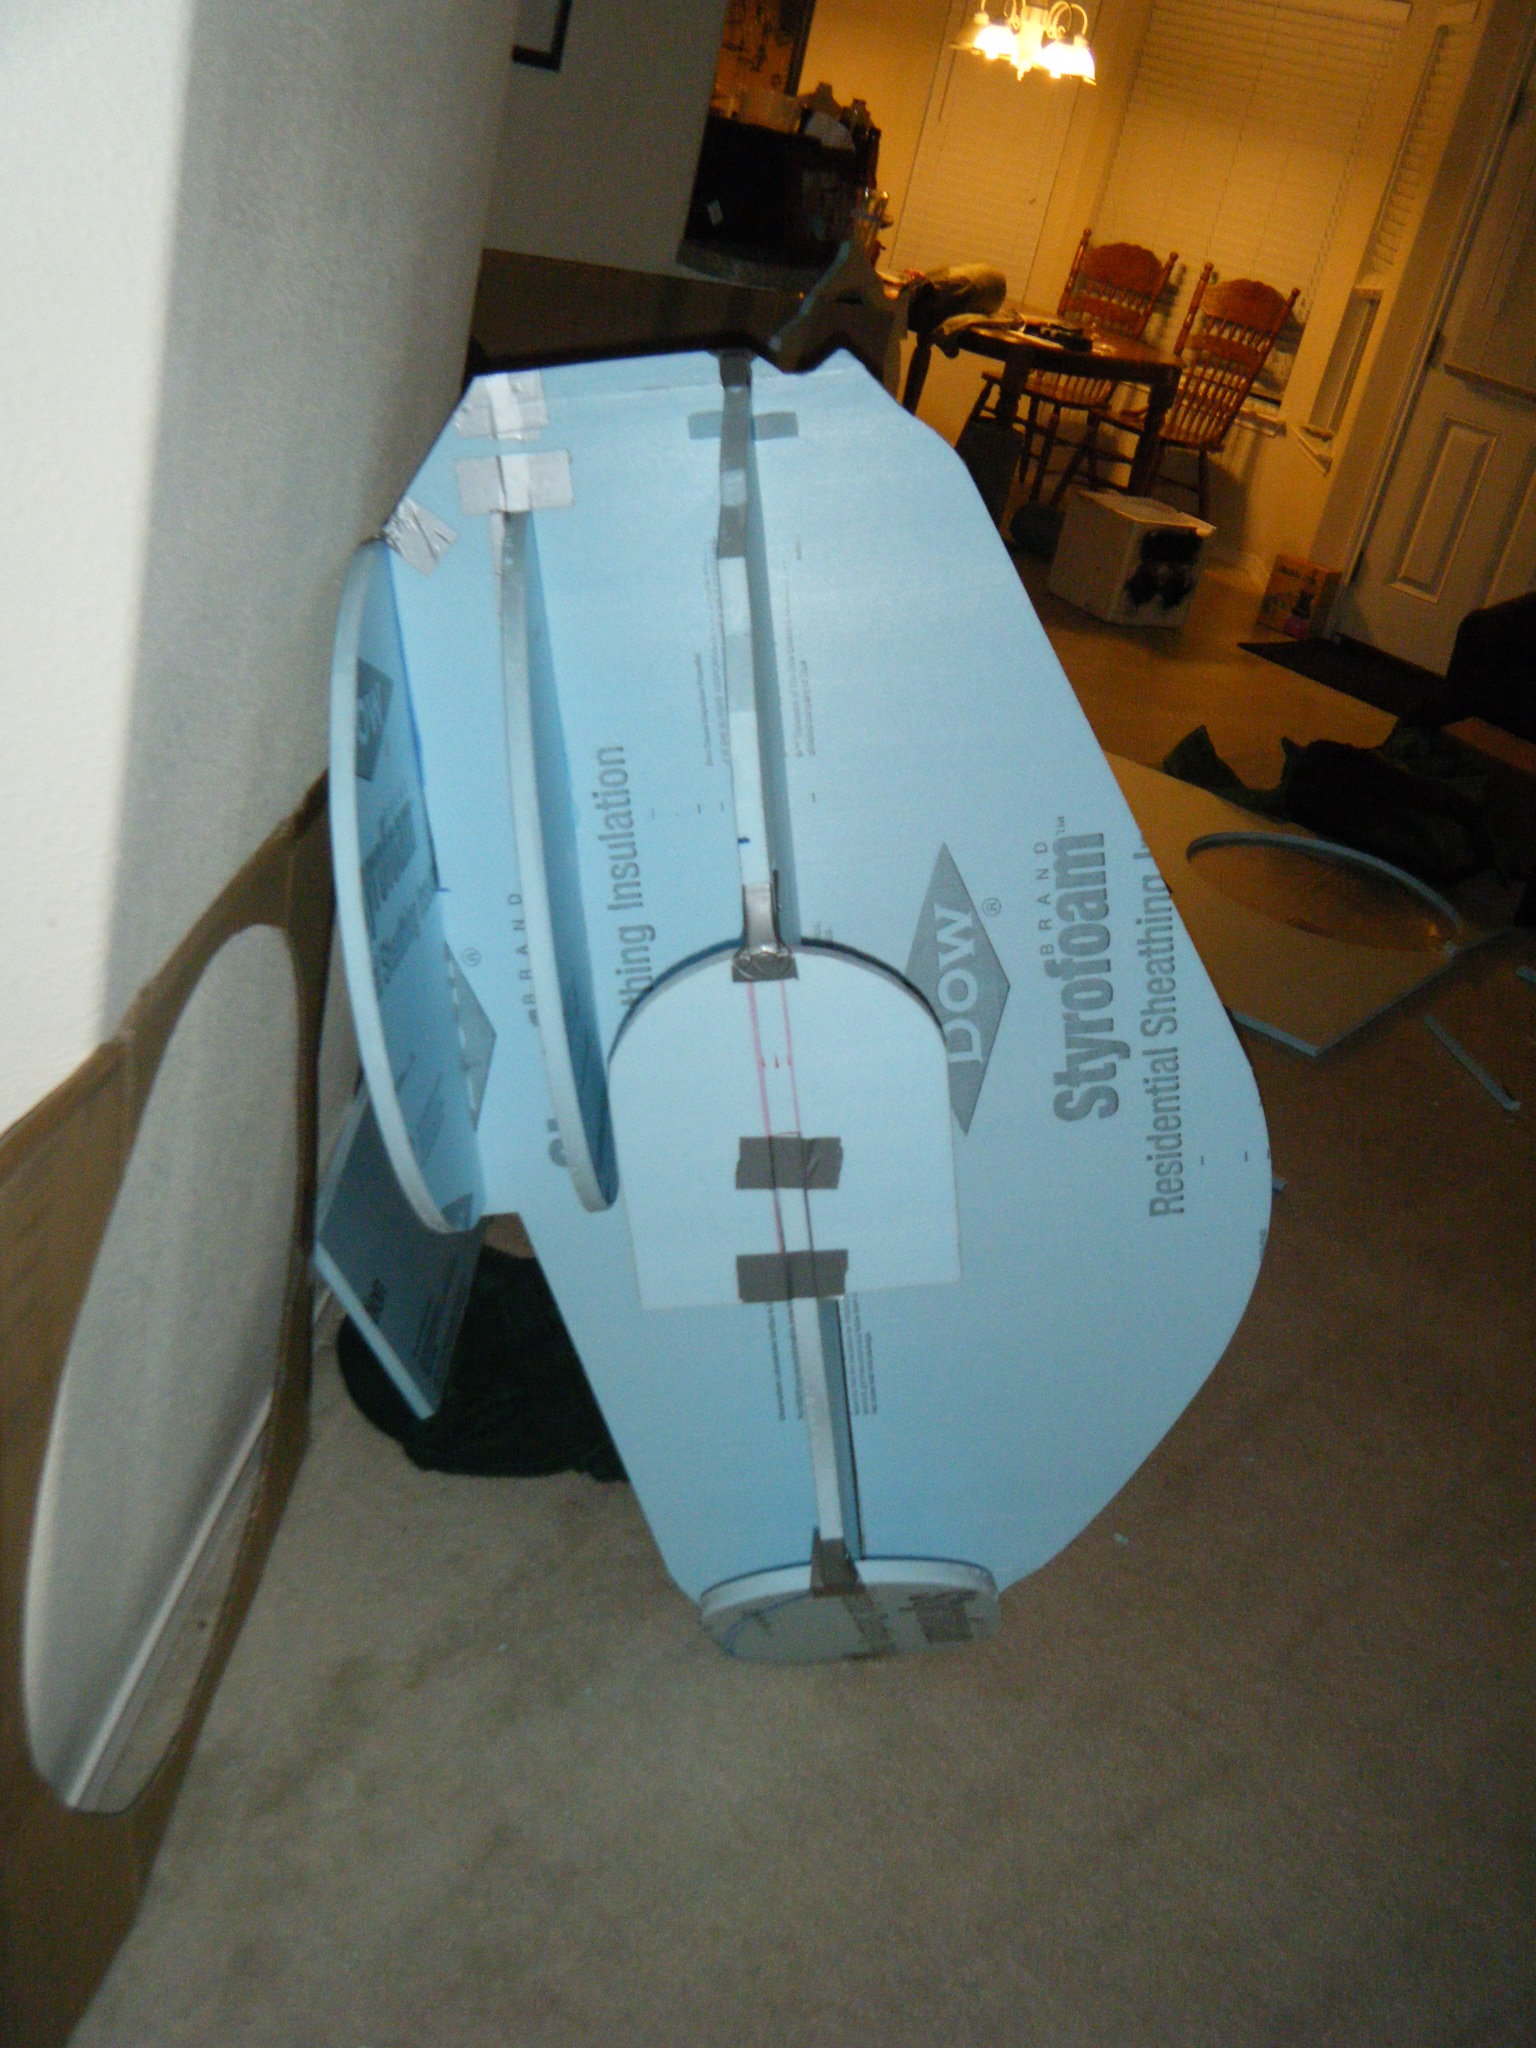
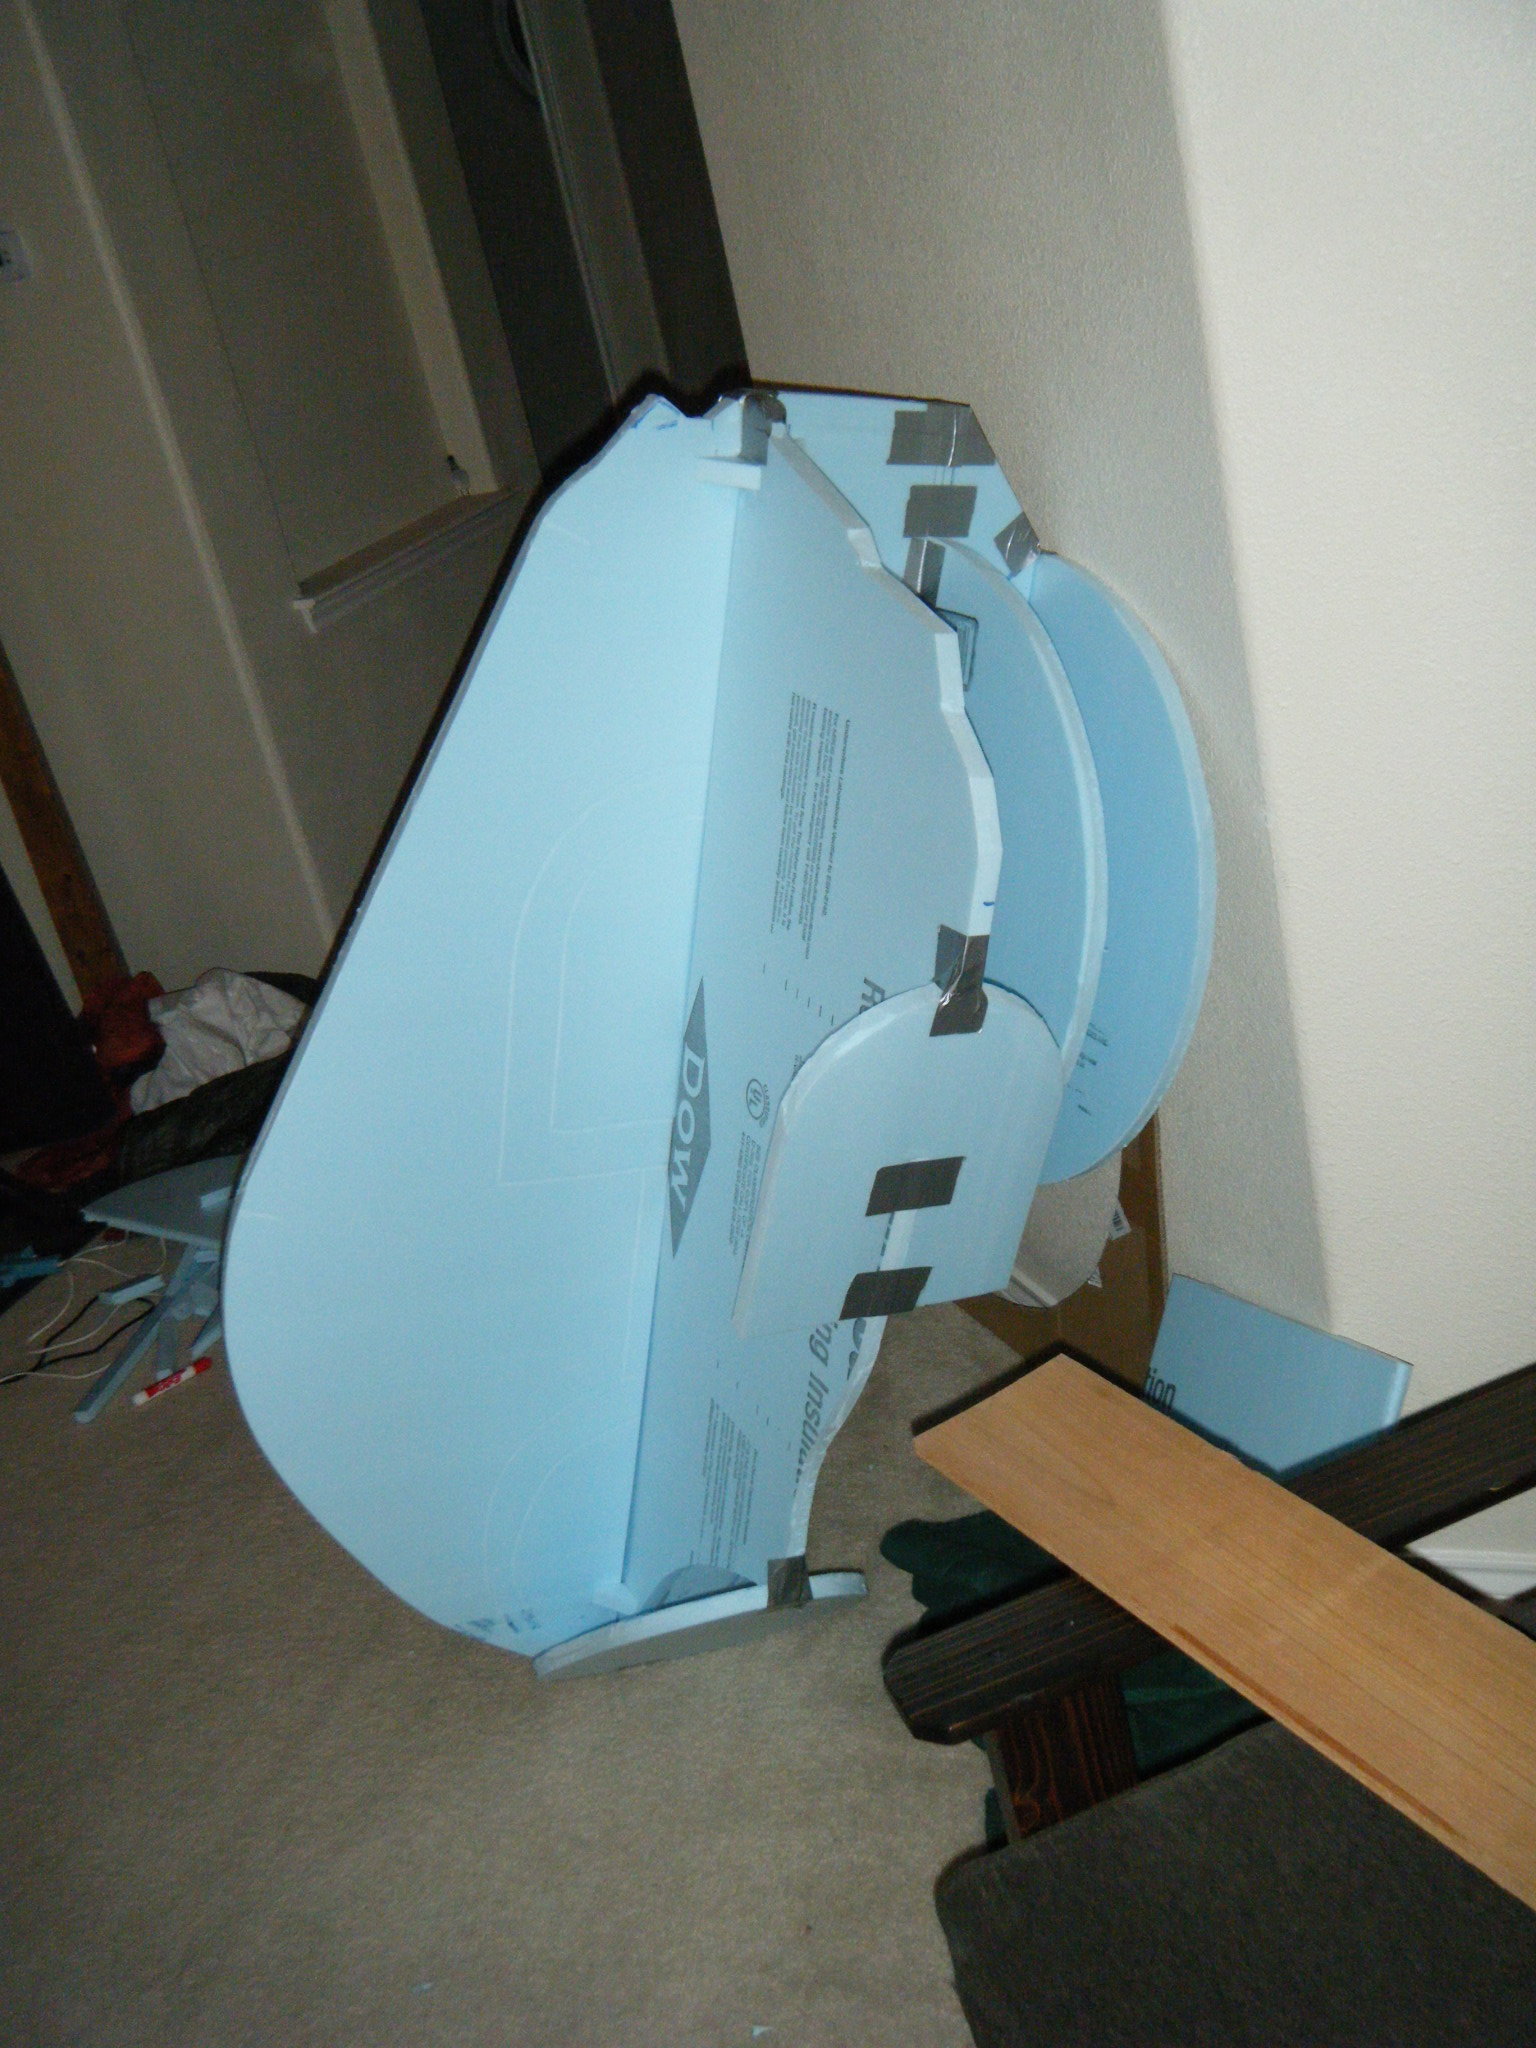
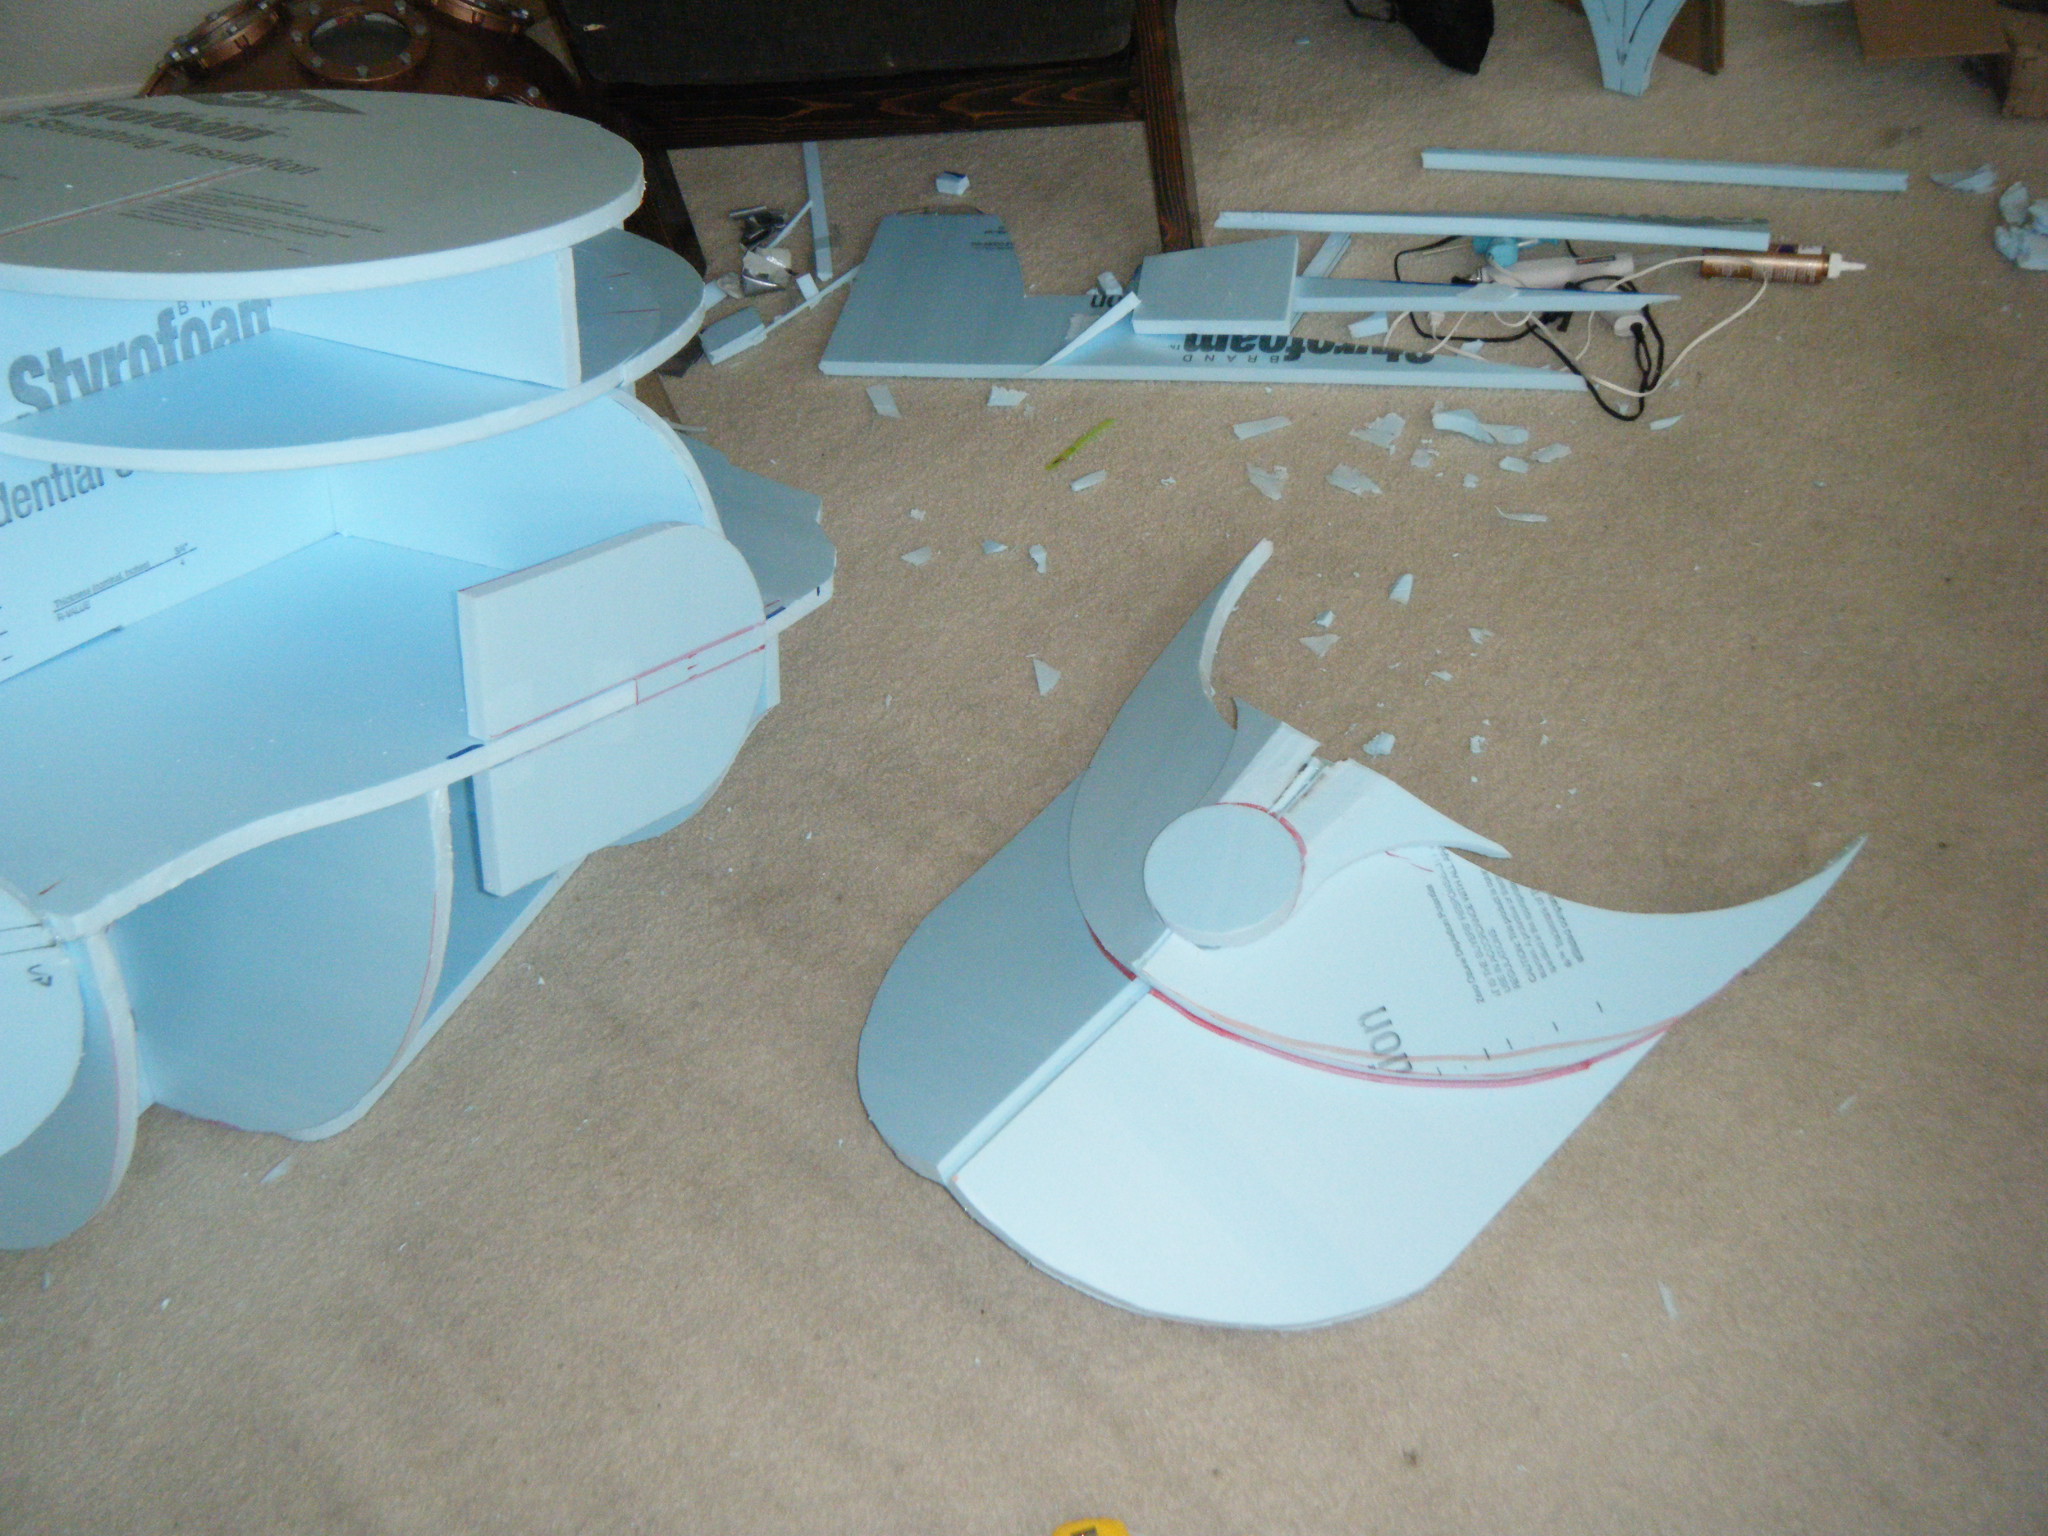
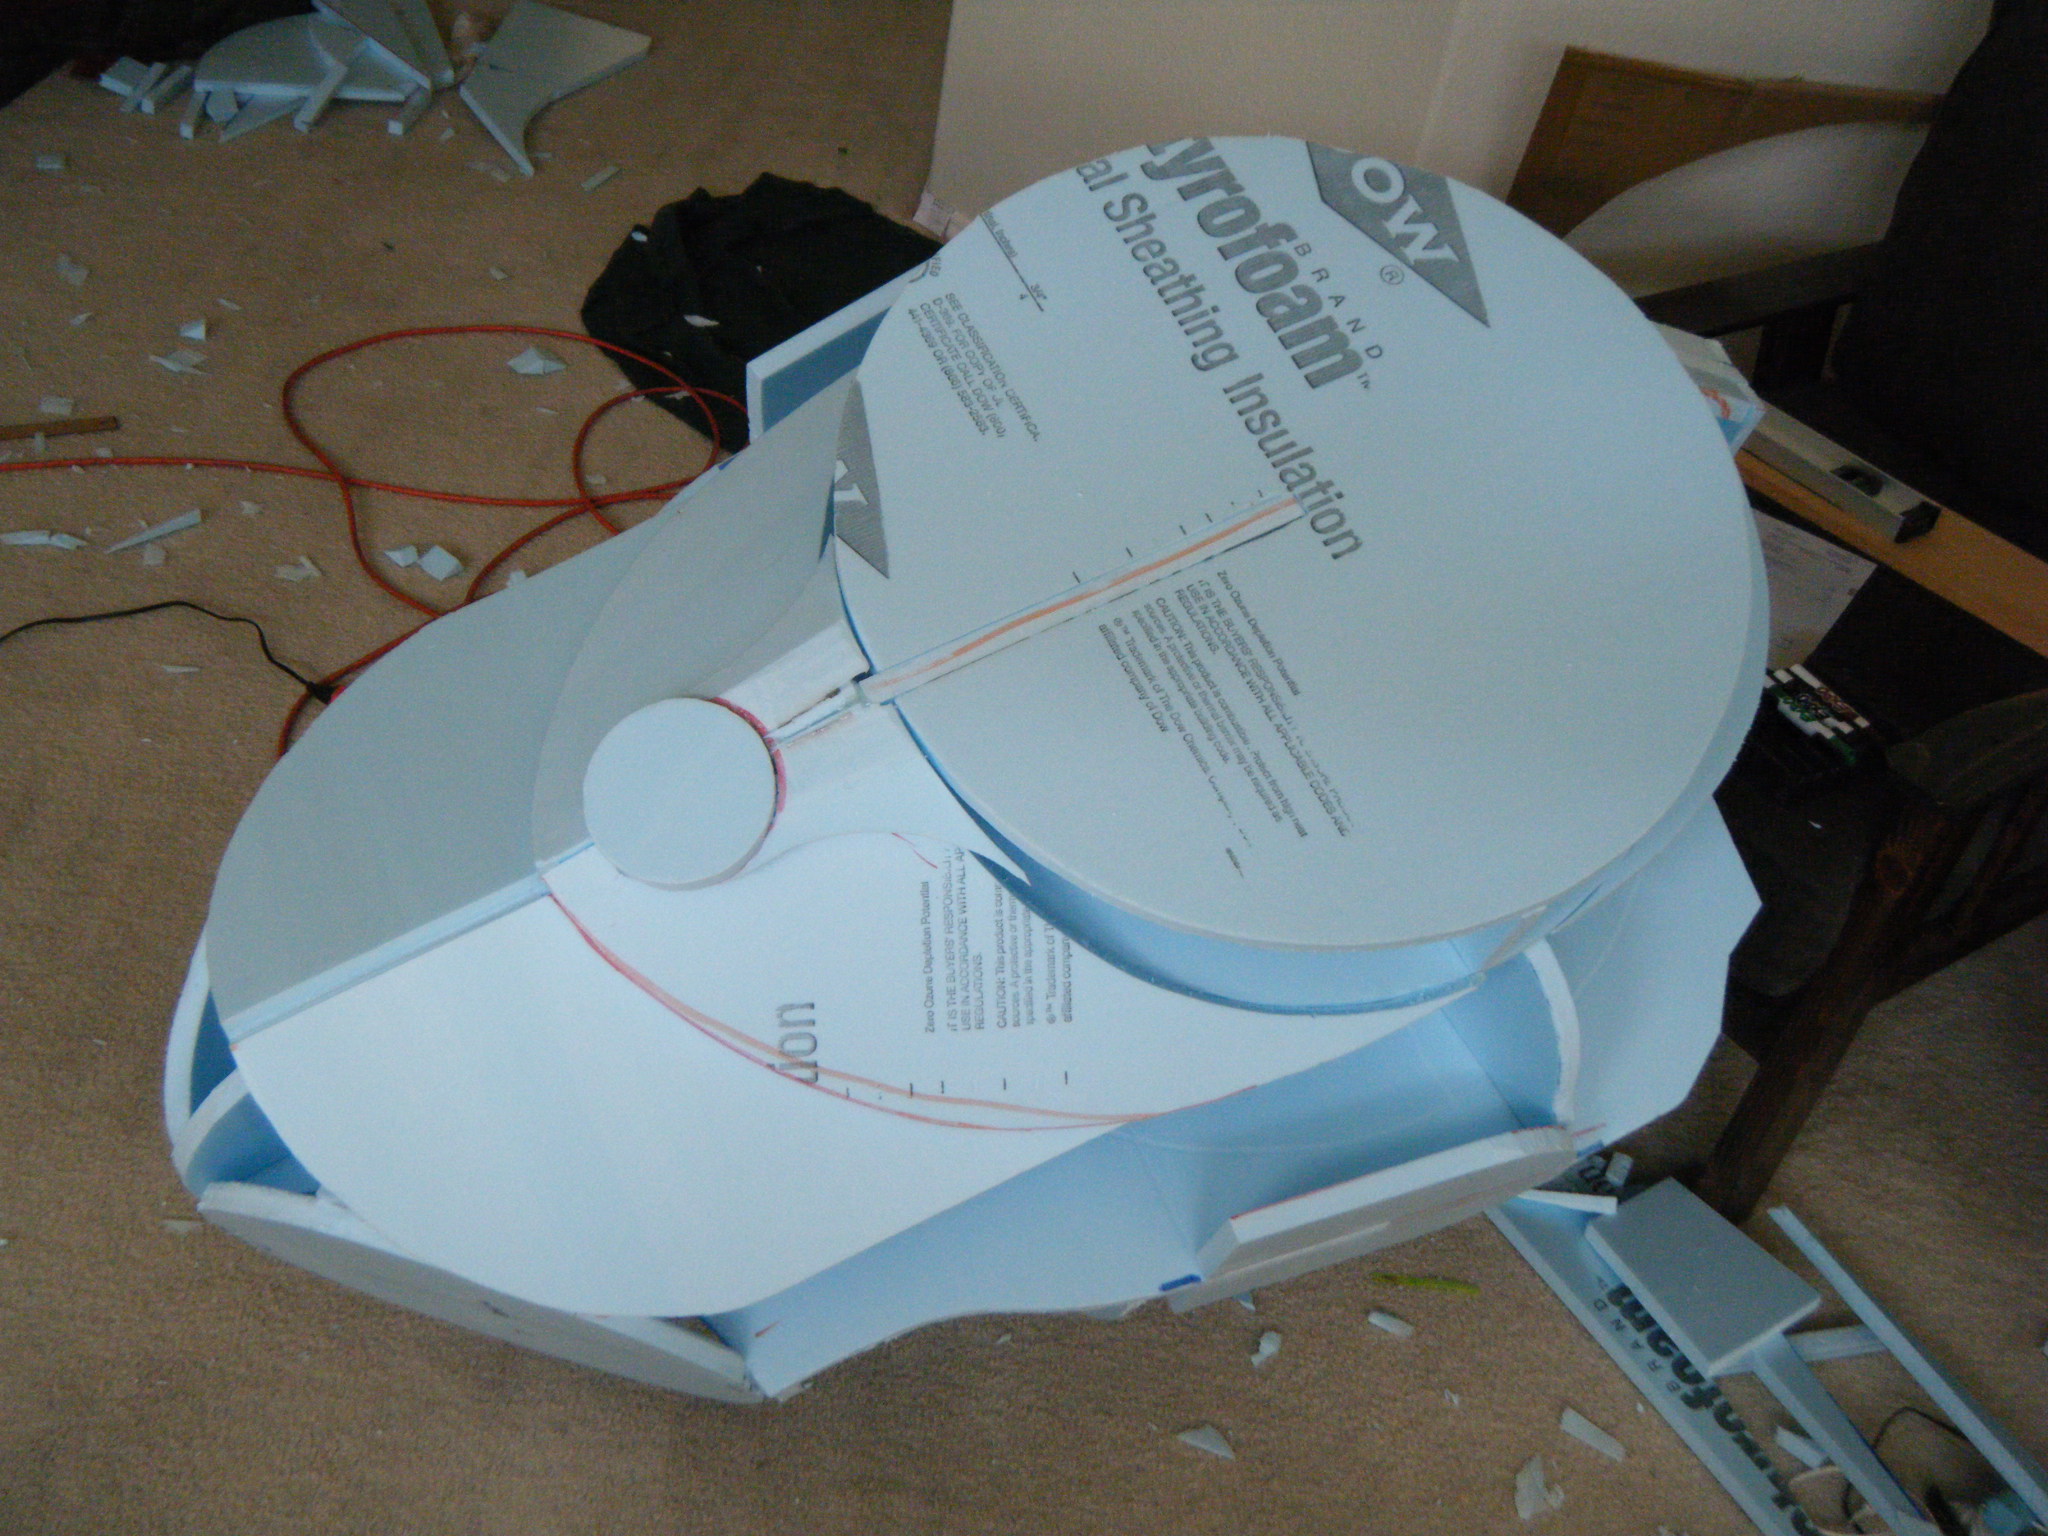
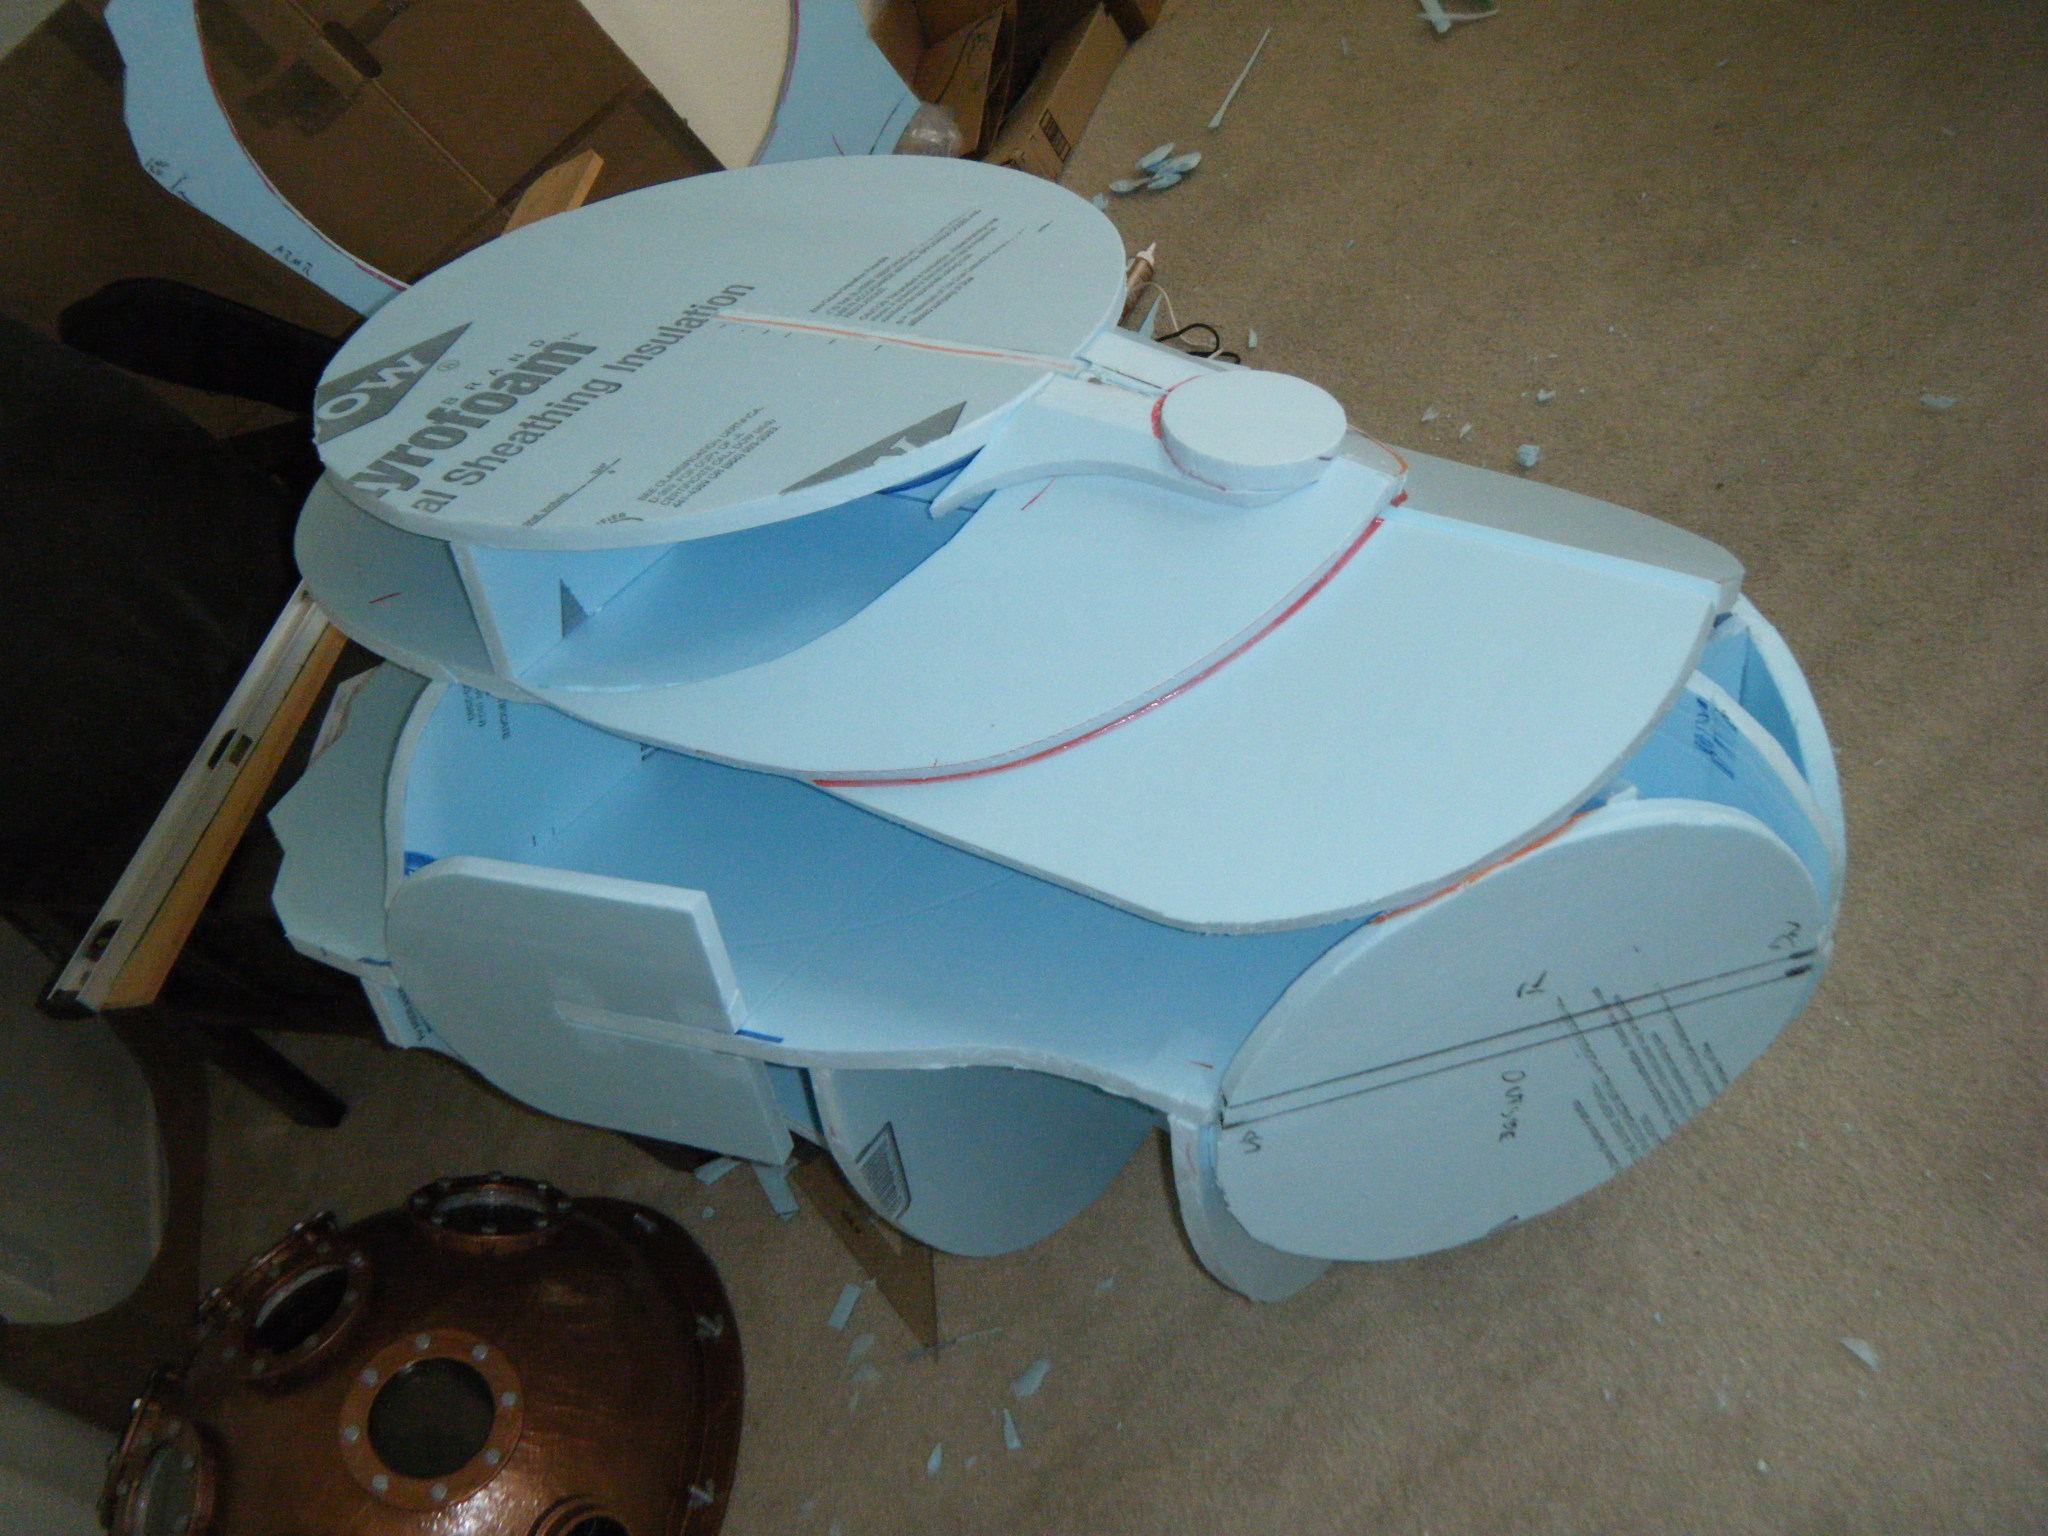
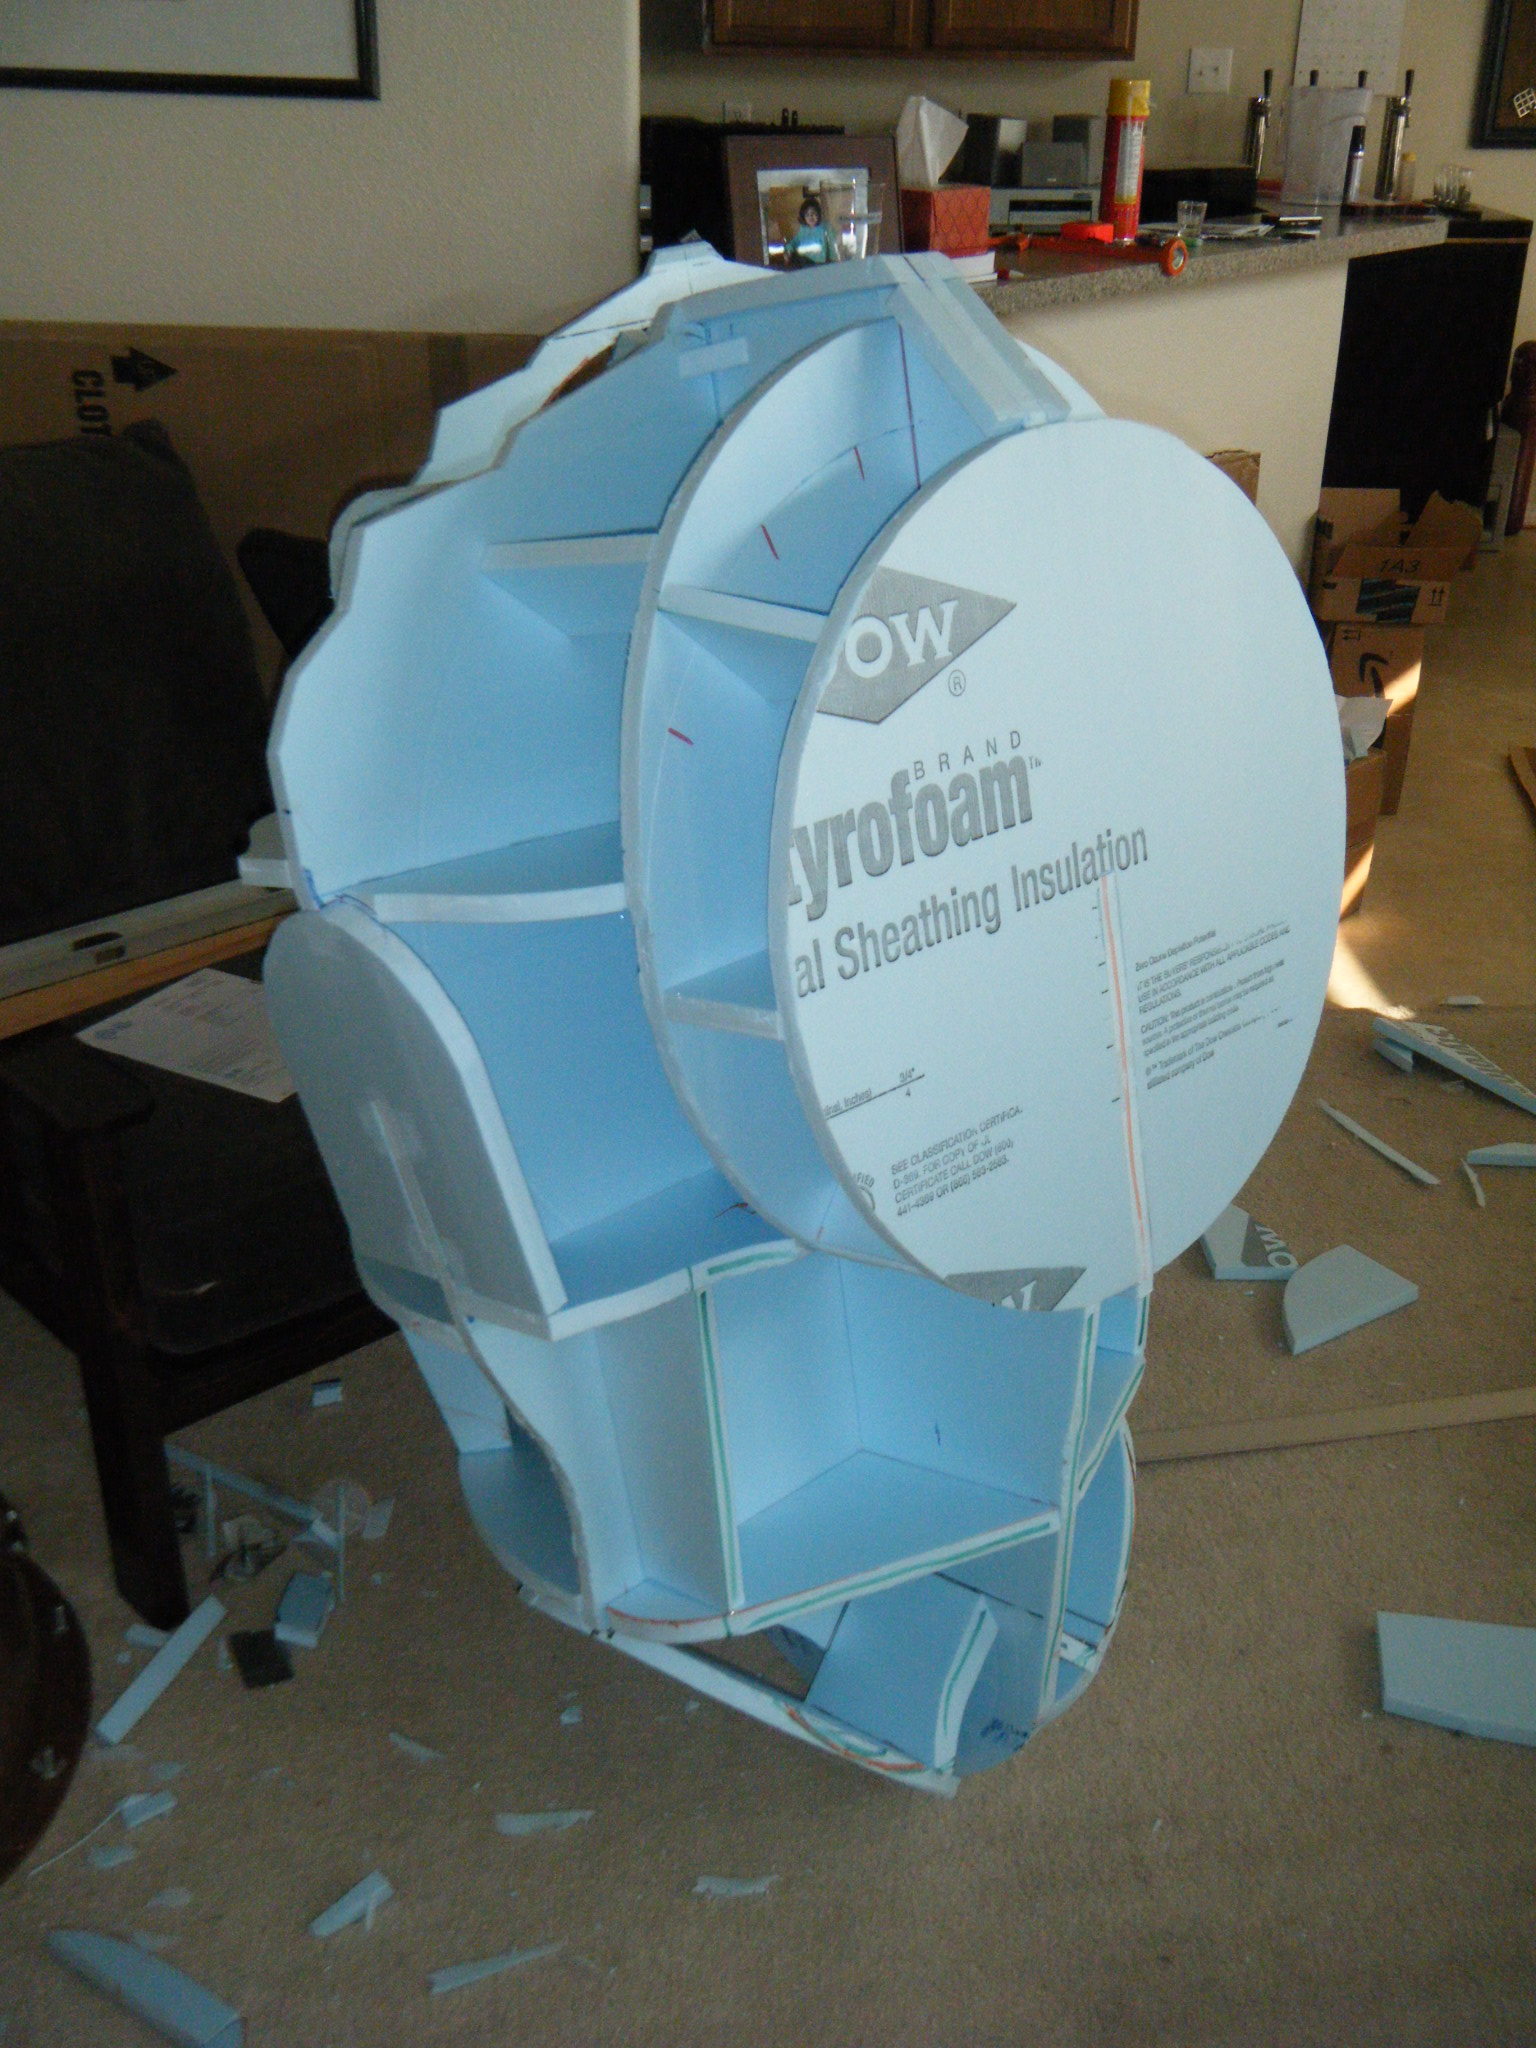
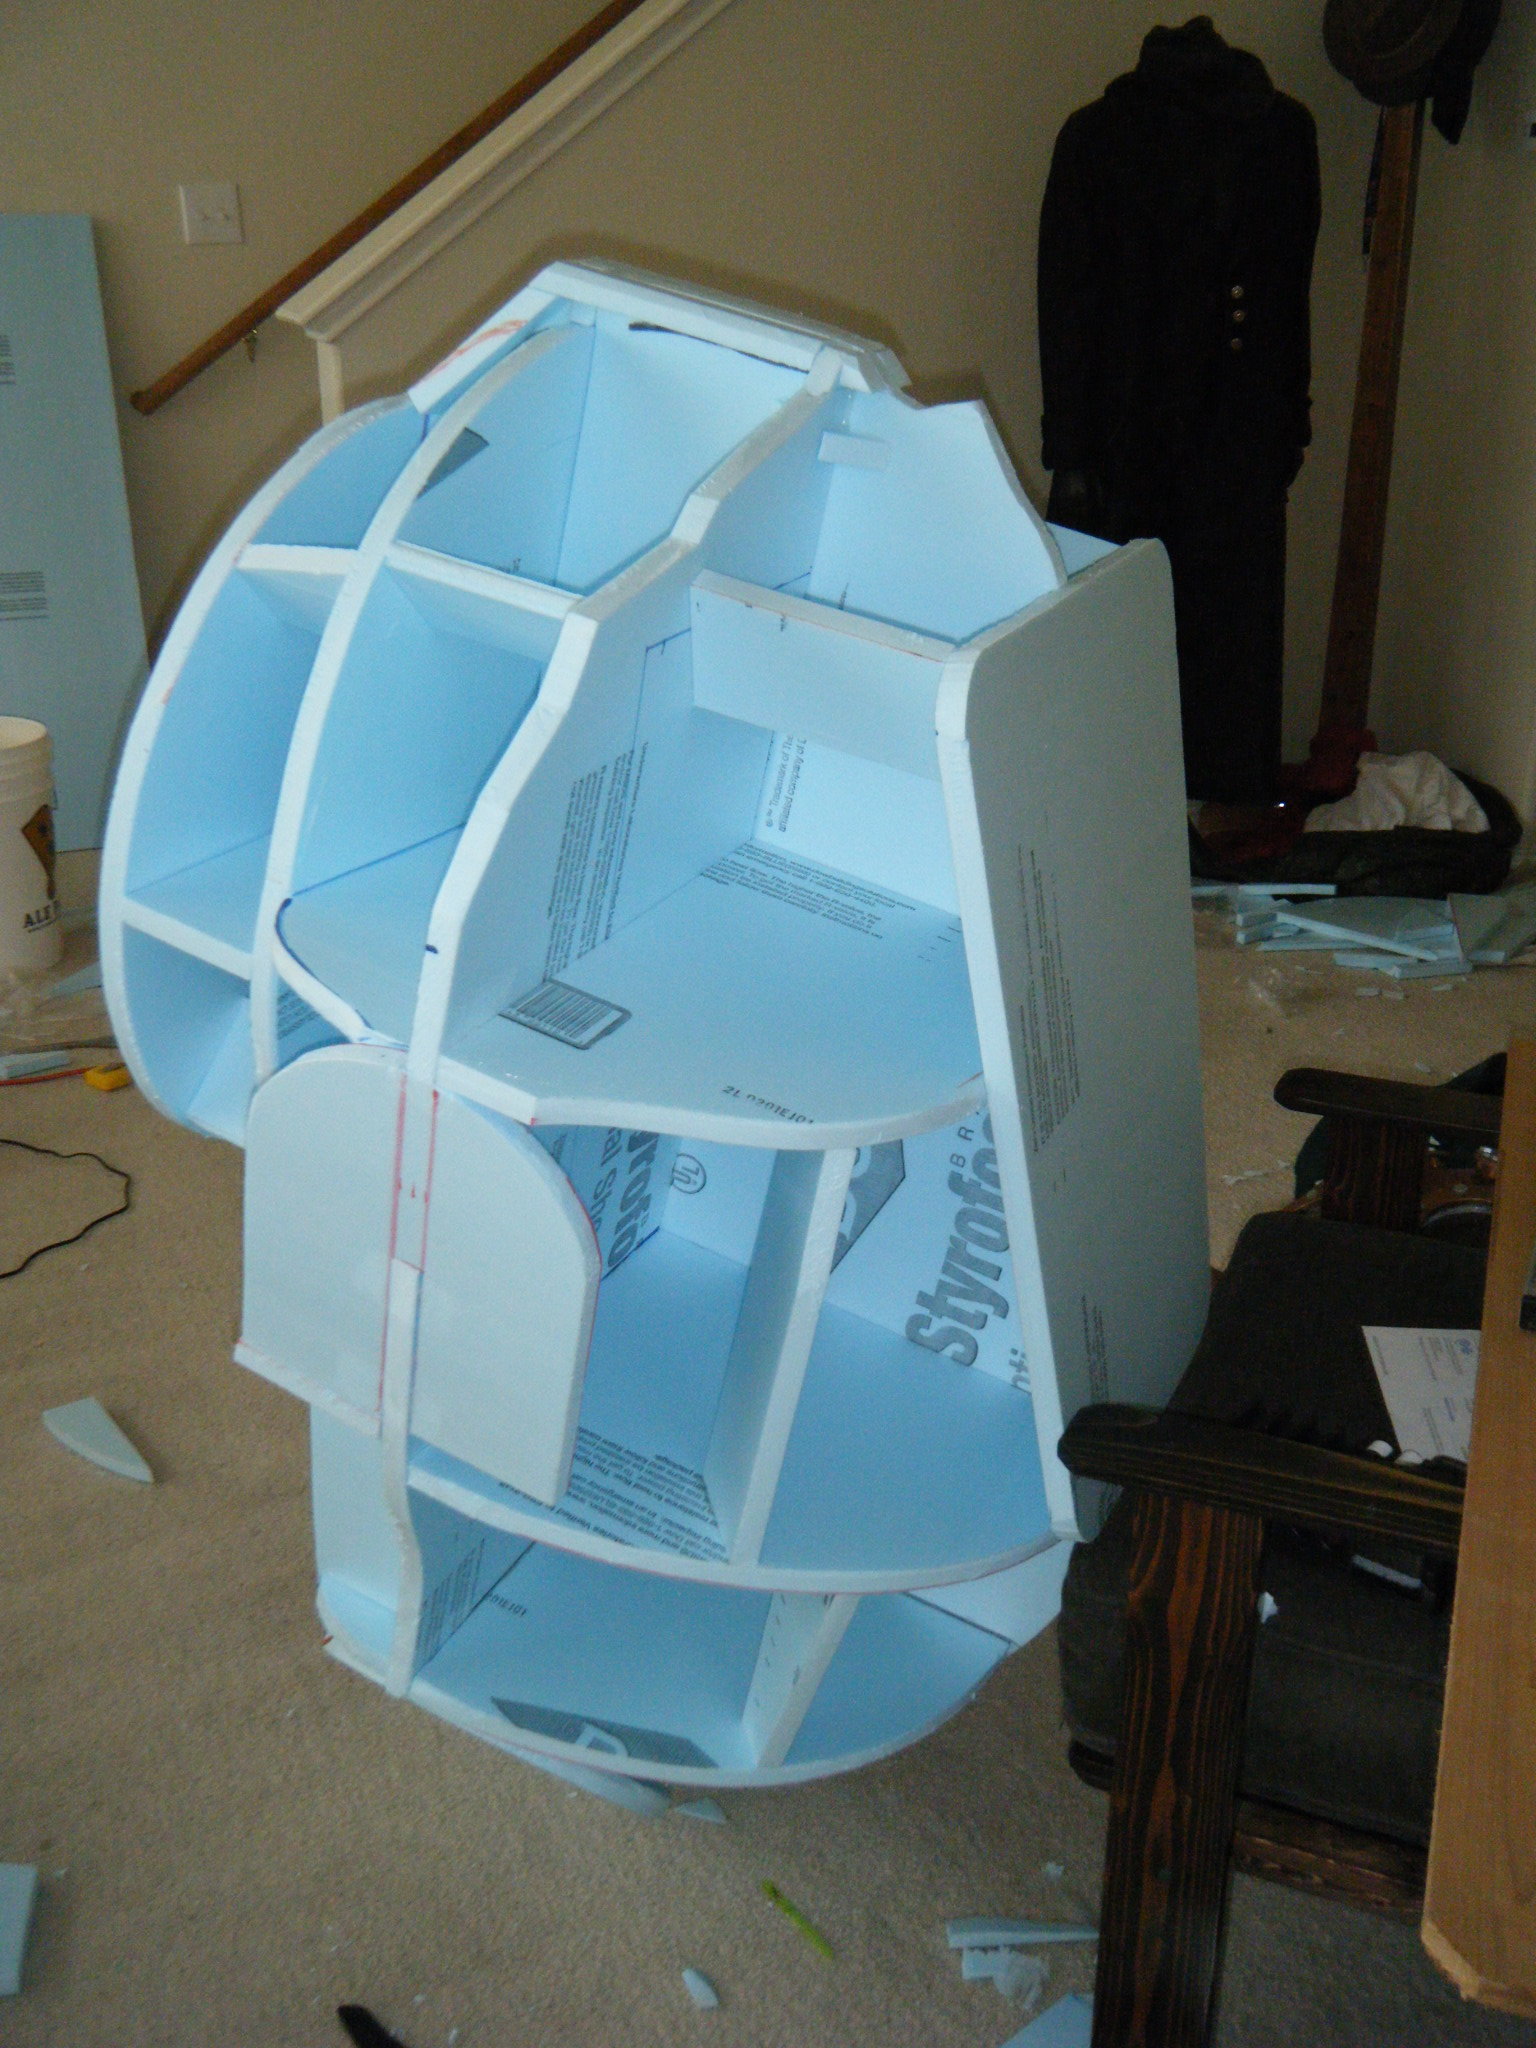
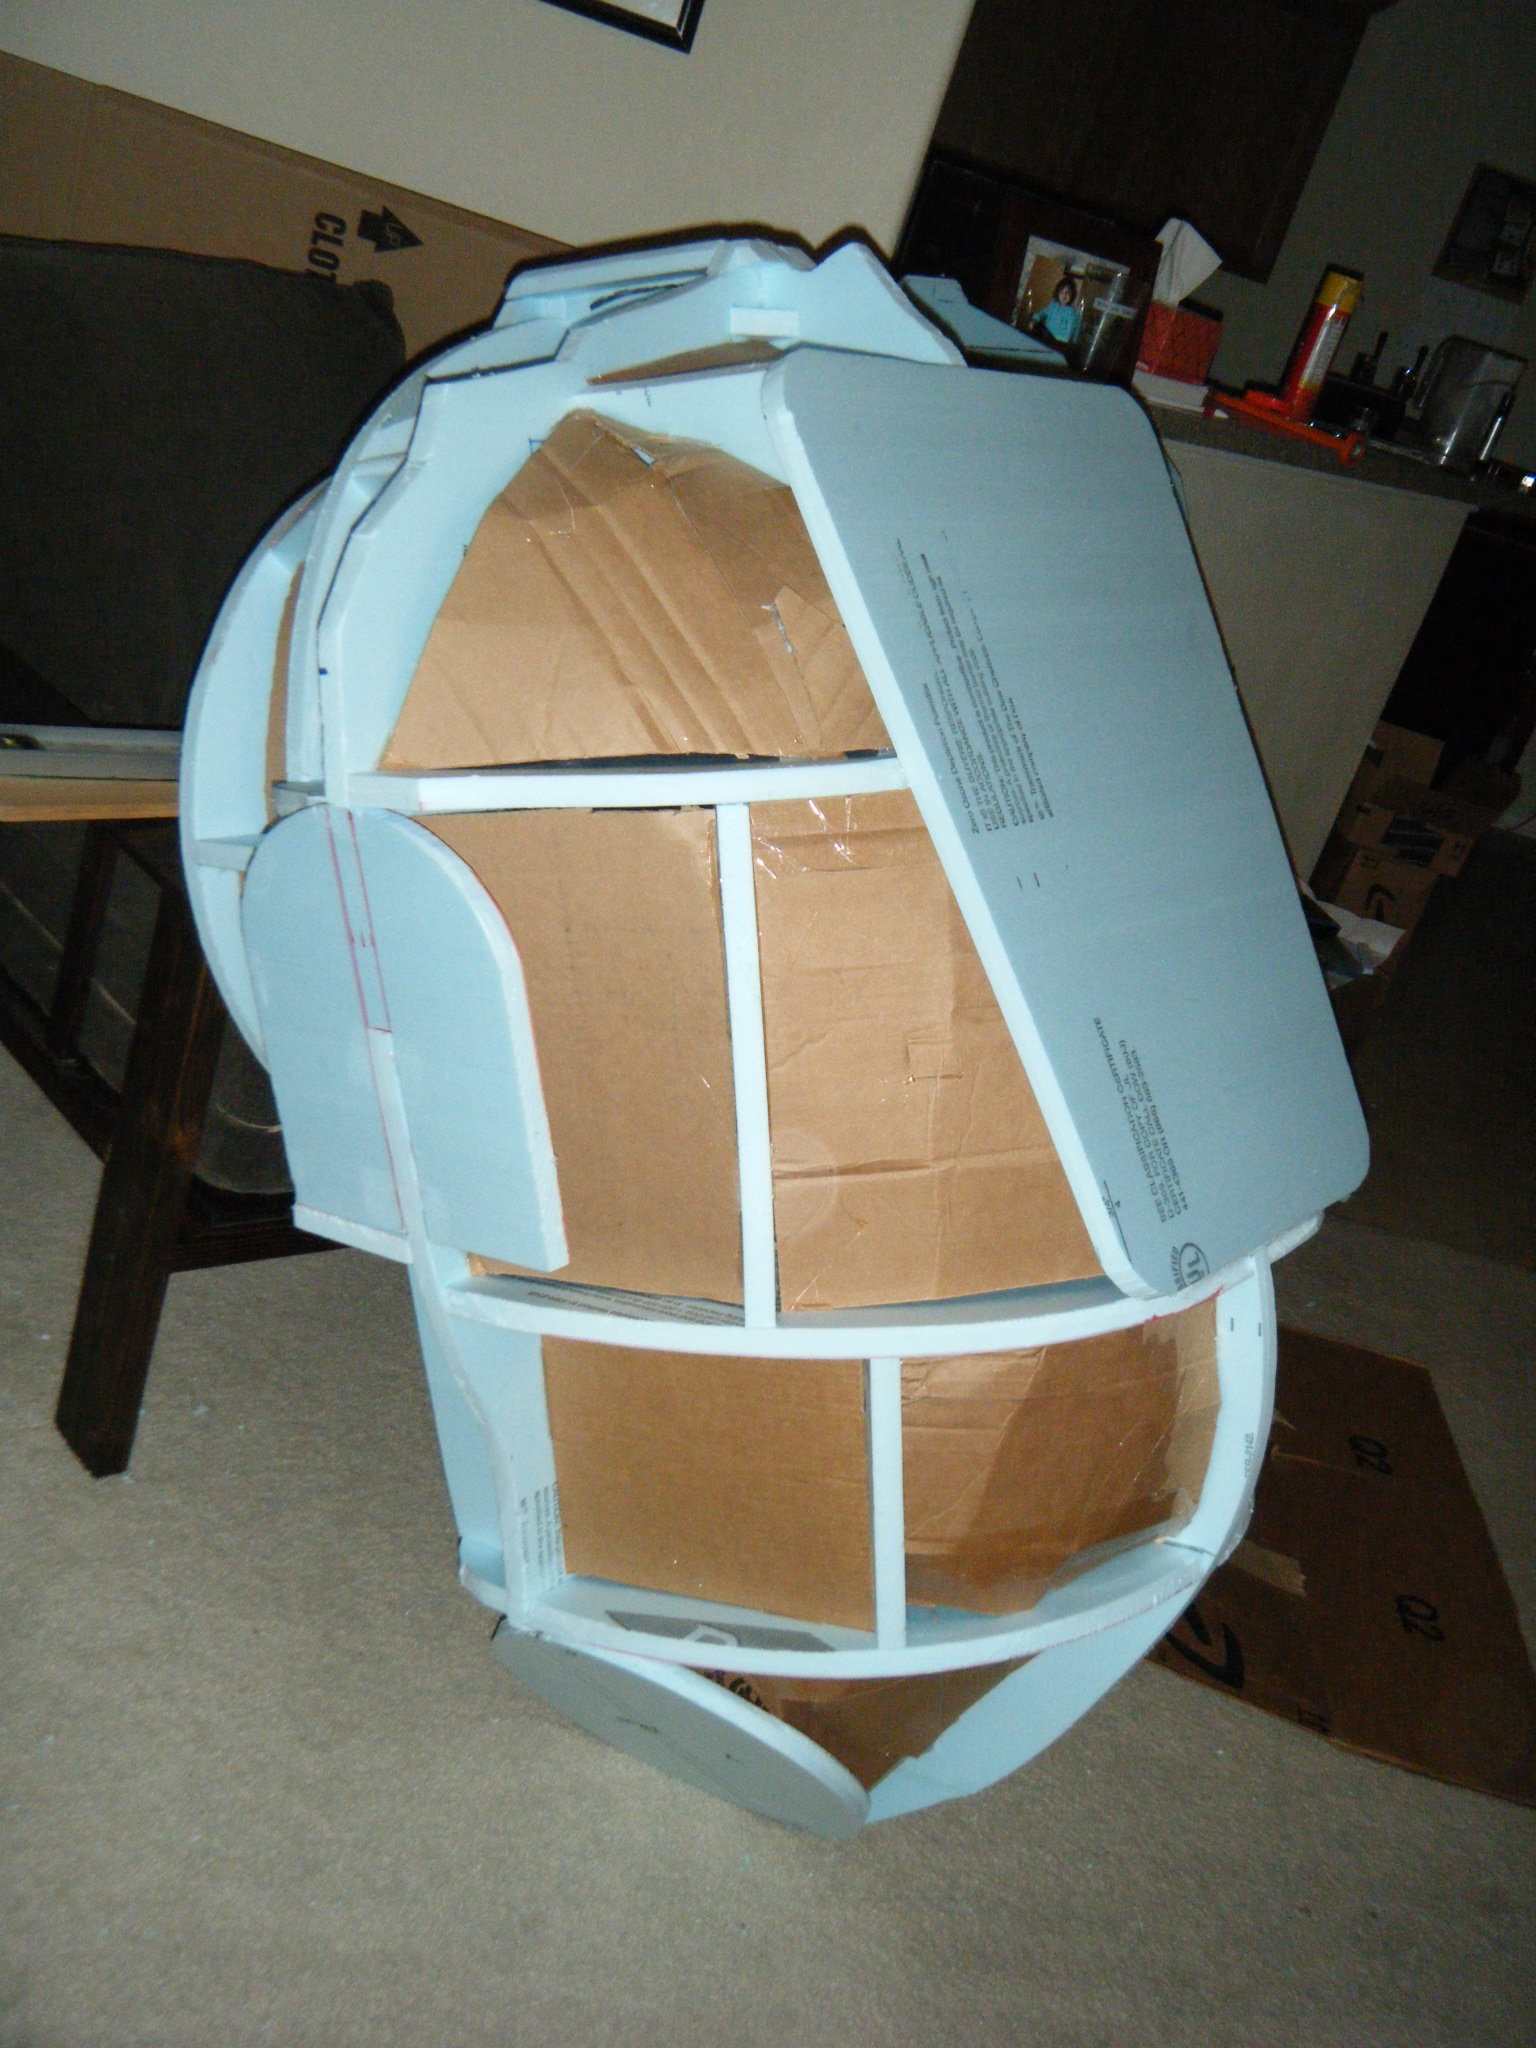
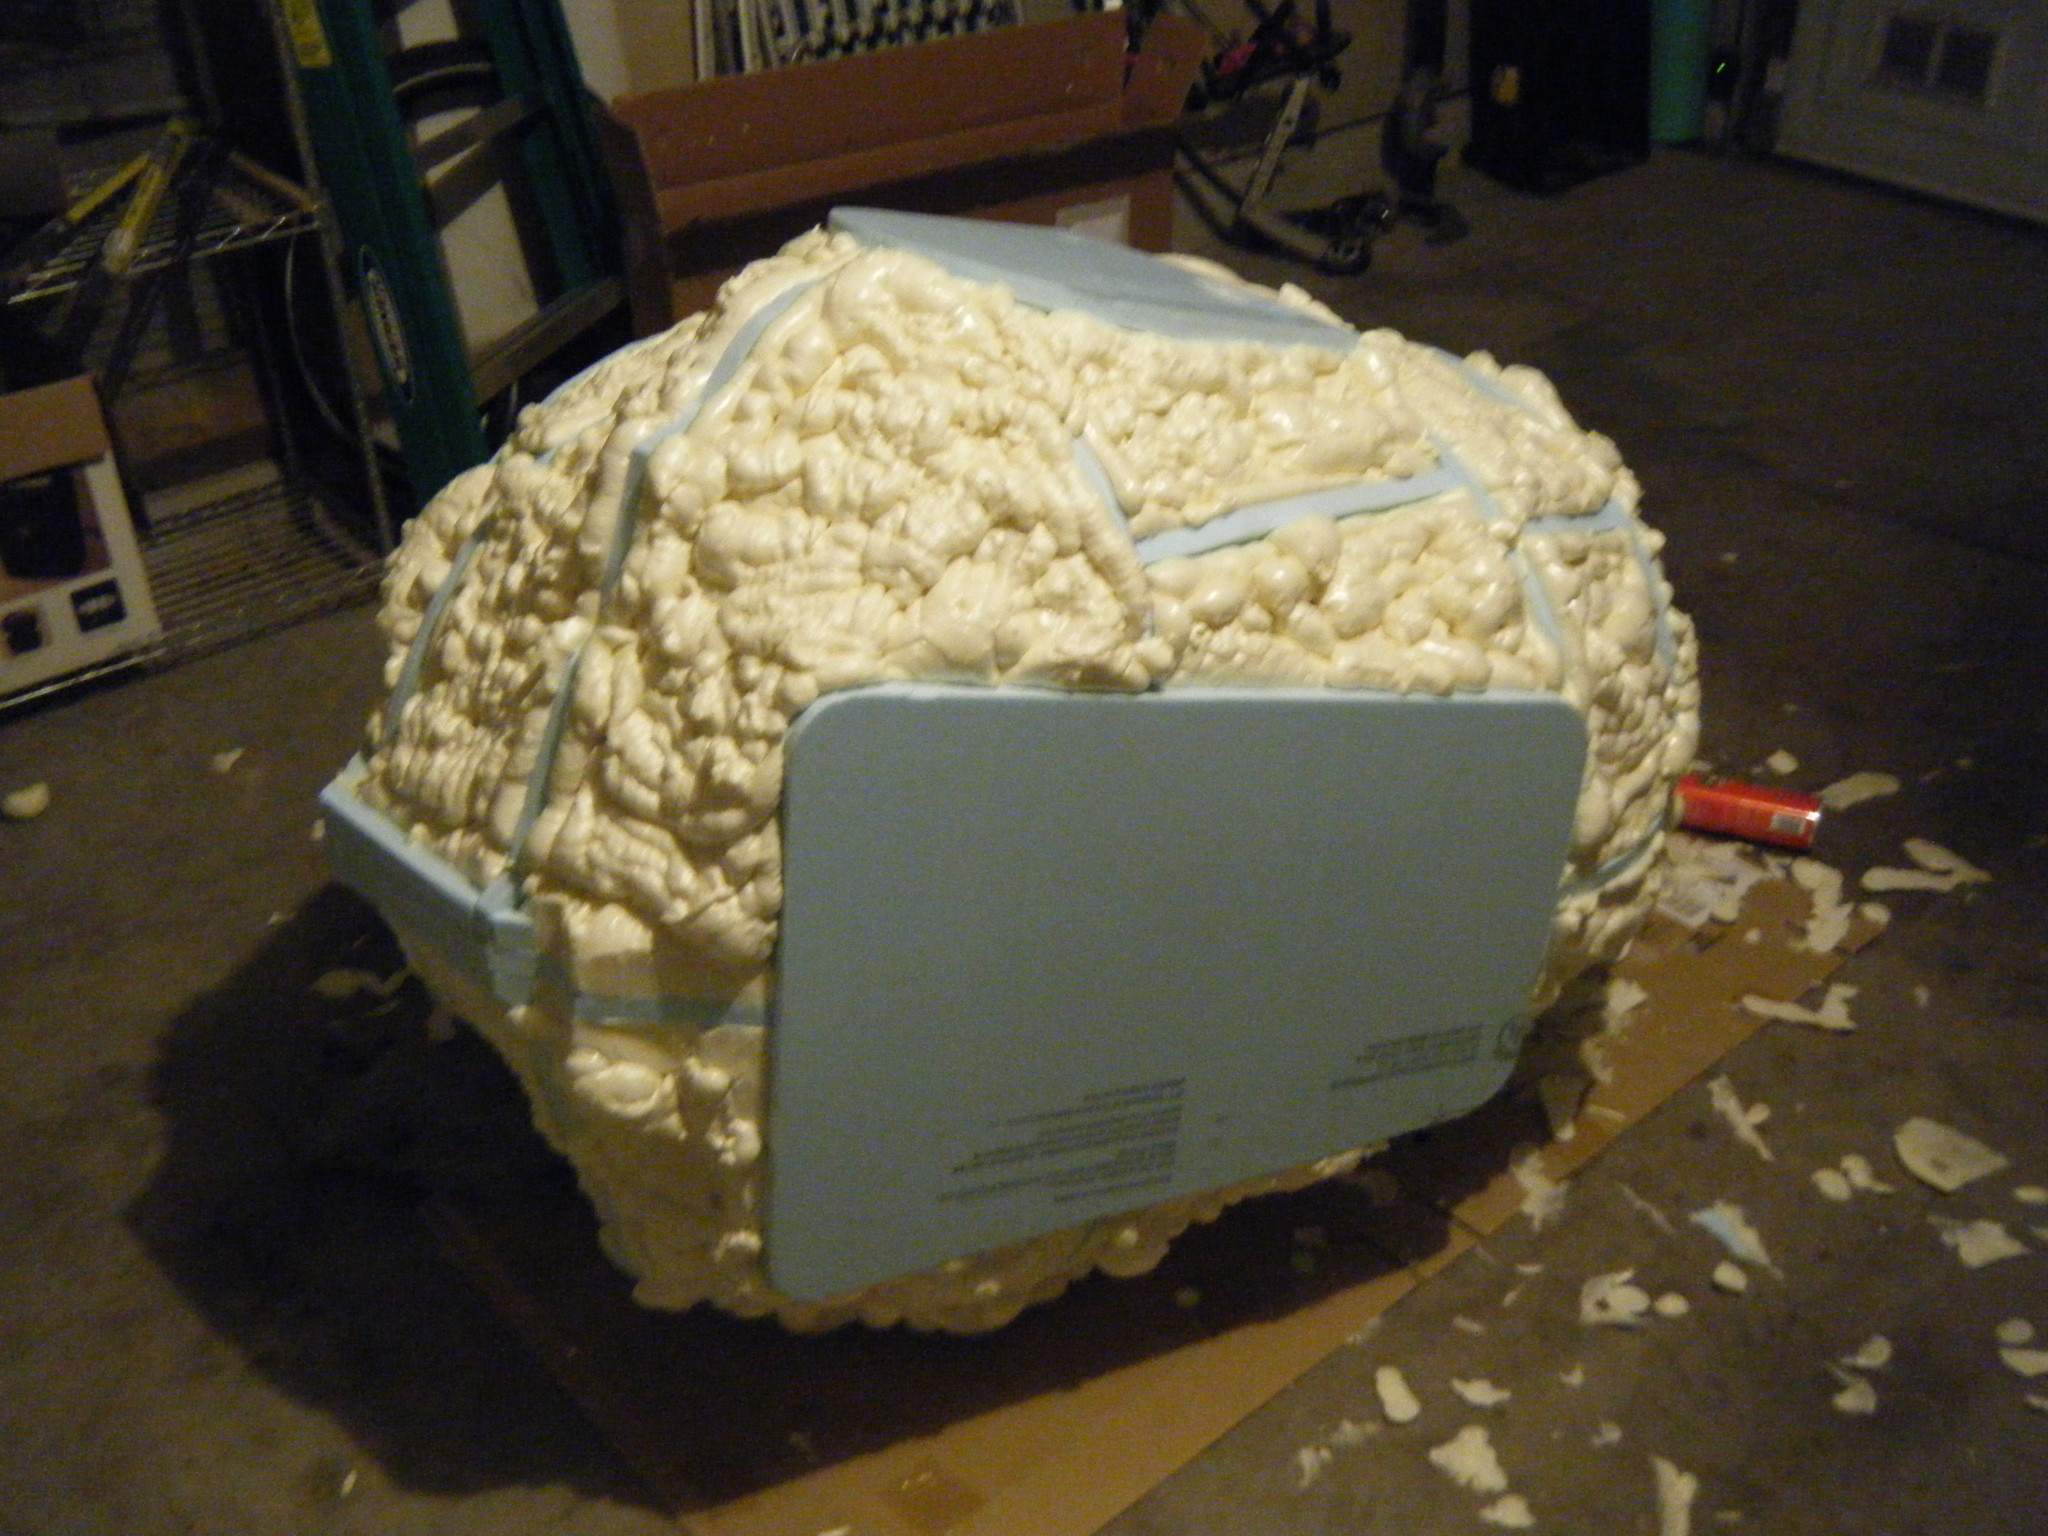
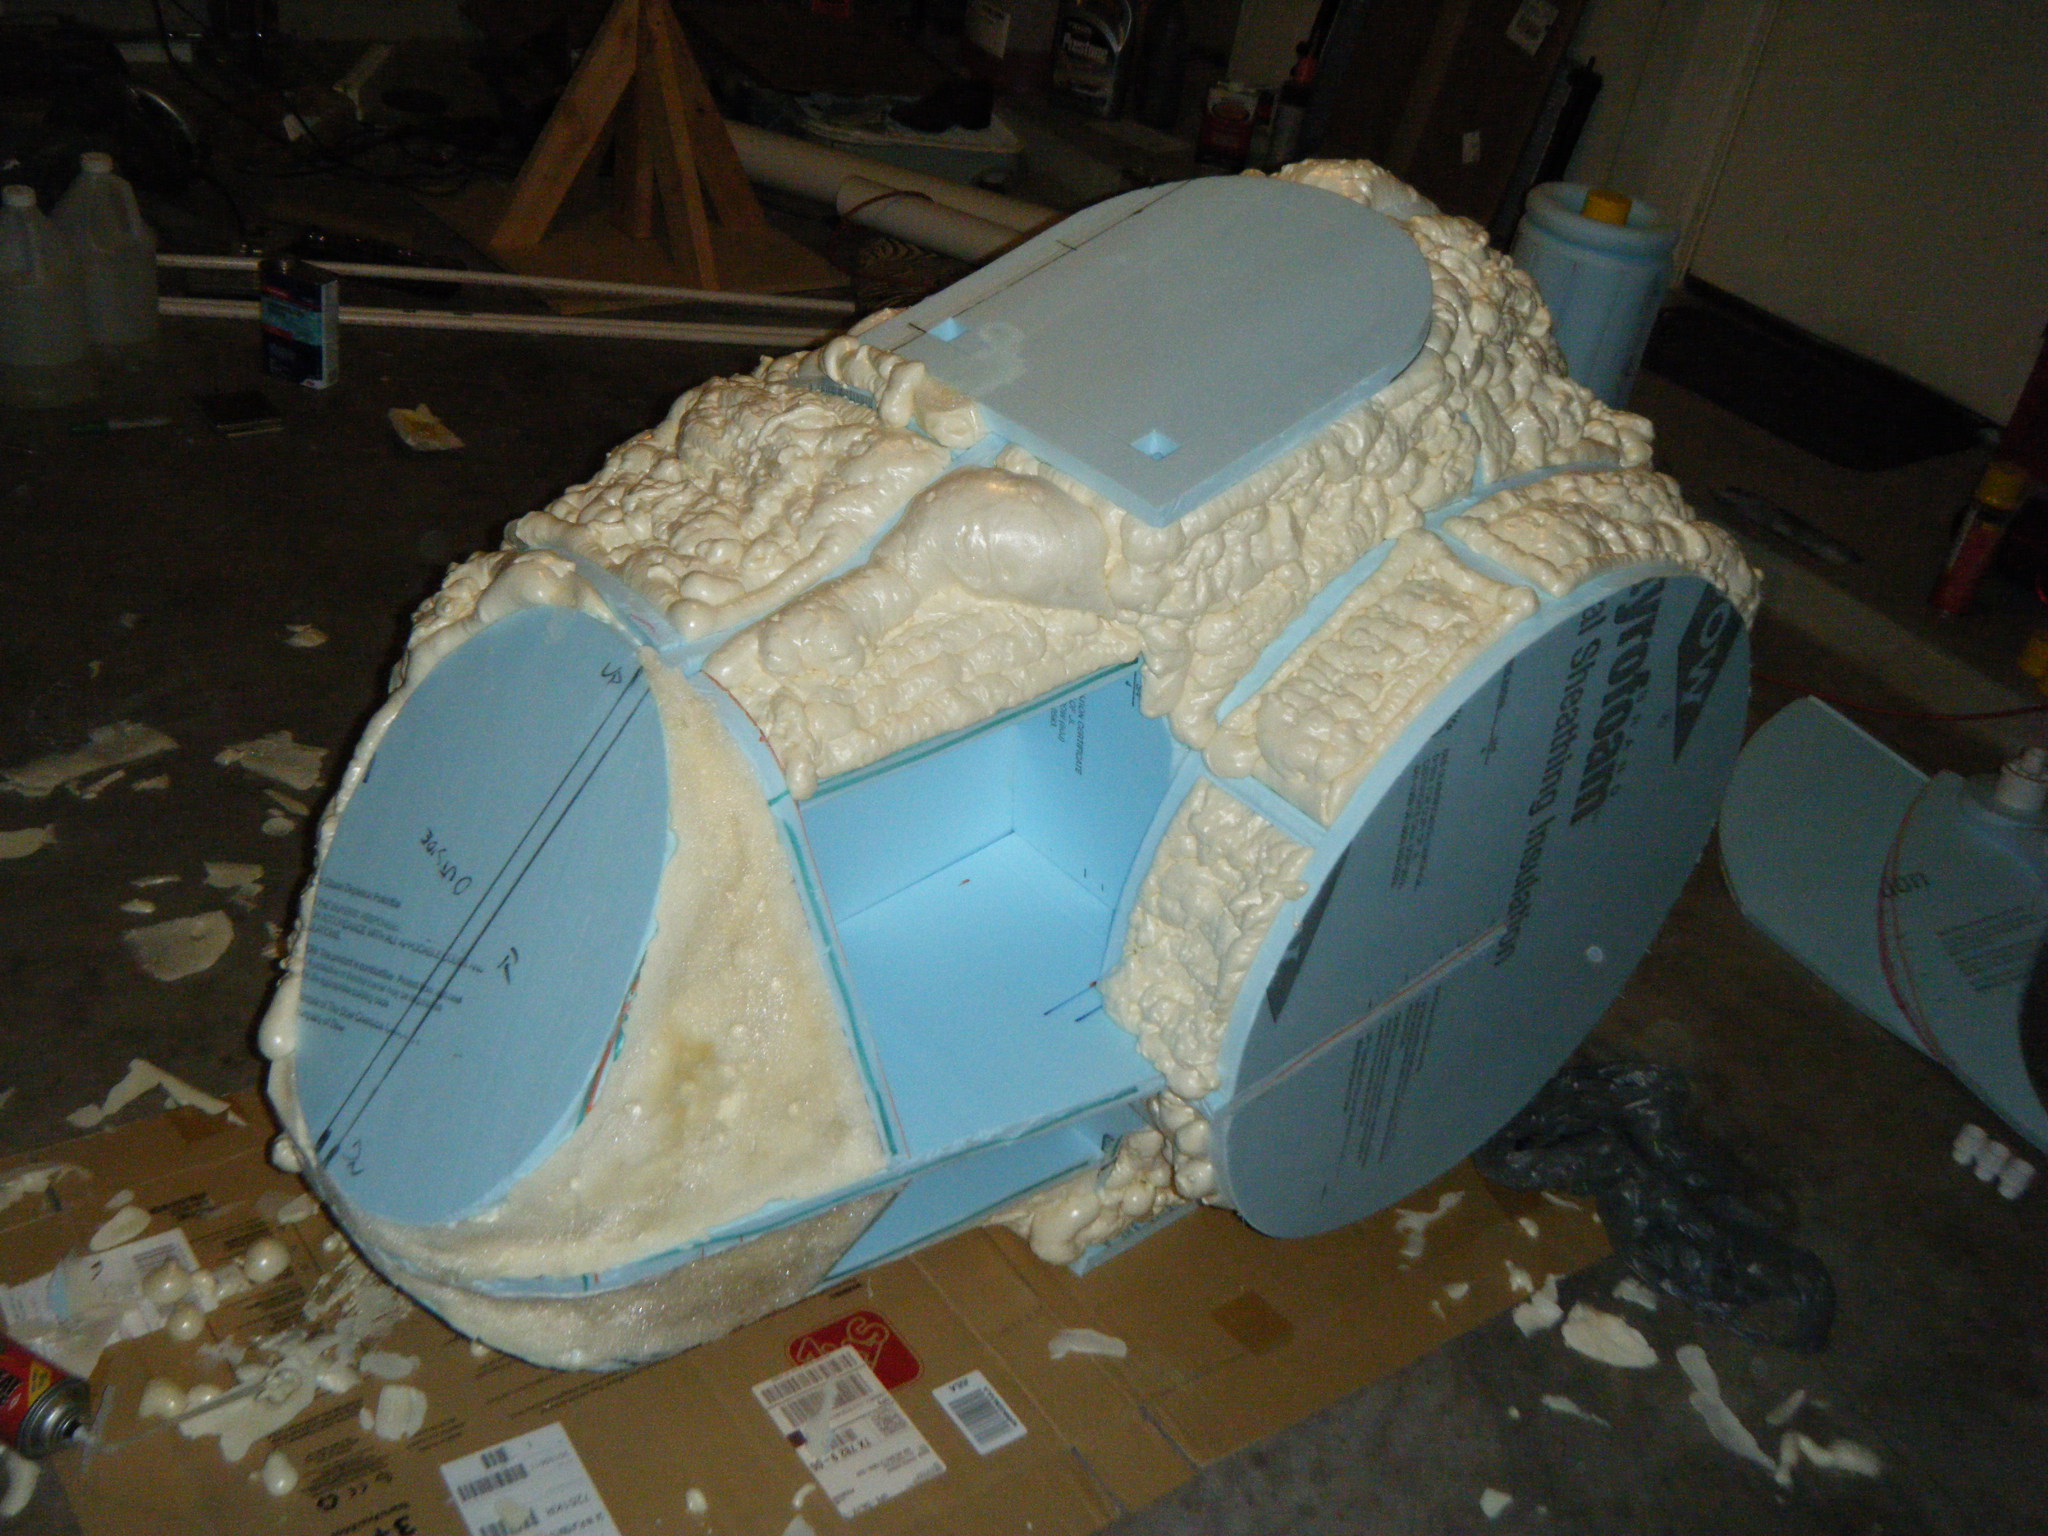
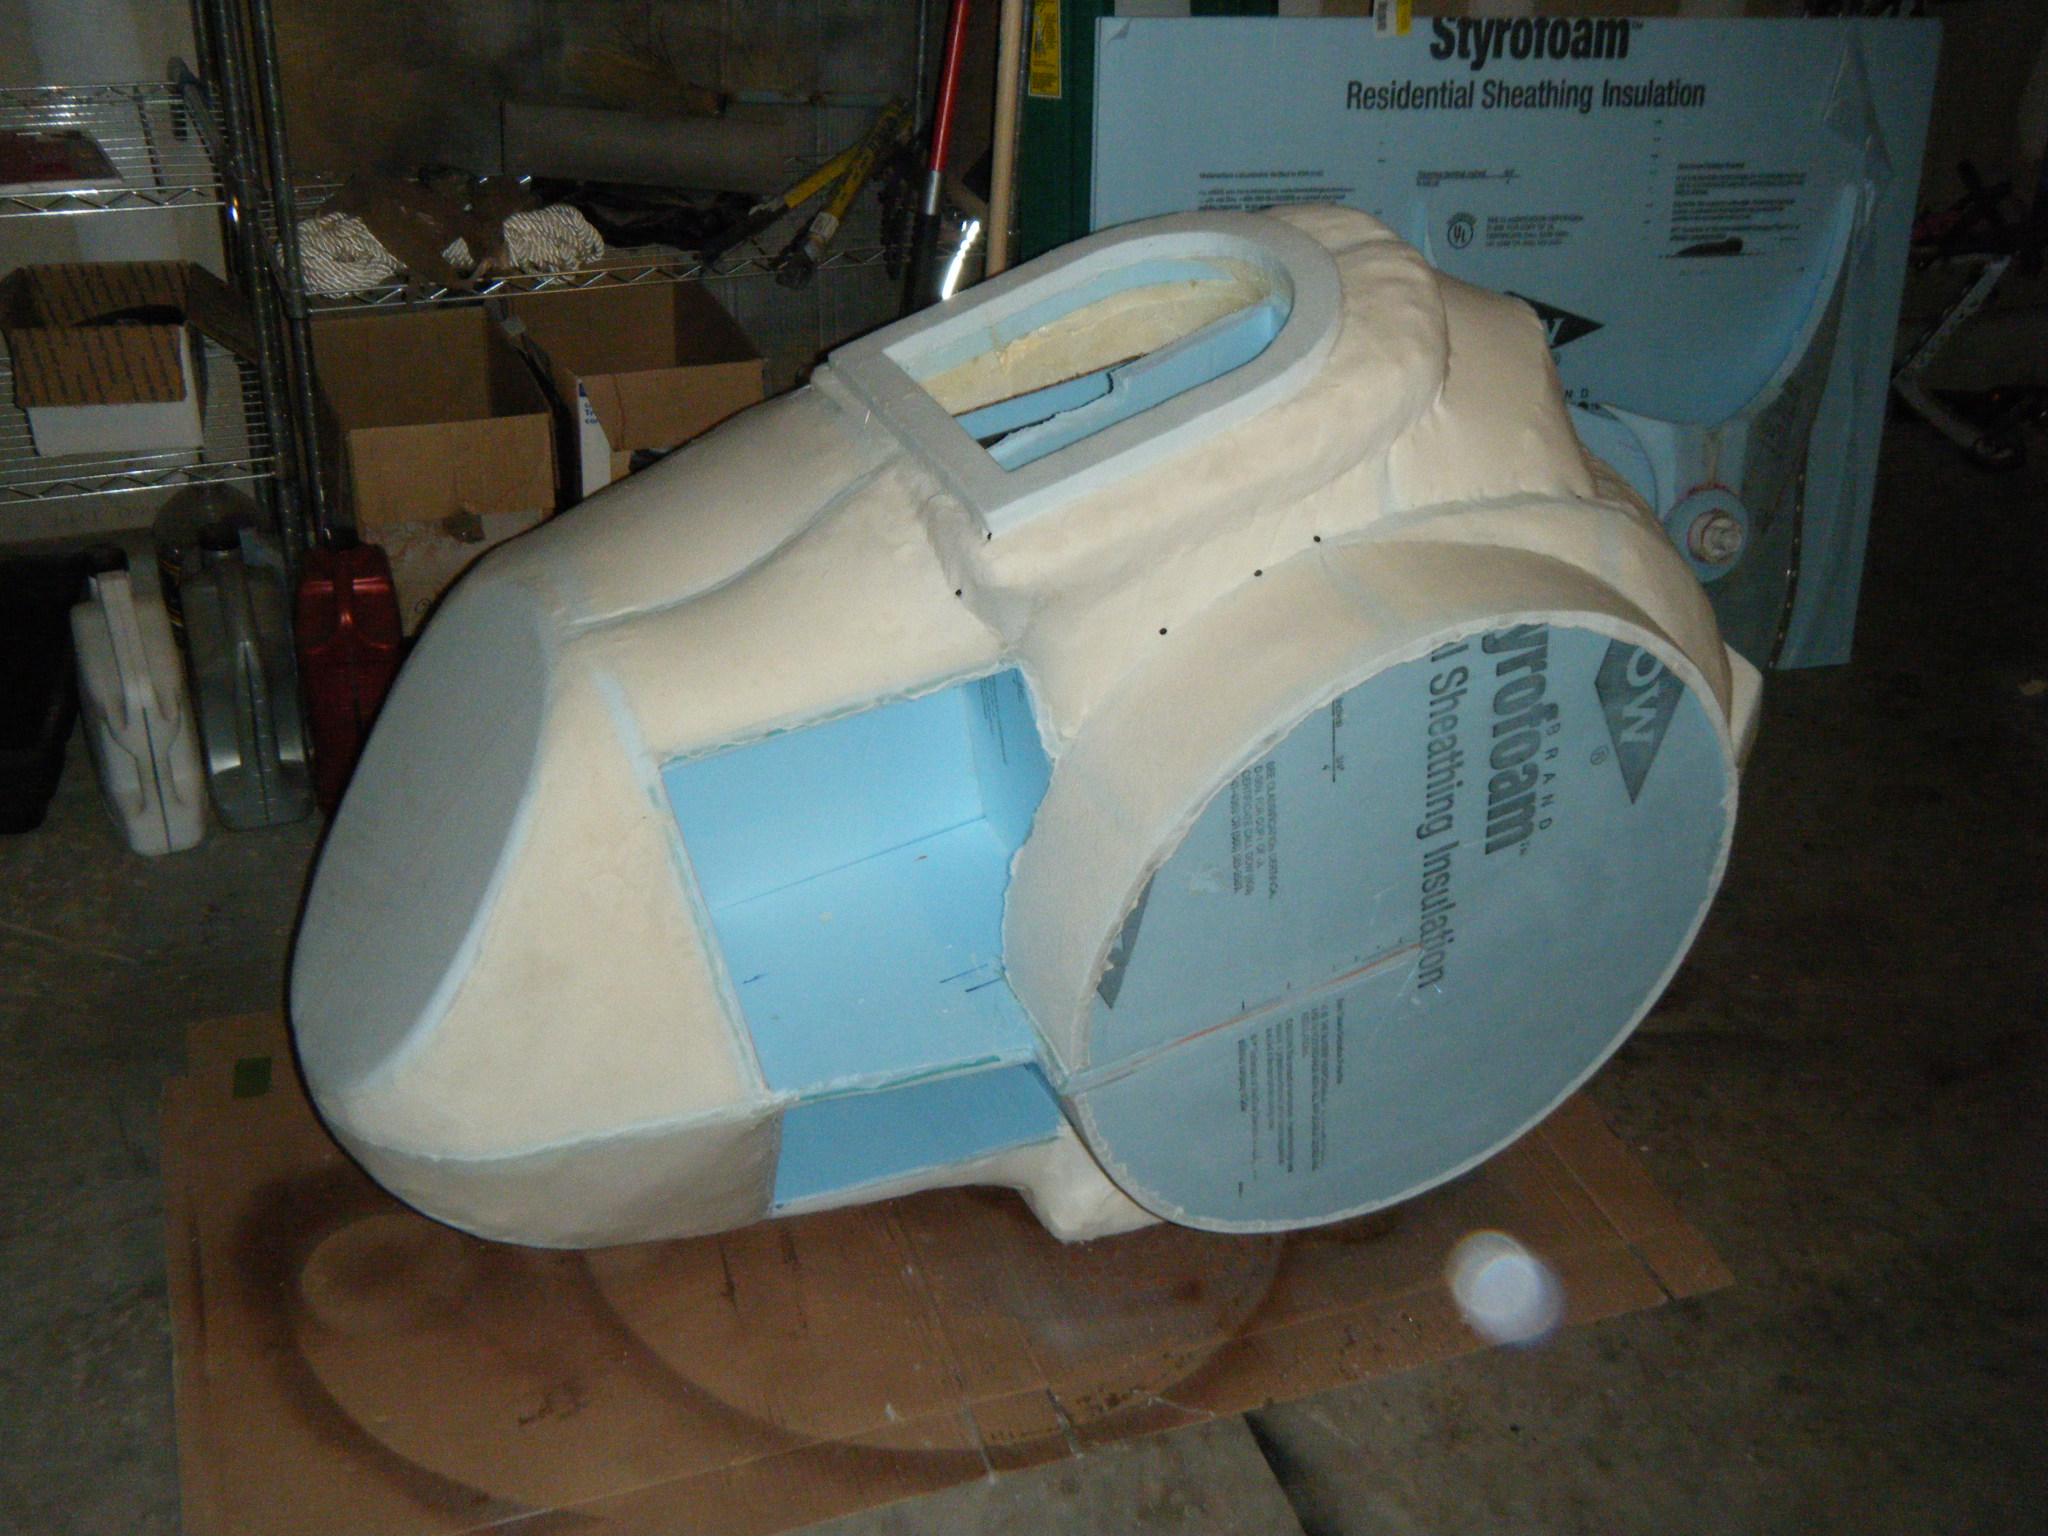
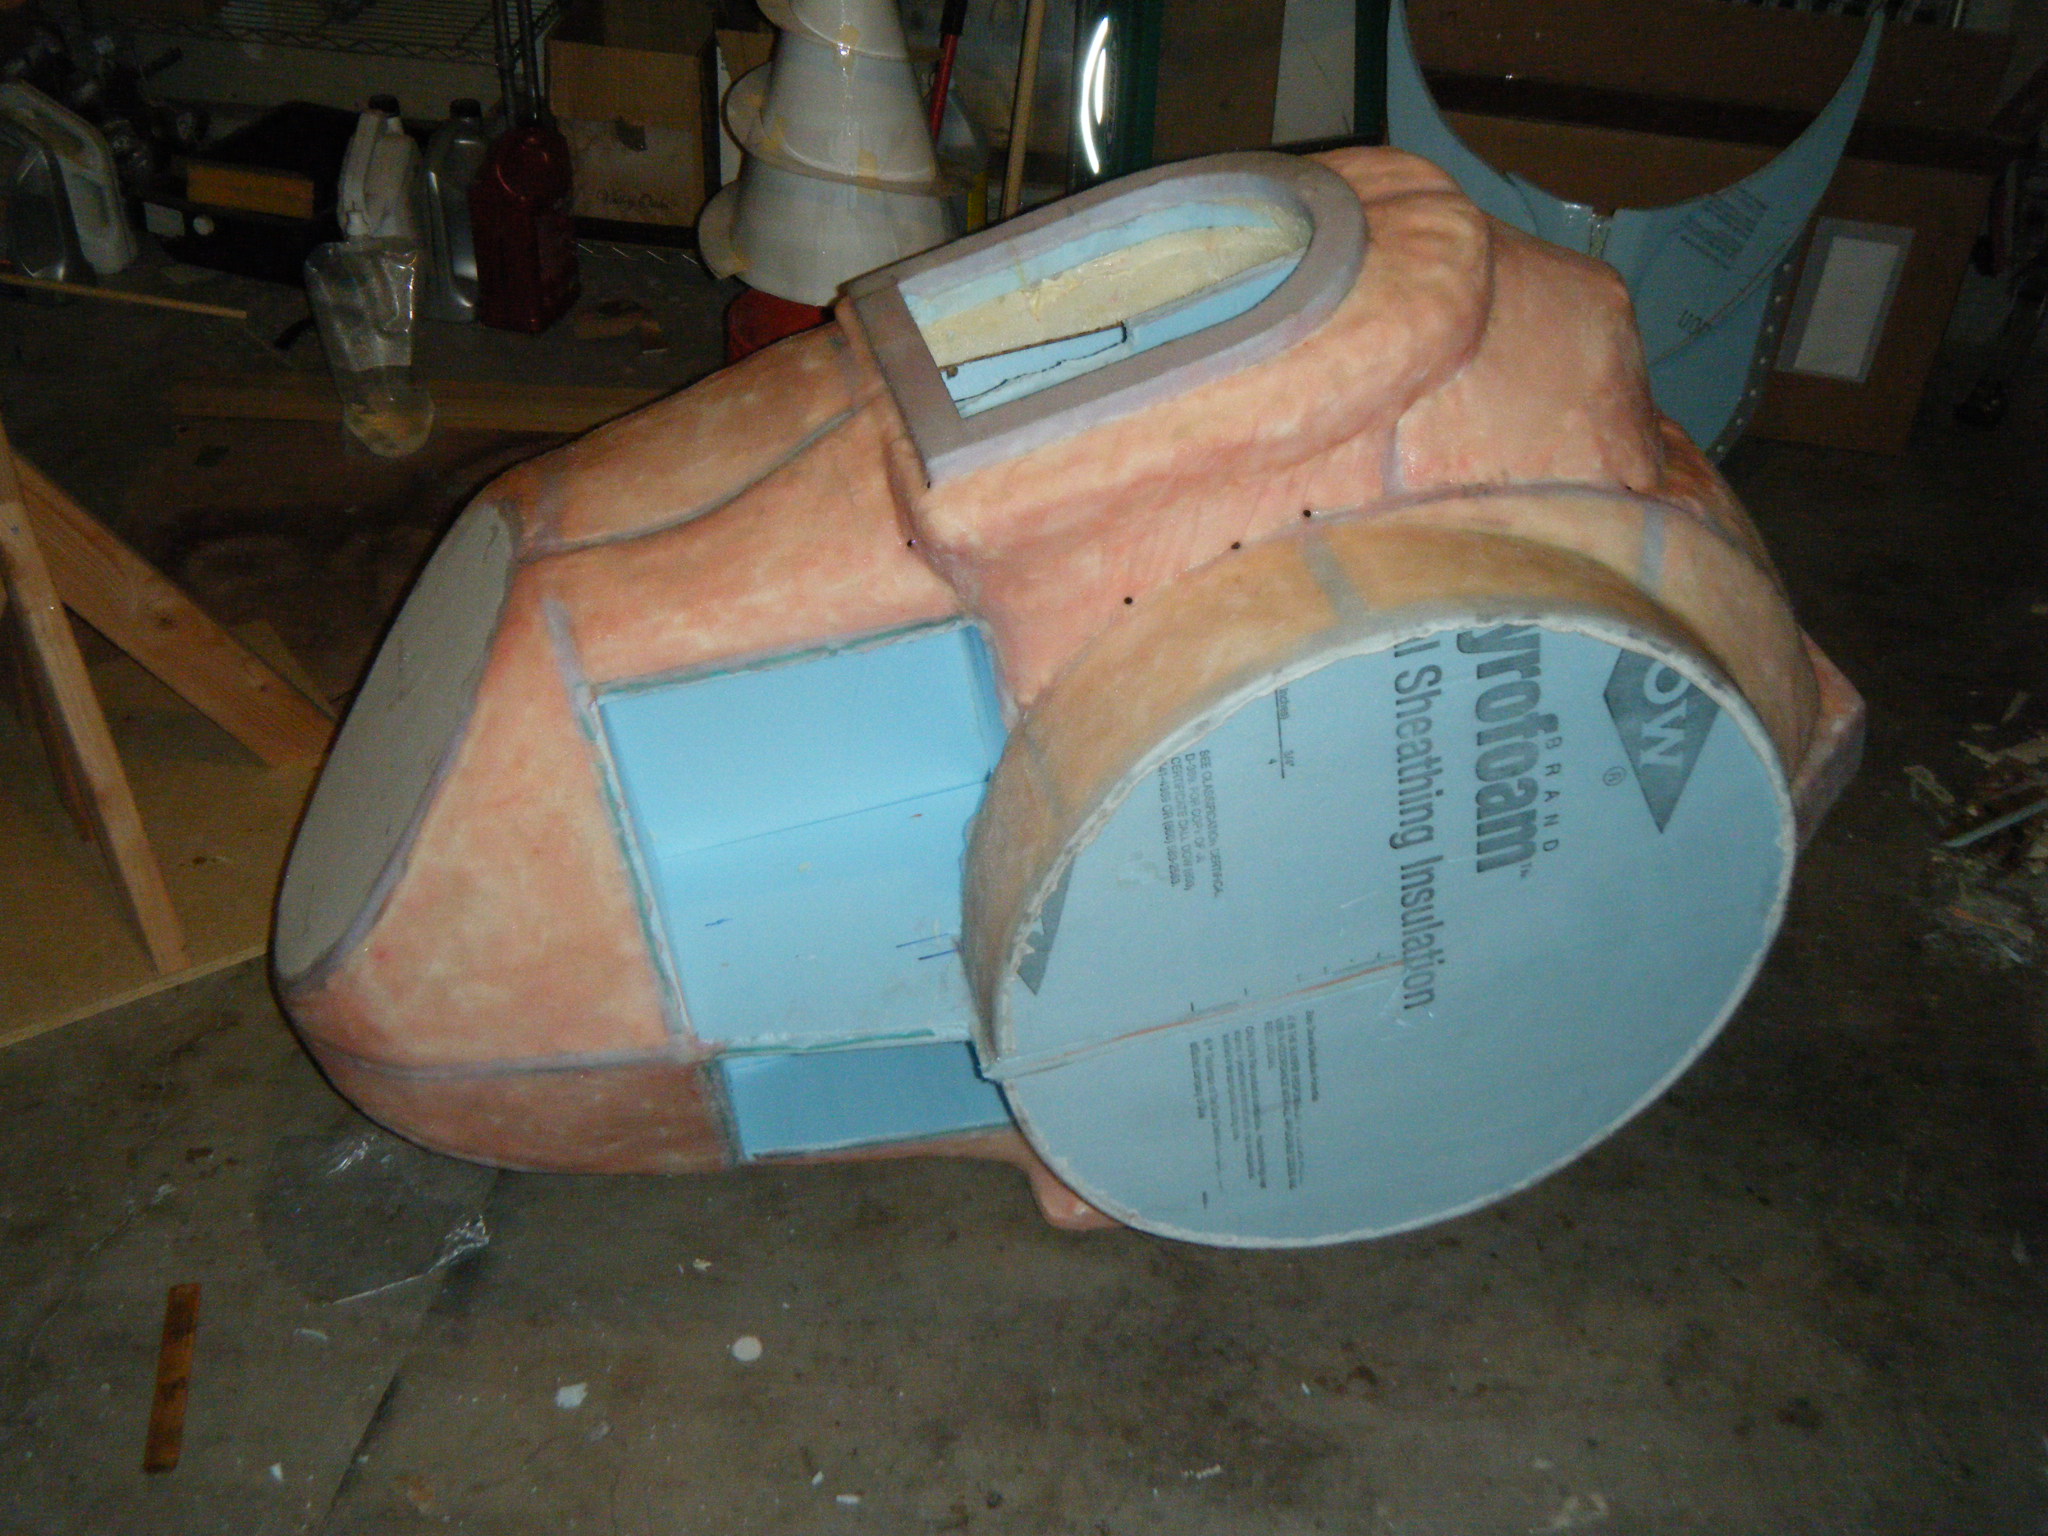
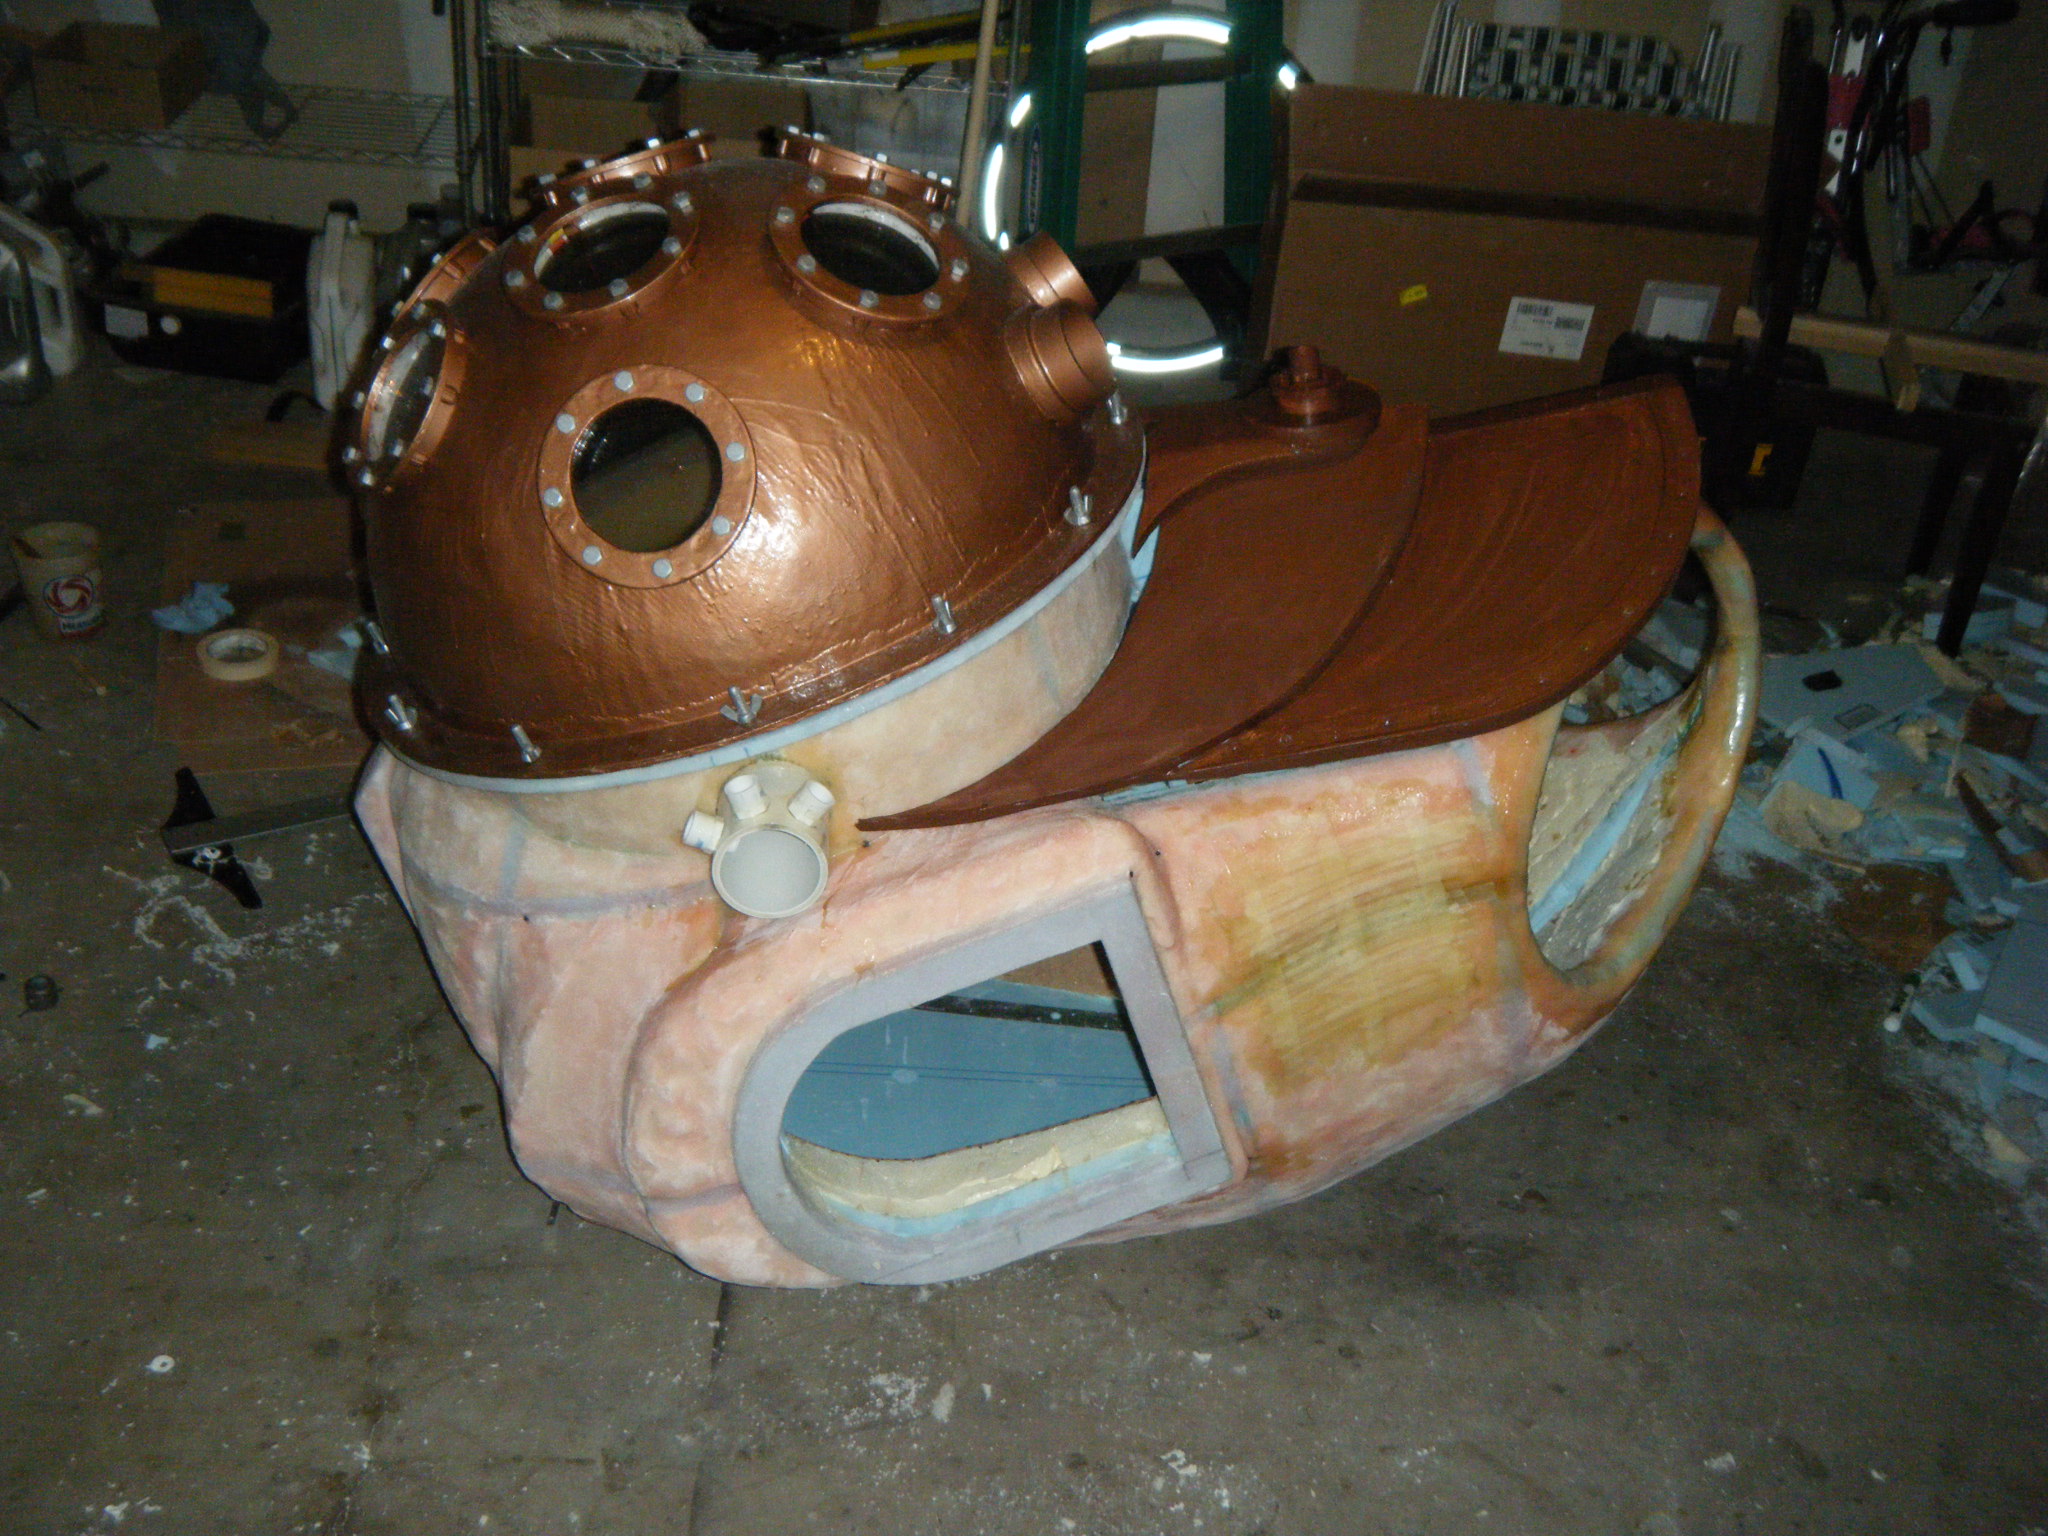
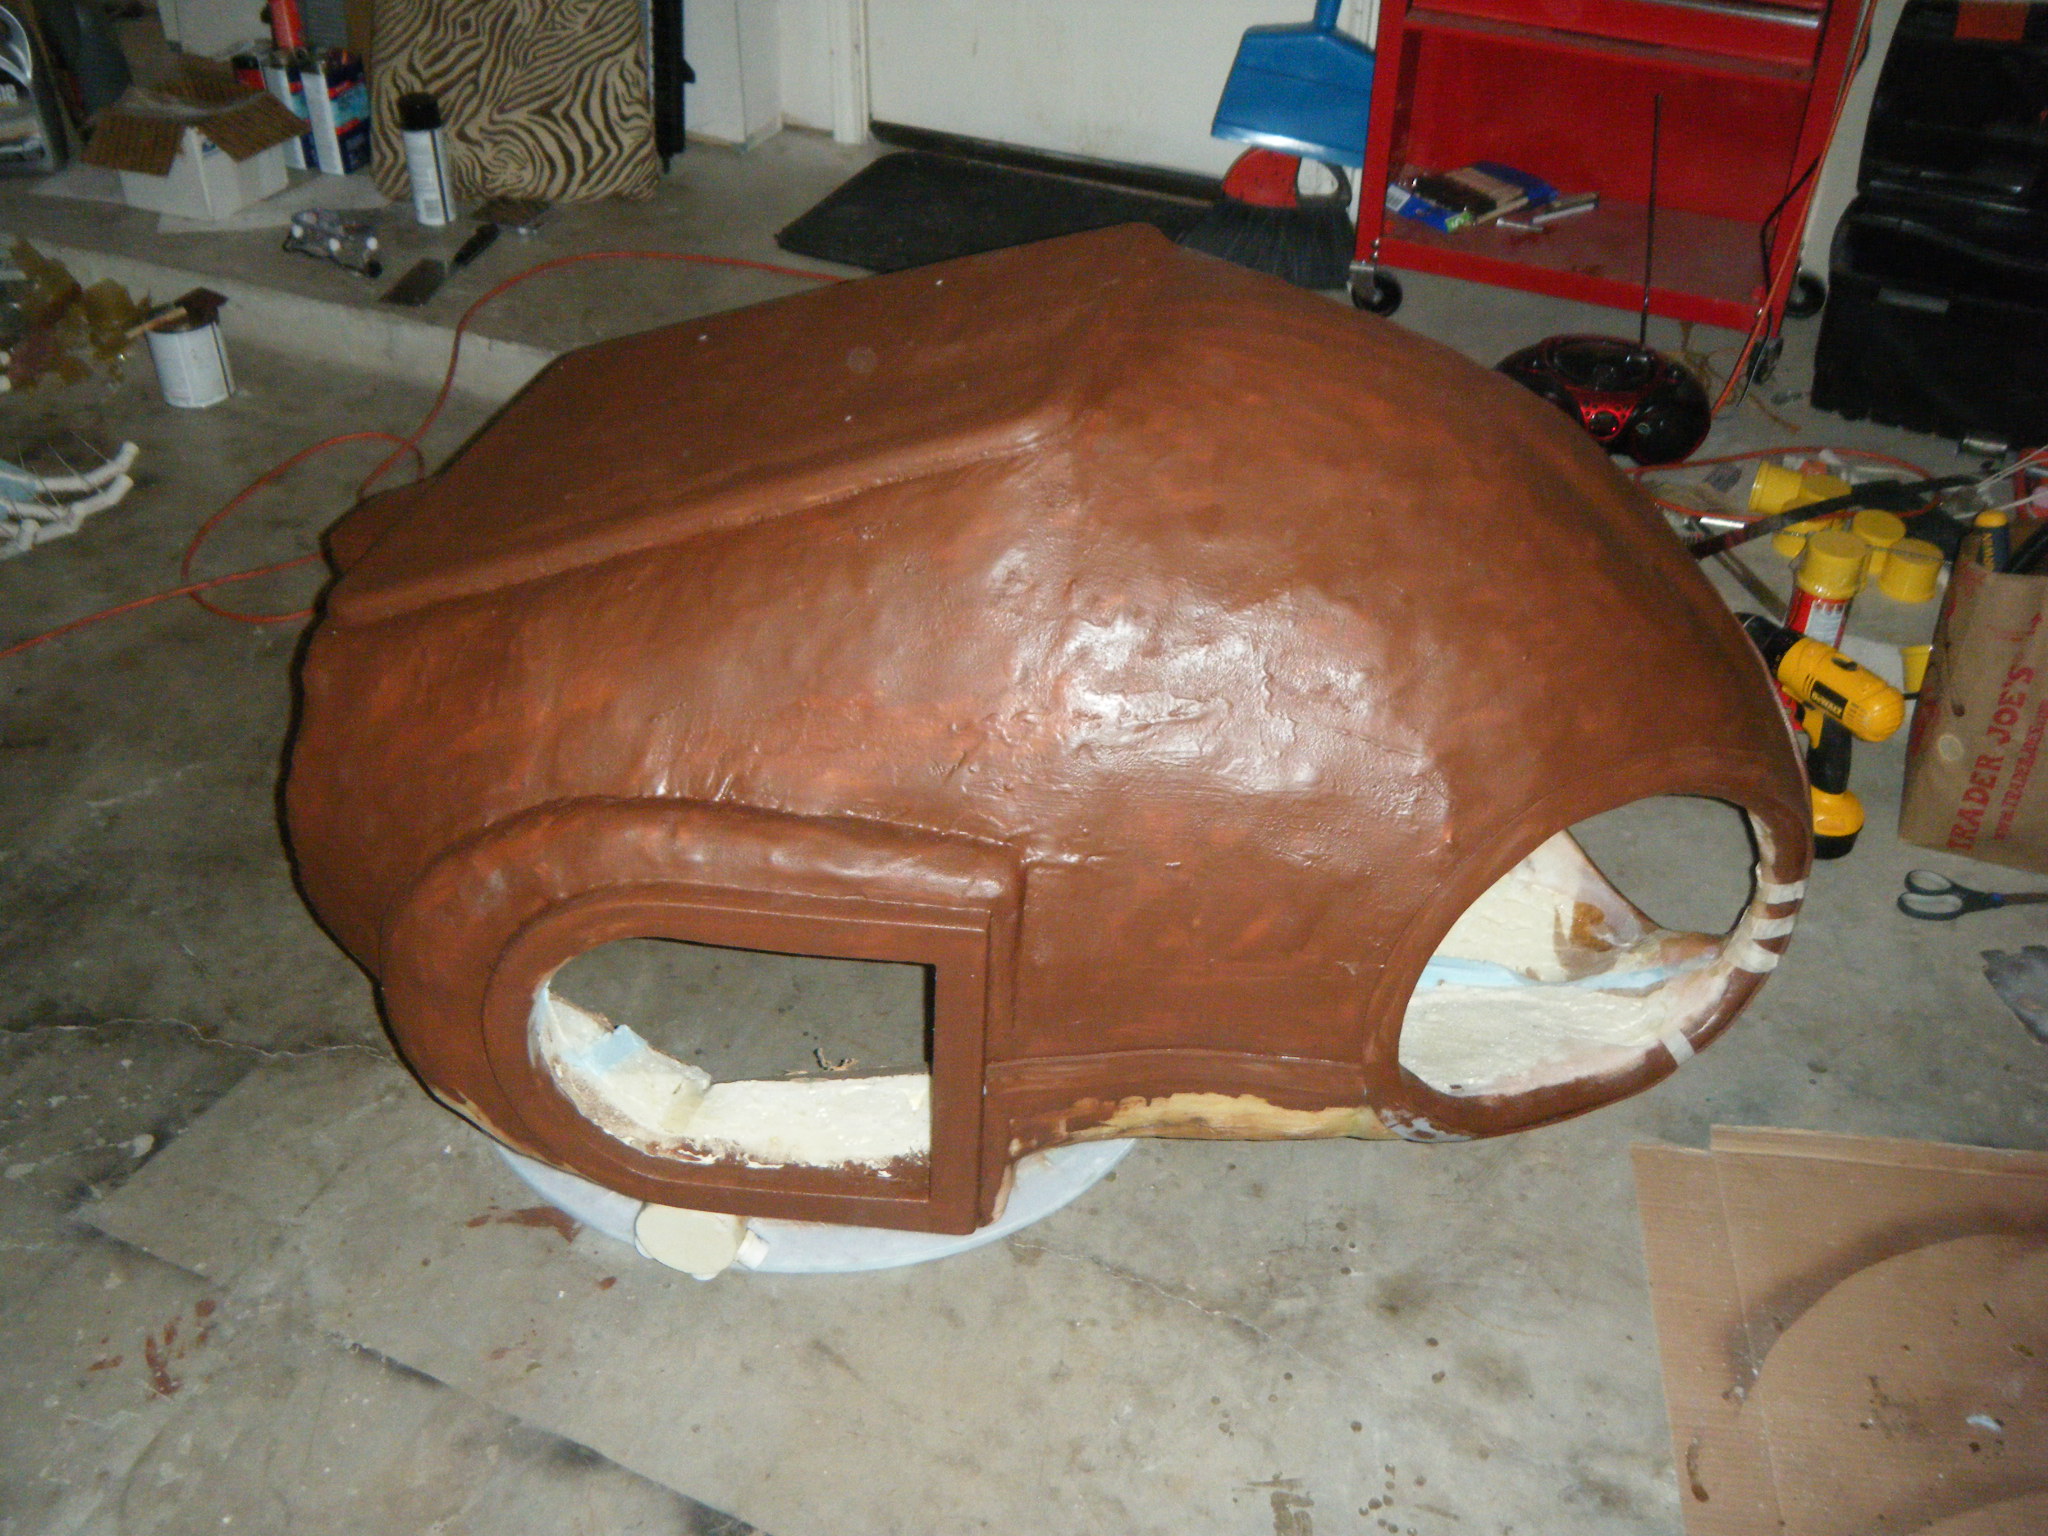
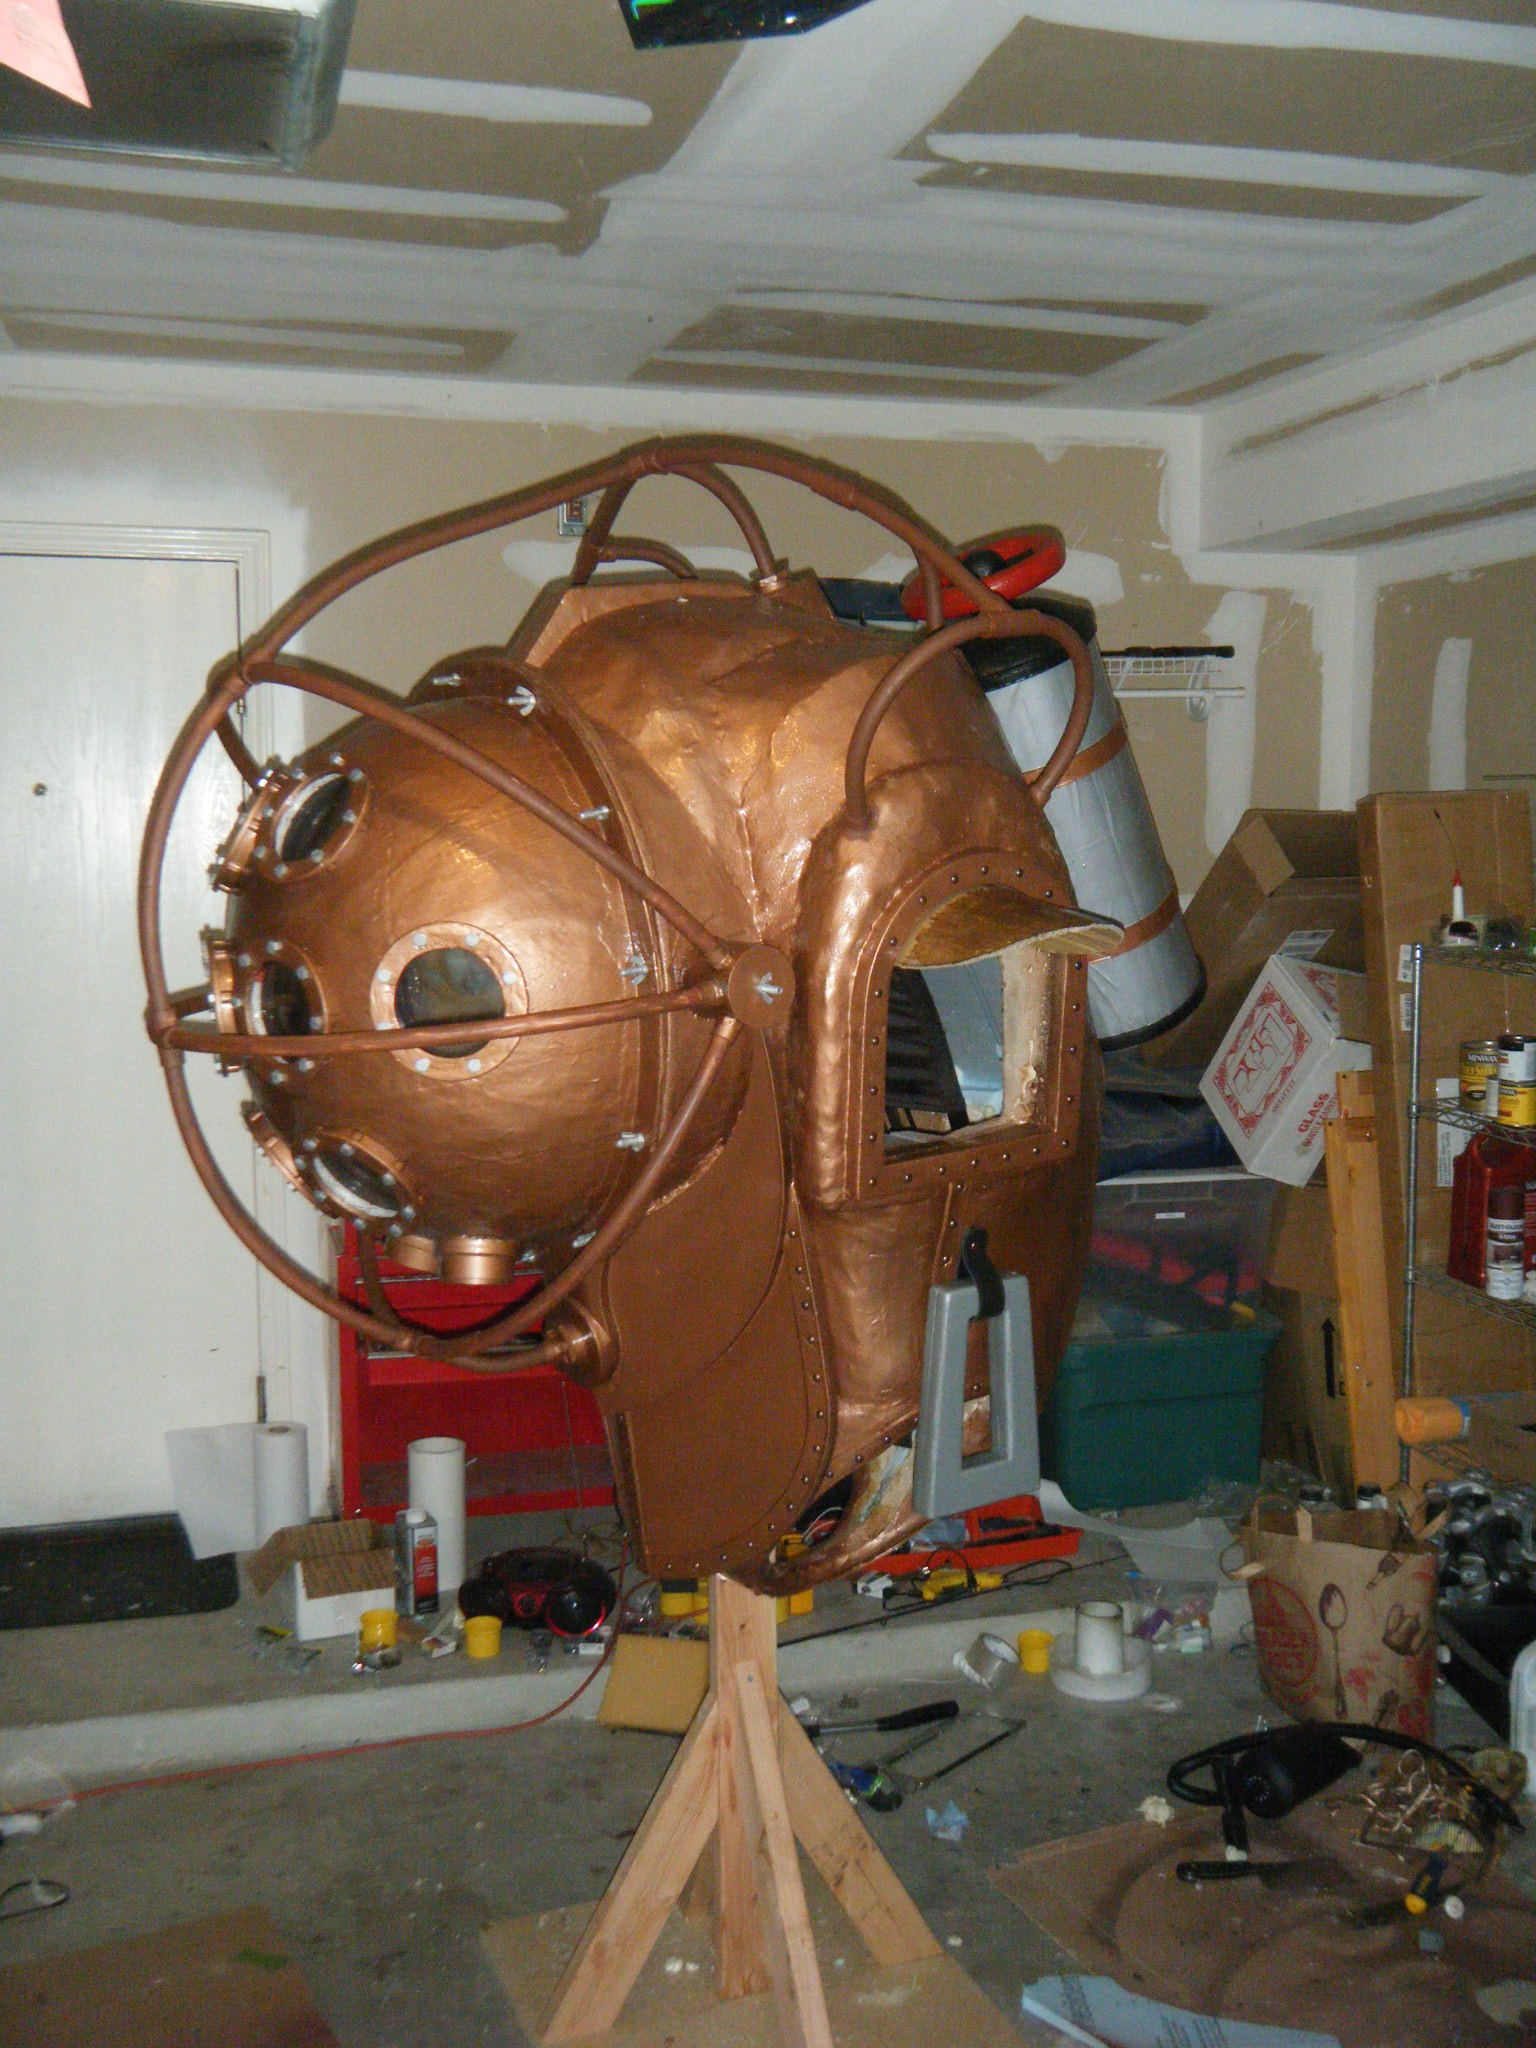
The big piece was the main body shell, and the chestplate that attaches to the front of it. I started this by cutting profile sections of 3/4″ foam board insulation, then cutting slots in each and fitting them together to give a really rough 3d representation of the body. I then cut pieces to represent the arm and leg holes, and also the big circle where the face dome would attach. I cut one more piece to indicate where the flat section on his back would be, where the tanks would attach. From there I just started referencing the sketch and adding skeleton pieces of foam throughout the body to give it some continuous form. Once a pretty decent foam skeleton was done, I taped cardboard in place and filled the space between the foam skeleton with Great Stuff spray foam. I love/hate that spray foam. Everything about it is wonderful, except that when you cut into it, it caves as the interior dries.
Anyway, once it was foamed I carved it to the shape I wanted, sanded it as smooth as I was able, and then hot-glued stretchy fabric over the whole thing to give me a less lumpy exterior, and to give the upcoming resin a substrate. Next step was to hit the whole thing with epoxy resin to create a hard exterior shell. It was important to use epoxy resin, because polyester resin (ie: Bondo resin) would *definitely* dissolve the foam.
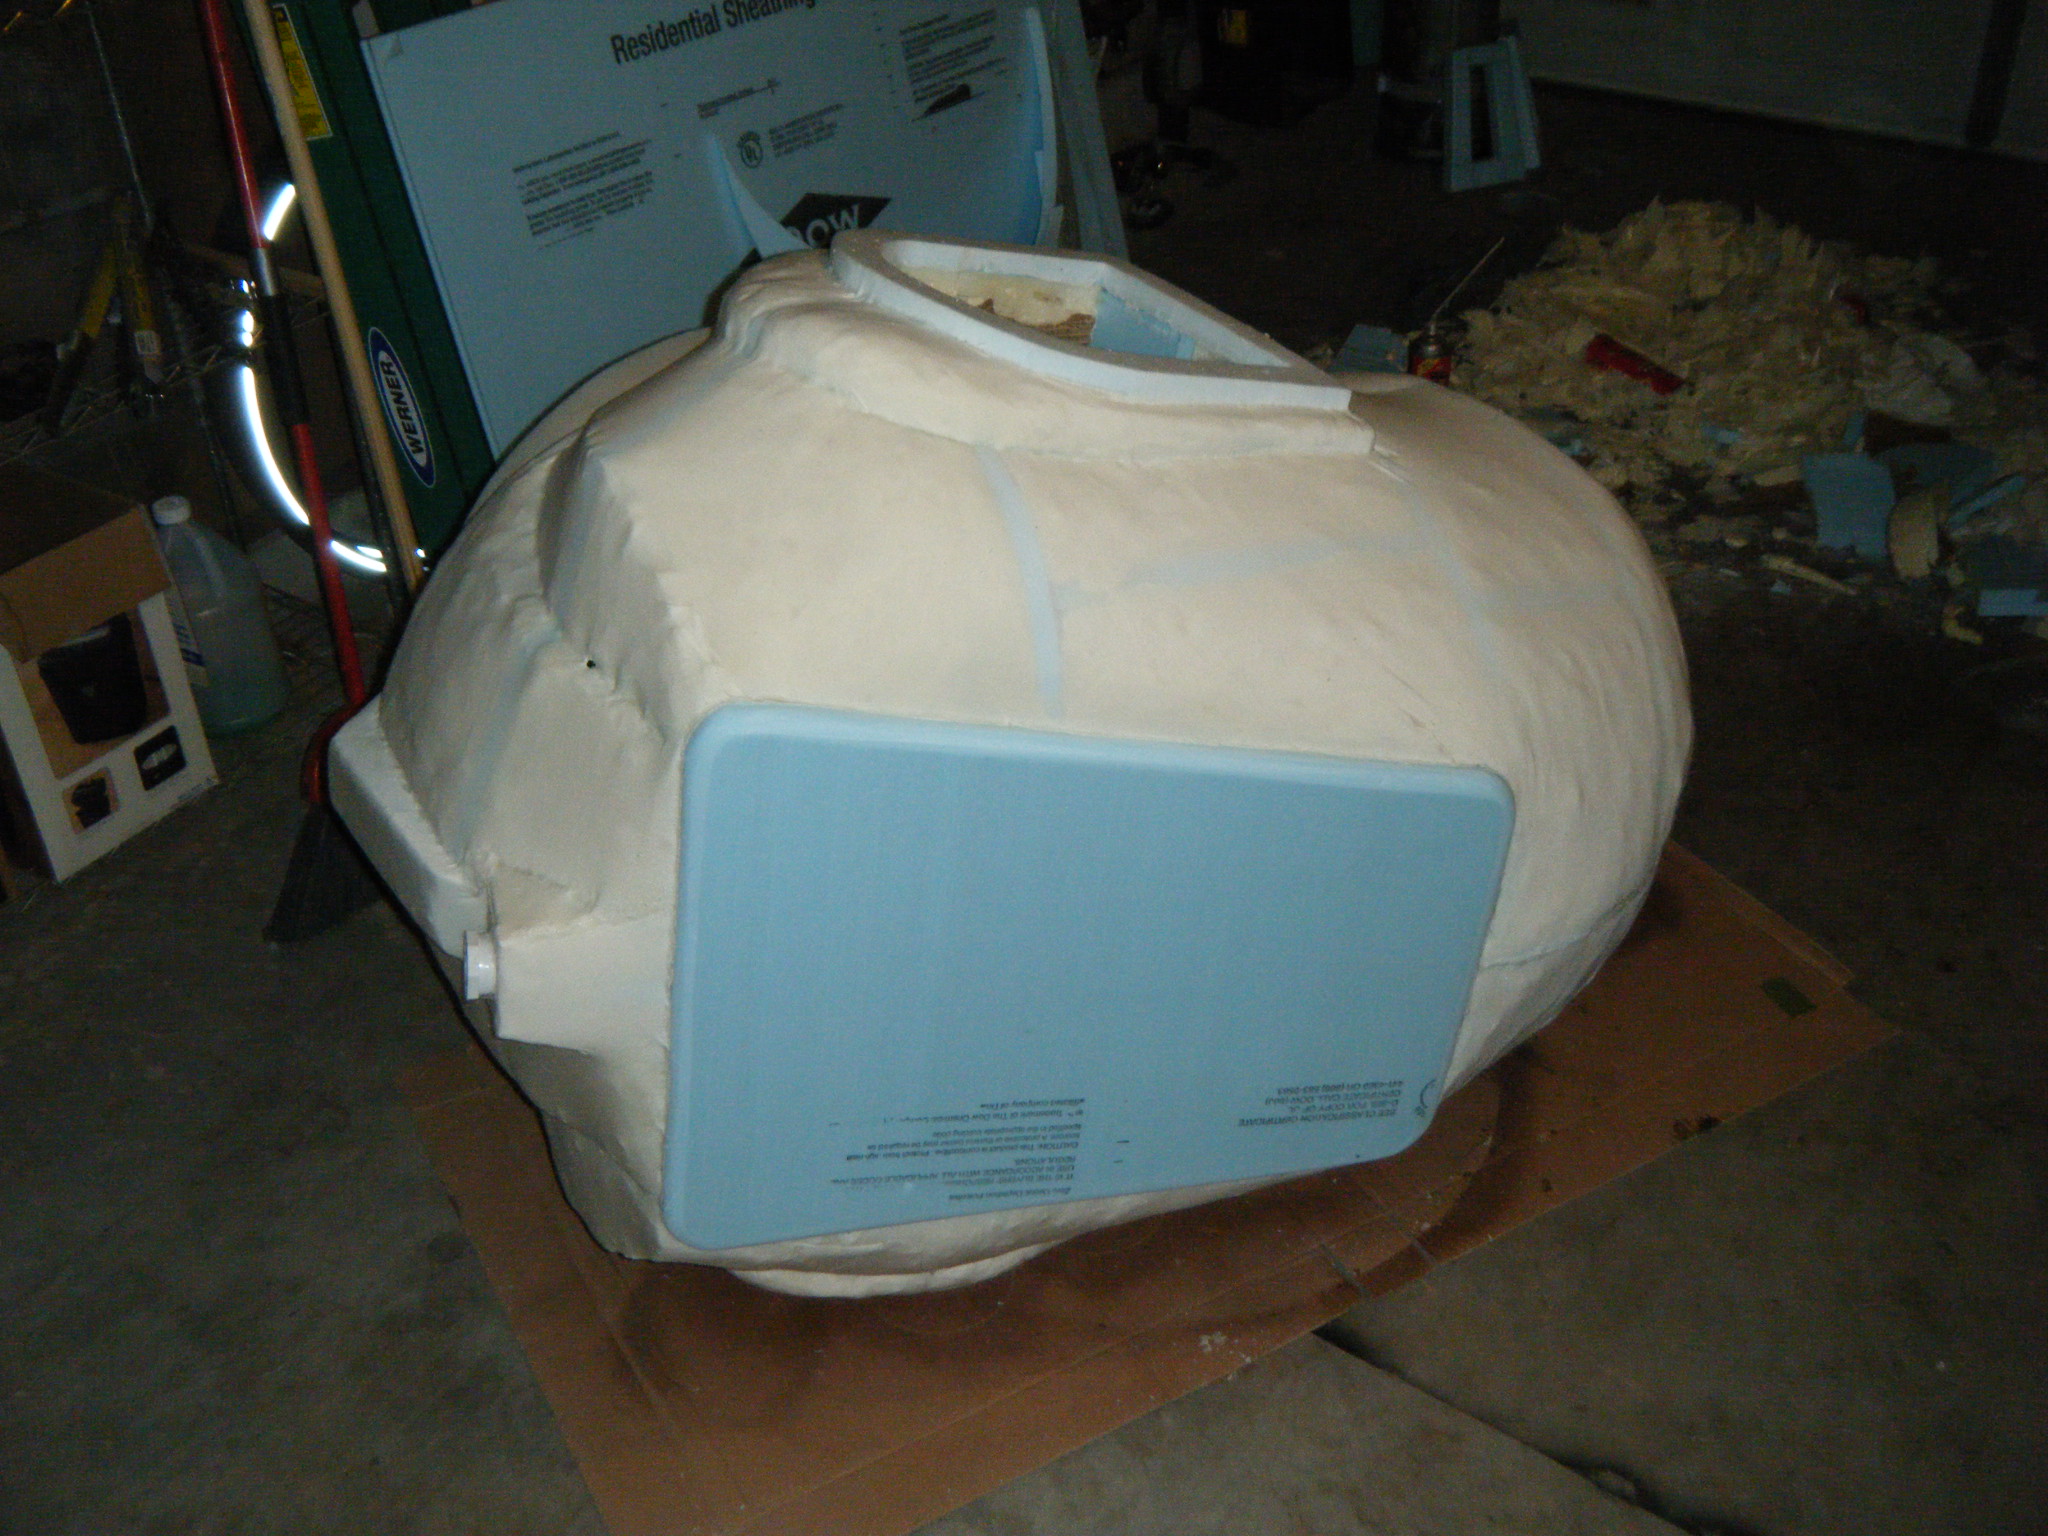
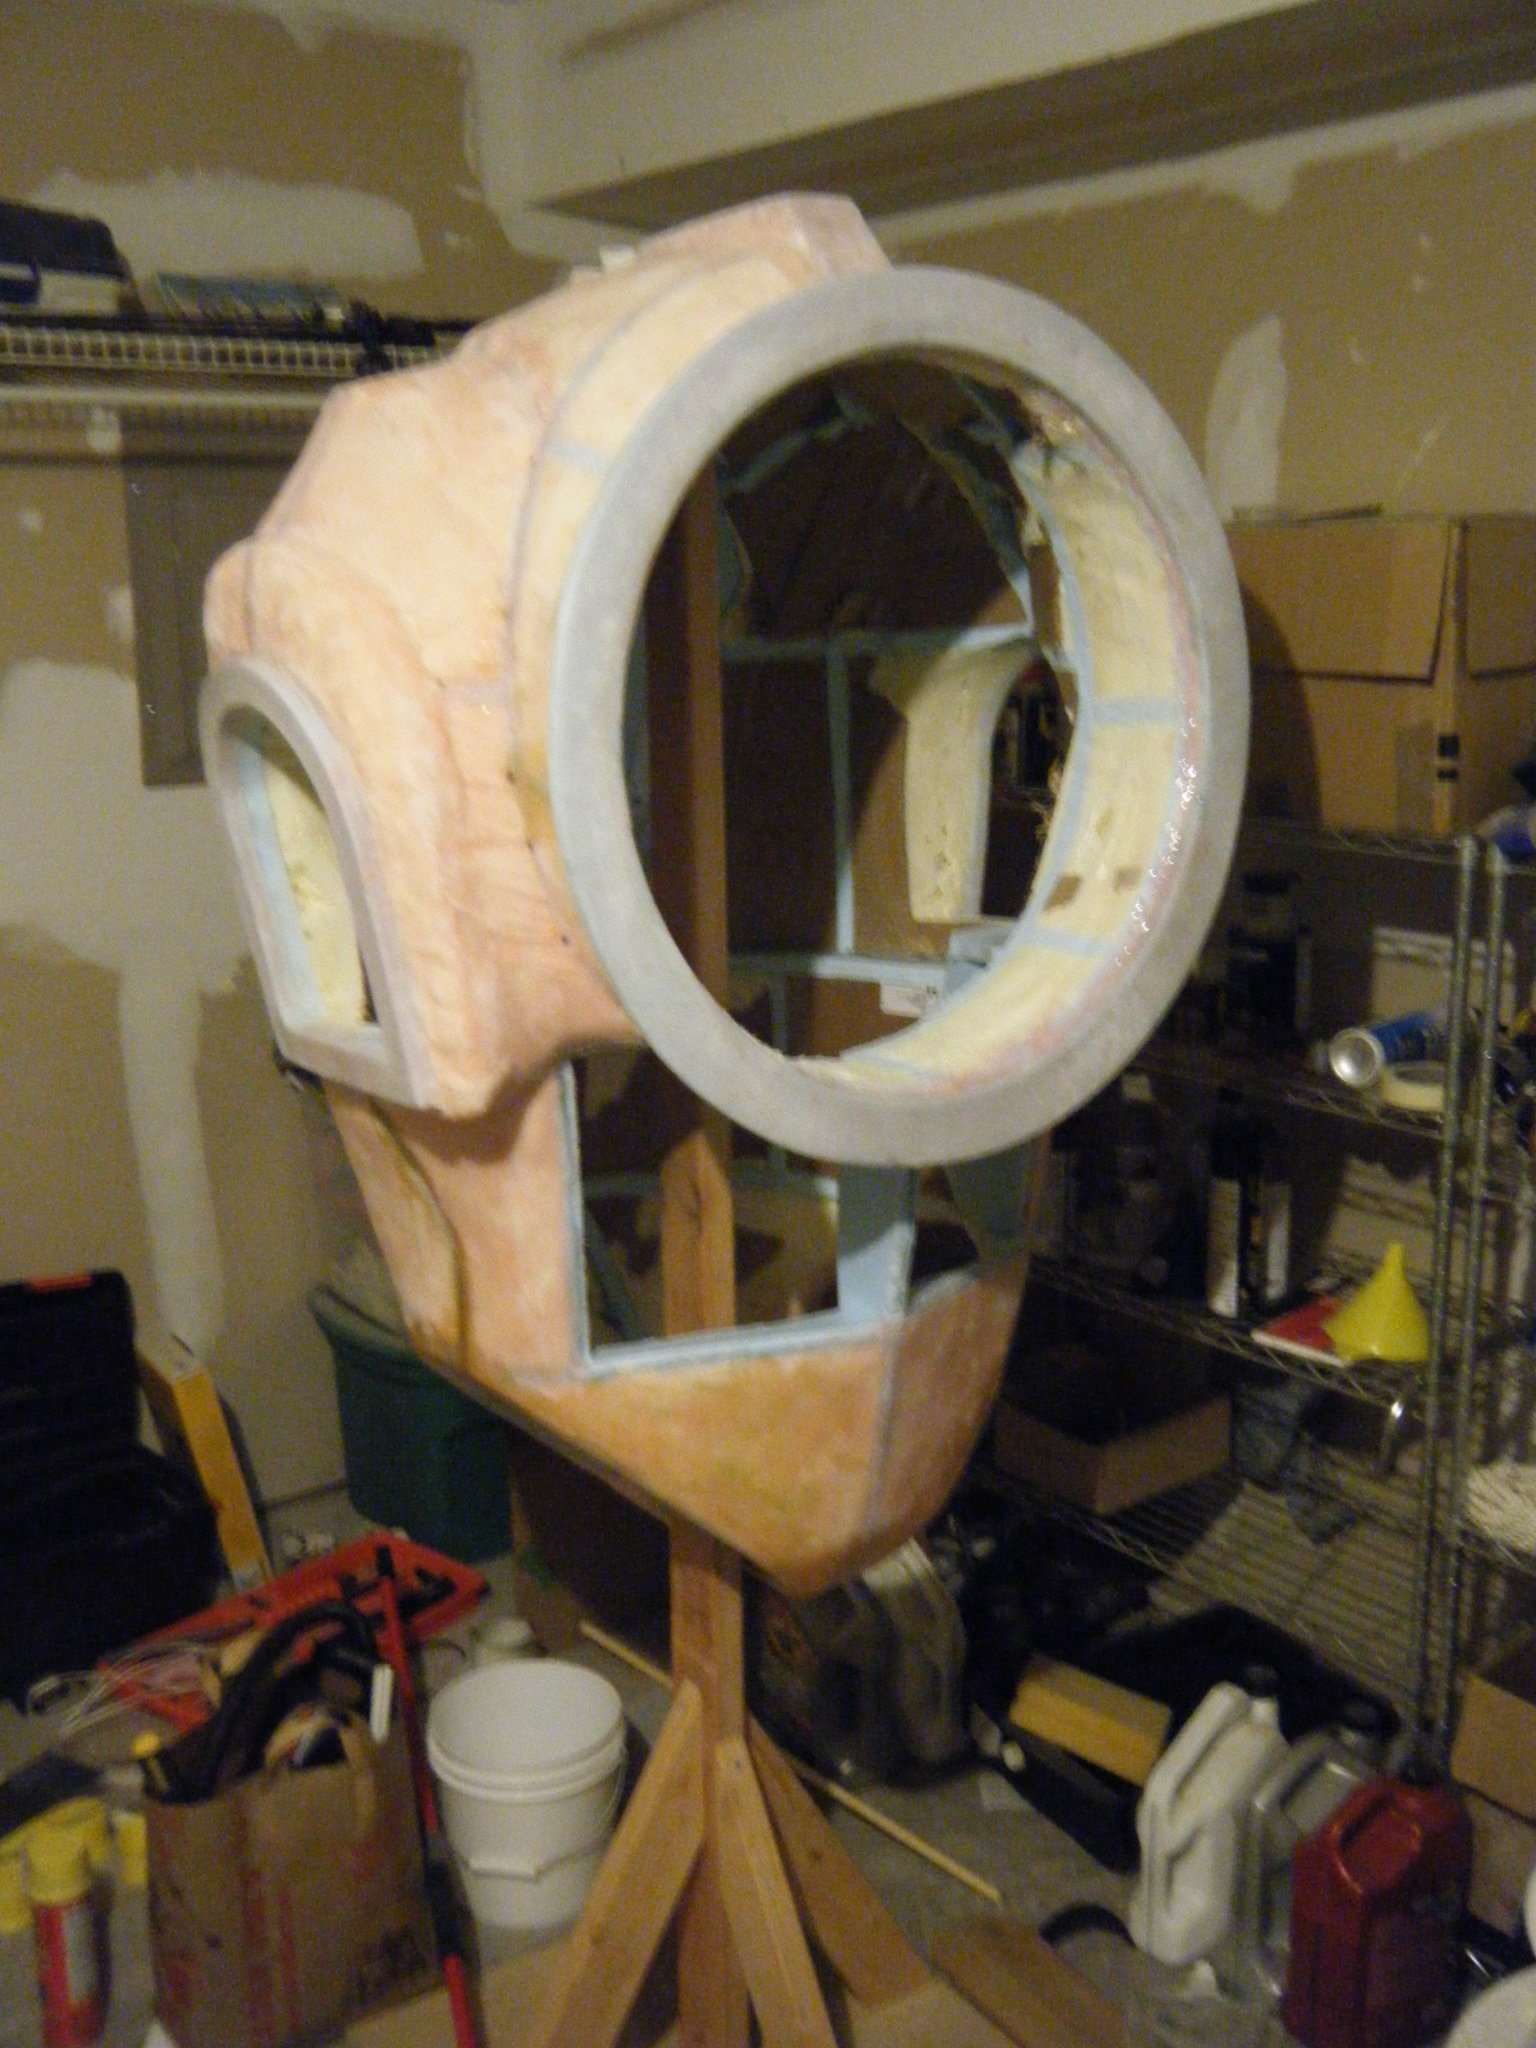
Hard exterior done, it was time to hollow everything out. Once hollowed, I cut a ring of 1/2″ foam board for the lip against which the face dome would rest, and added a bit more resin and fabric to hold it in place. I reinforced this area a bit extra since I knew it would be supporting the full weight of the face dome. Once I had it sufficiently reinforced, I cut holes in the side for a 3″ PVC pipe and stuck 3x 1/2″ PVC connectors on each of the 3″ pipes. These would eventually hold the roll cage.
I mounted an external backpack frame inside the main shell so I could carry all the weight with some sort of reasonable load distribution. Oh, and all that little raised edge stuff around the leg holes and under the arms – that’s foam tape from the weather-stripping section of Lowe’s. Once the tape was on and painted, I stuck more bronze upholstery nails along the tape at 1.5″ intervals.
The other half of the main shell was the chest plate. That I made completely from foam board, because I wanted it to look like a thick solid sheet of metal. I used foam tape (ie: weatherstrip) around the edges to accent it, painted the whole thing with primer, resin, primer, spray paint, repeat forever. Point is, there was a bunch of resin on there to protect it. Once it was painted, I used some bronze furniture upholstery nails to accent the foam tape strip. I also mounted a PVC piece on the chest plate so that eventually the PVC roll cage could attach.
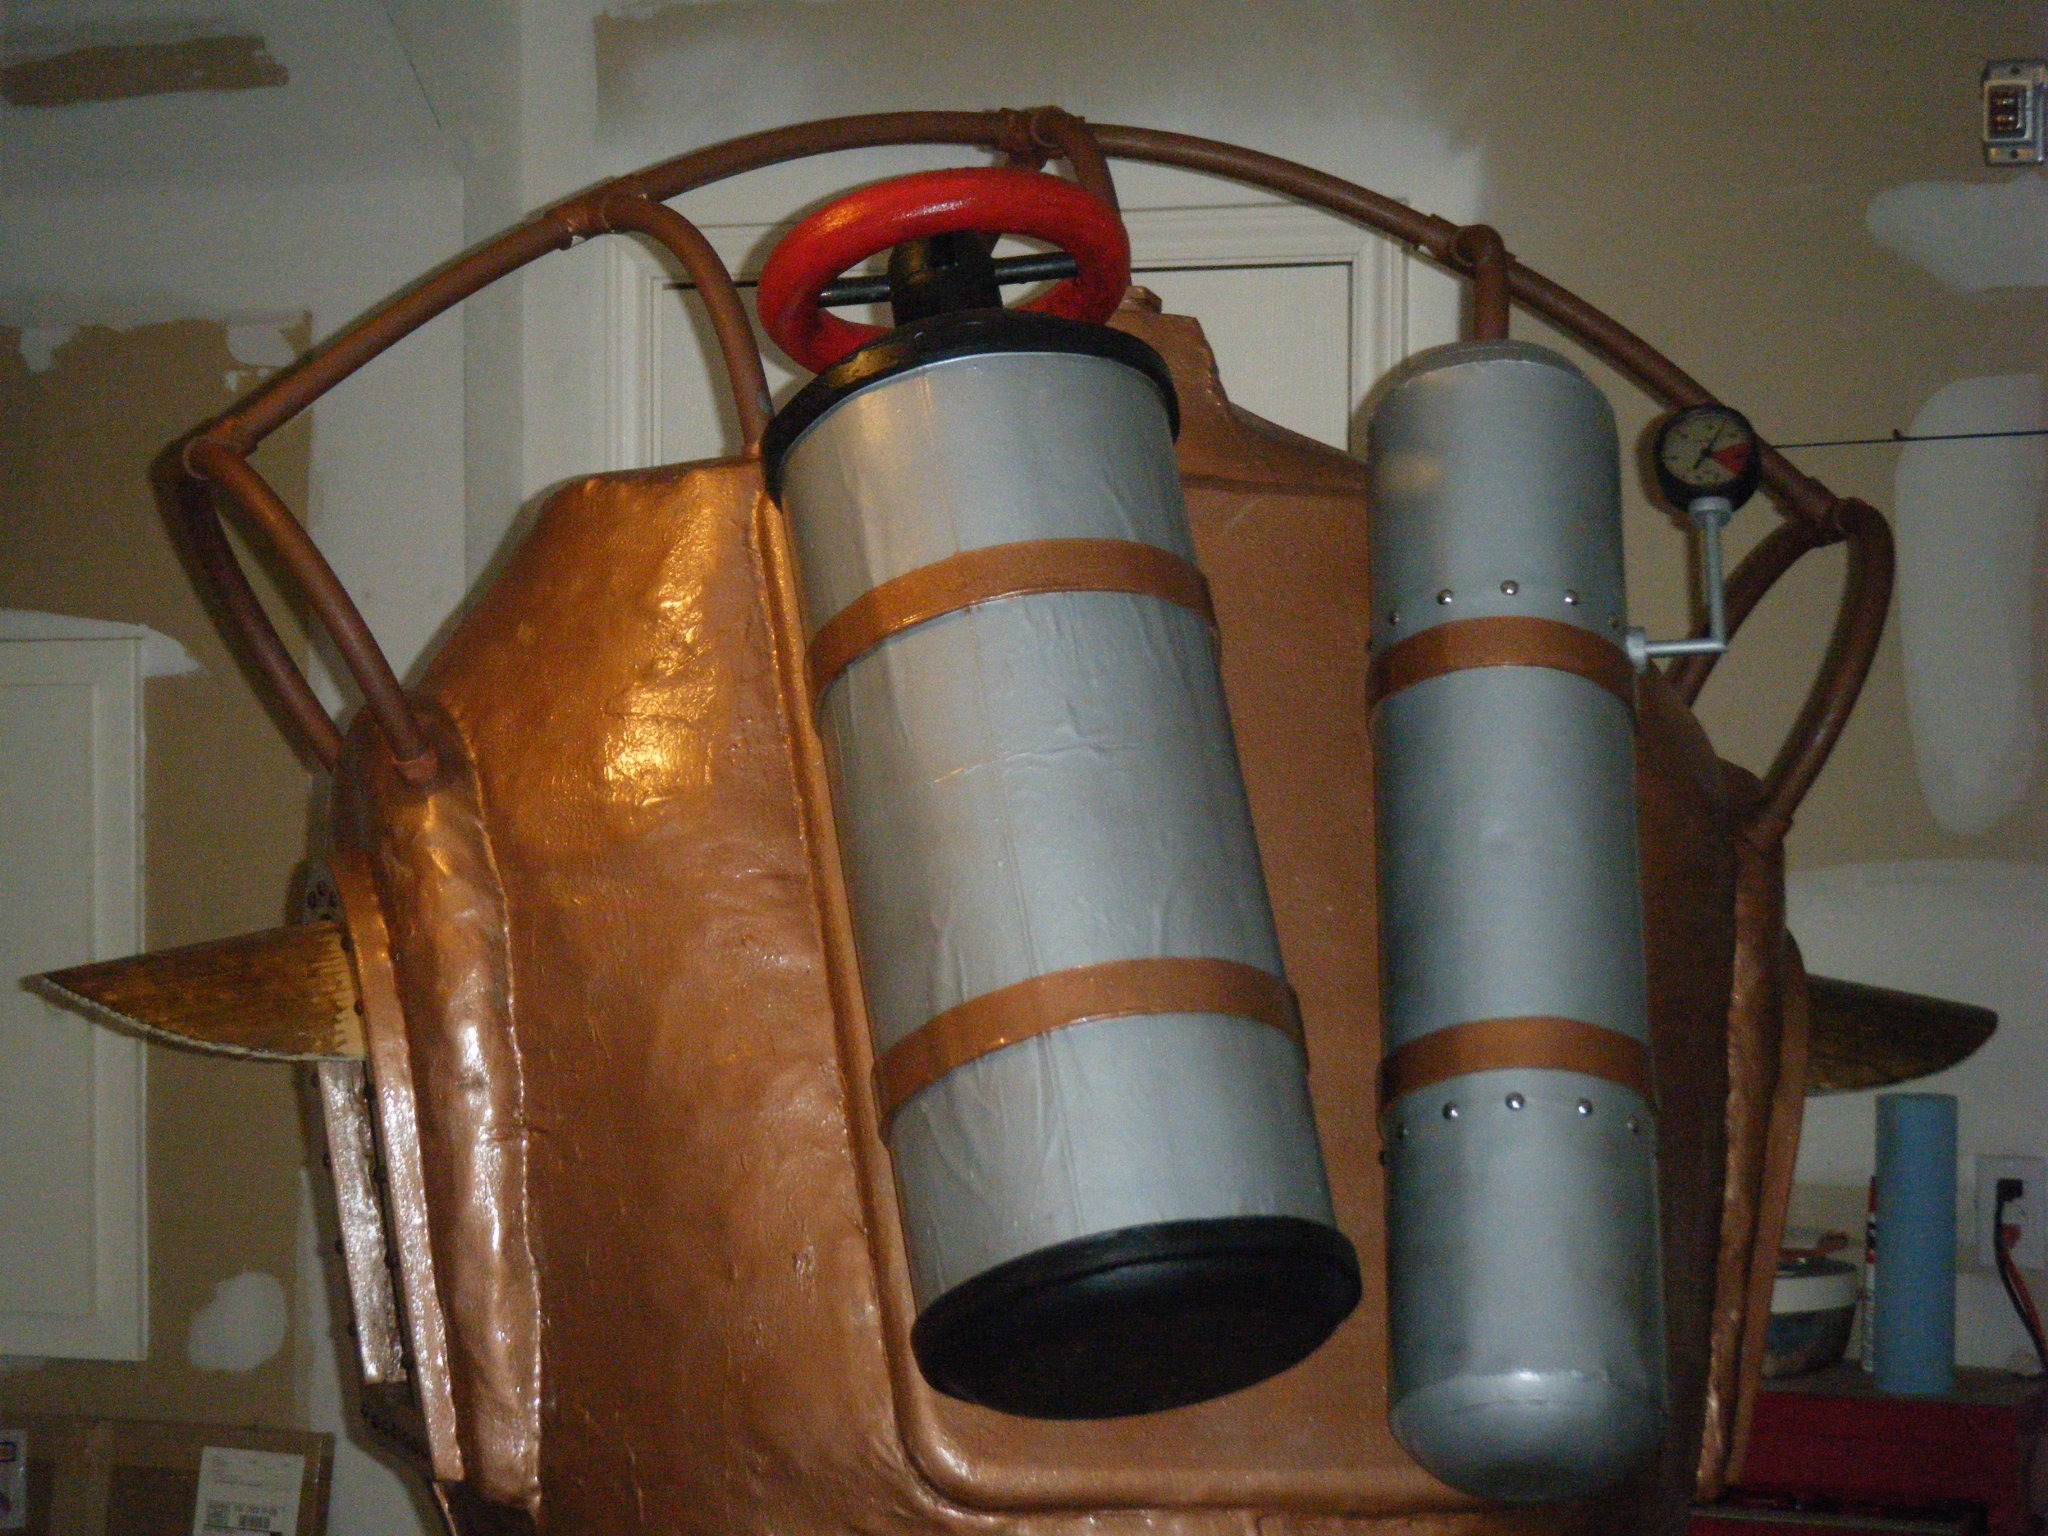
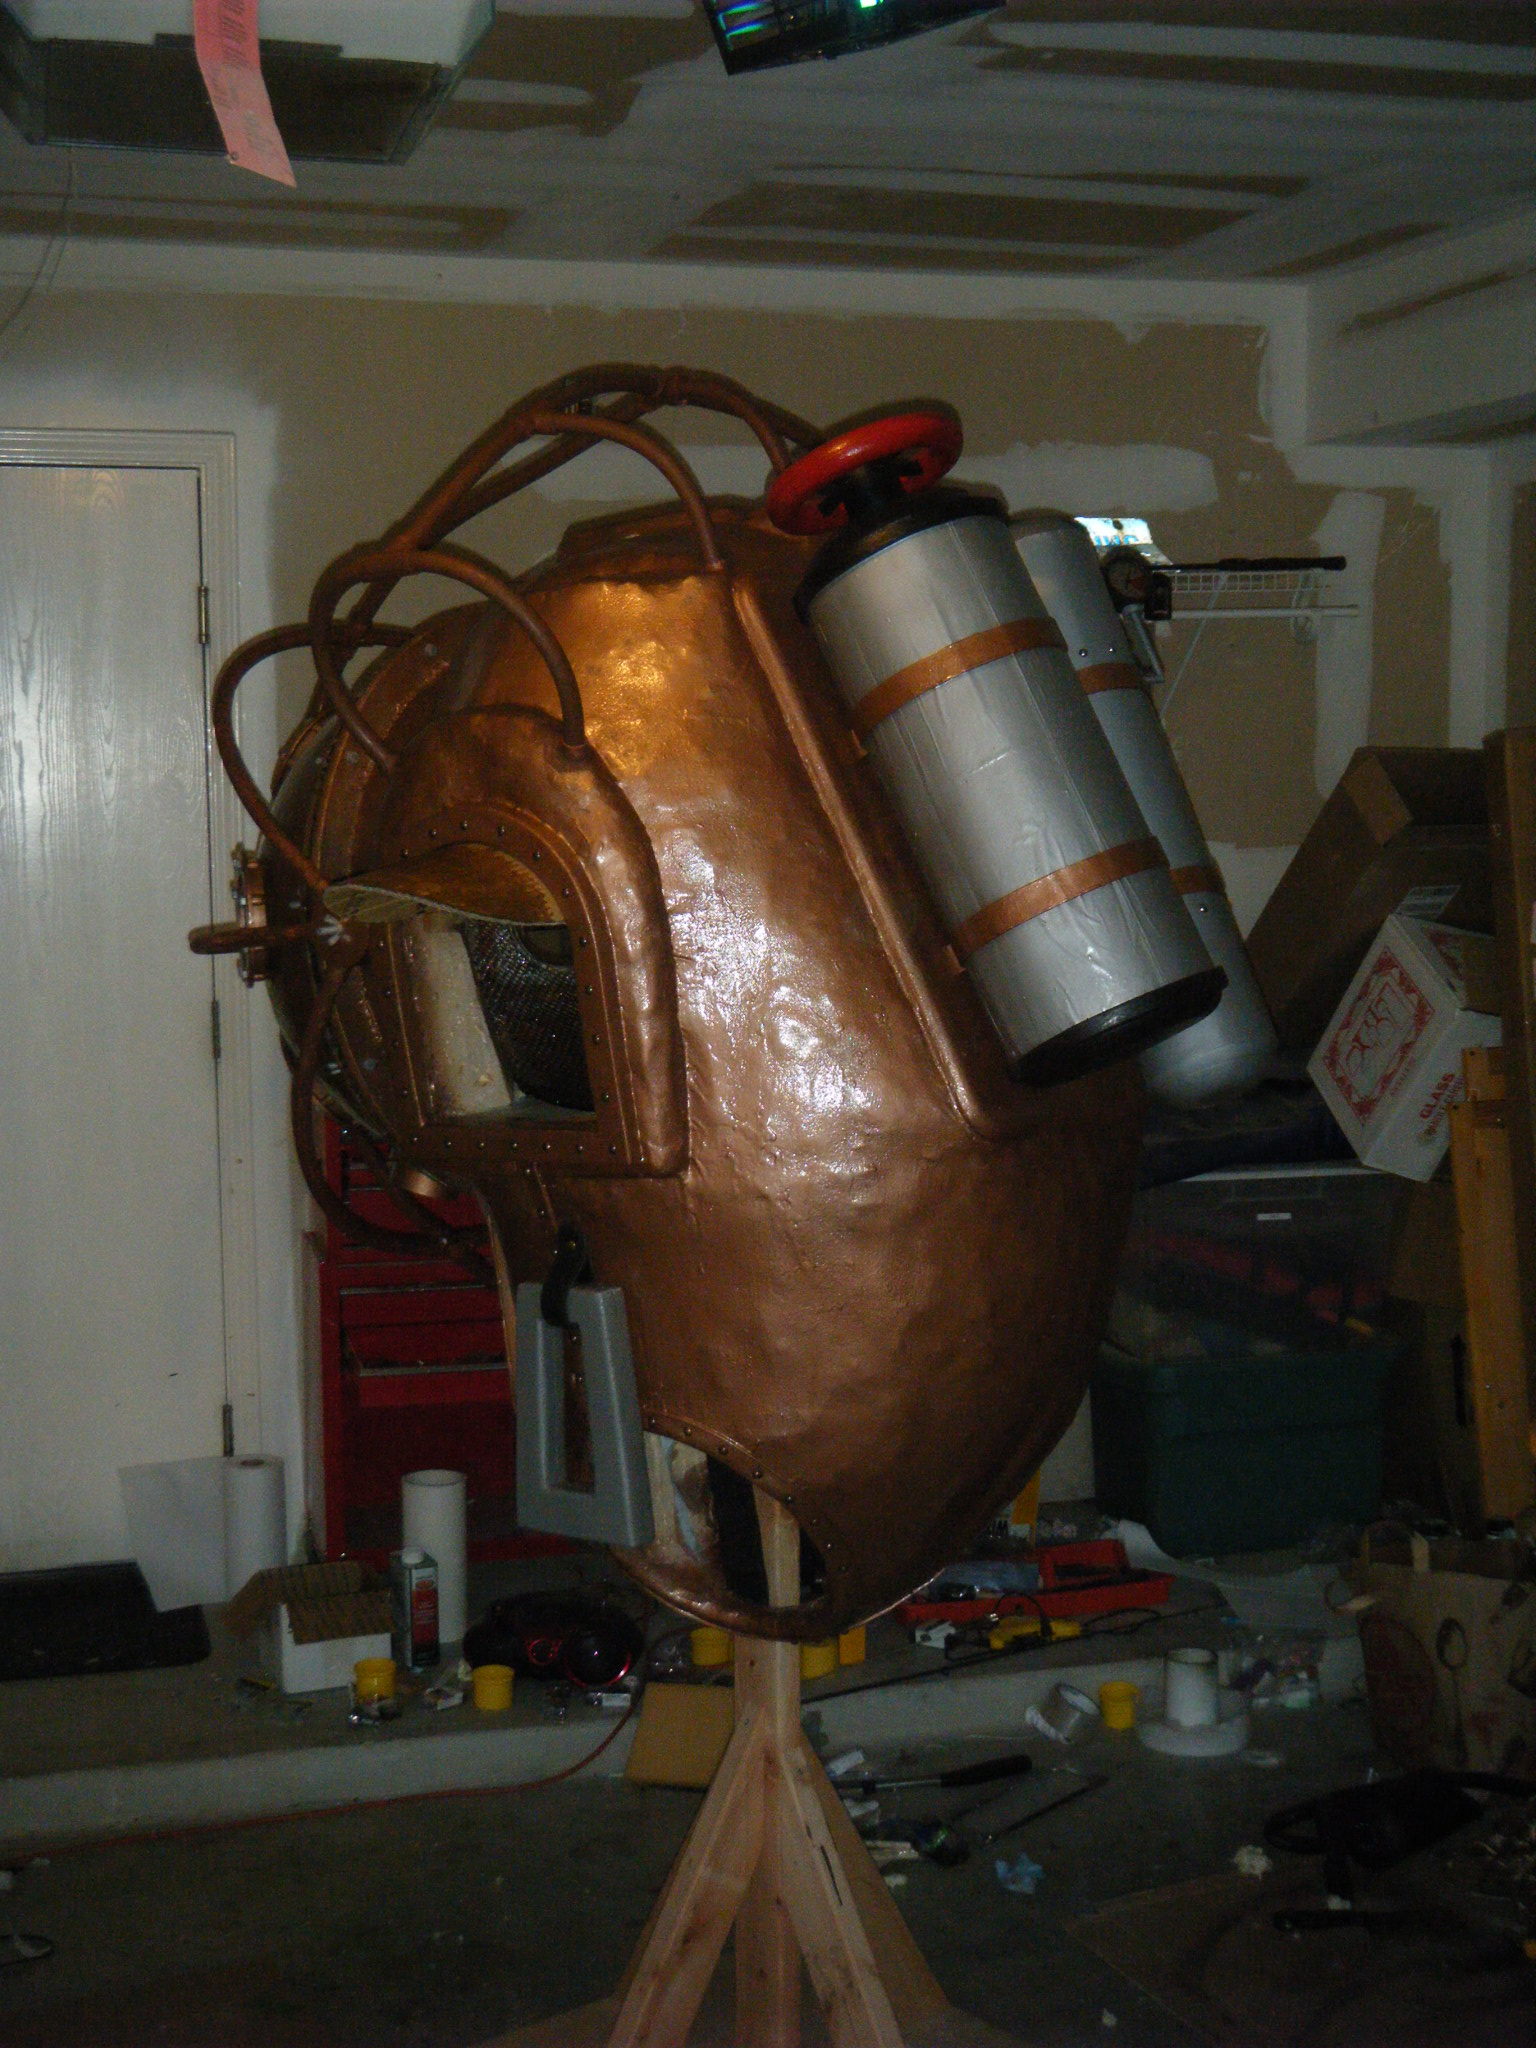
After painting and assembling the face dome, main body shell, and chest plate, this costume was looking pretty good. It felt like I was almost done, but I knew I was a long way from it. It’s ridiculous how many peripheral pieces are part of this thing. I built two oxygen tank sort of things out of foam board and posterboard. One got a wheel valve on top and the other got a pressure gauge coming out the side. The pressure gauge is one of my favourite parts. I built a couple bolts into each tank permanently, and drilled holes through the main body shell to anchor those tanks onto the back. They’re held on with a couple wing nuts from the inside.
And more pics:

One of the more subtle pieces on this costume is the dive weights. Those I made by gluing together a couple sheets of foam board, cutting out the general shape with a jig saw, and sanding the edges round. A bit of epoxy resin and paint, and they were ready to hang. To hang ’em on the body/boots, I used a cheap-o belt from Good Will, added a snap to each anchor point, and screwed or pop-riveted the belt to the body/boots. They turned out okay.
Around this time I started desperately running out of time before Comic-Con, so the “making-of” photos mostly stop at this point. Sorry about that. There were a lot of pieces to go, though.
Each of the arms was a feat of modern engineering. The main shell was about as wide as my outstretched arms from elbow-to-elbow, so I had to build fake arms, with my elbows where Big Daddy’s shoulders would be, and my wrists at his elbows. This meant his forearm was all a PVC-core extension, and his hand/drill was anchored to the end of that extension. For both arms I used 4″ PVC for his bicep and forearm portion, and connected them with a hinge built from some hardware I found at Lowe’s. It was angle brackets, or angle reinforcements, or something.
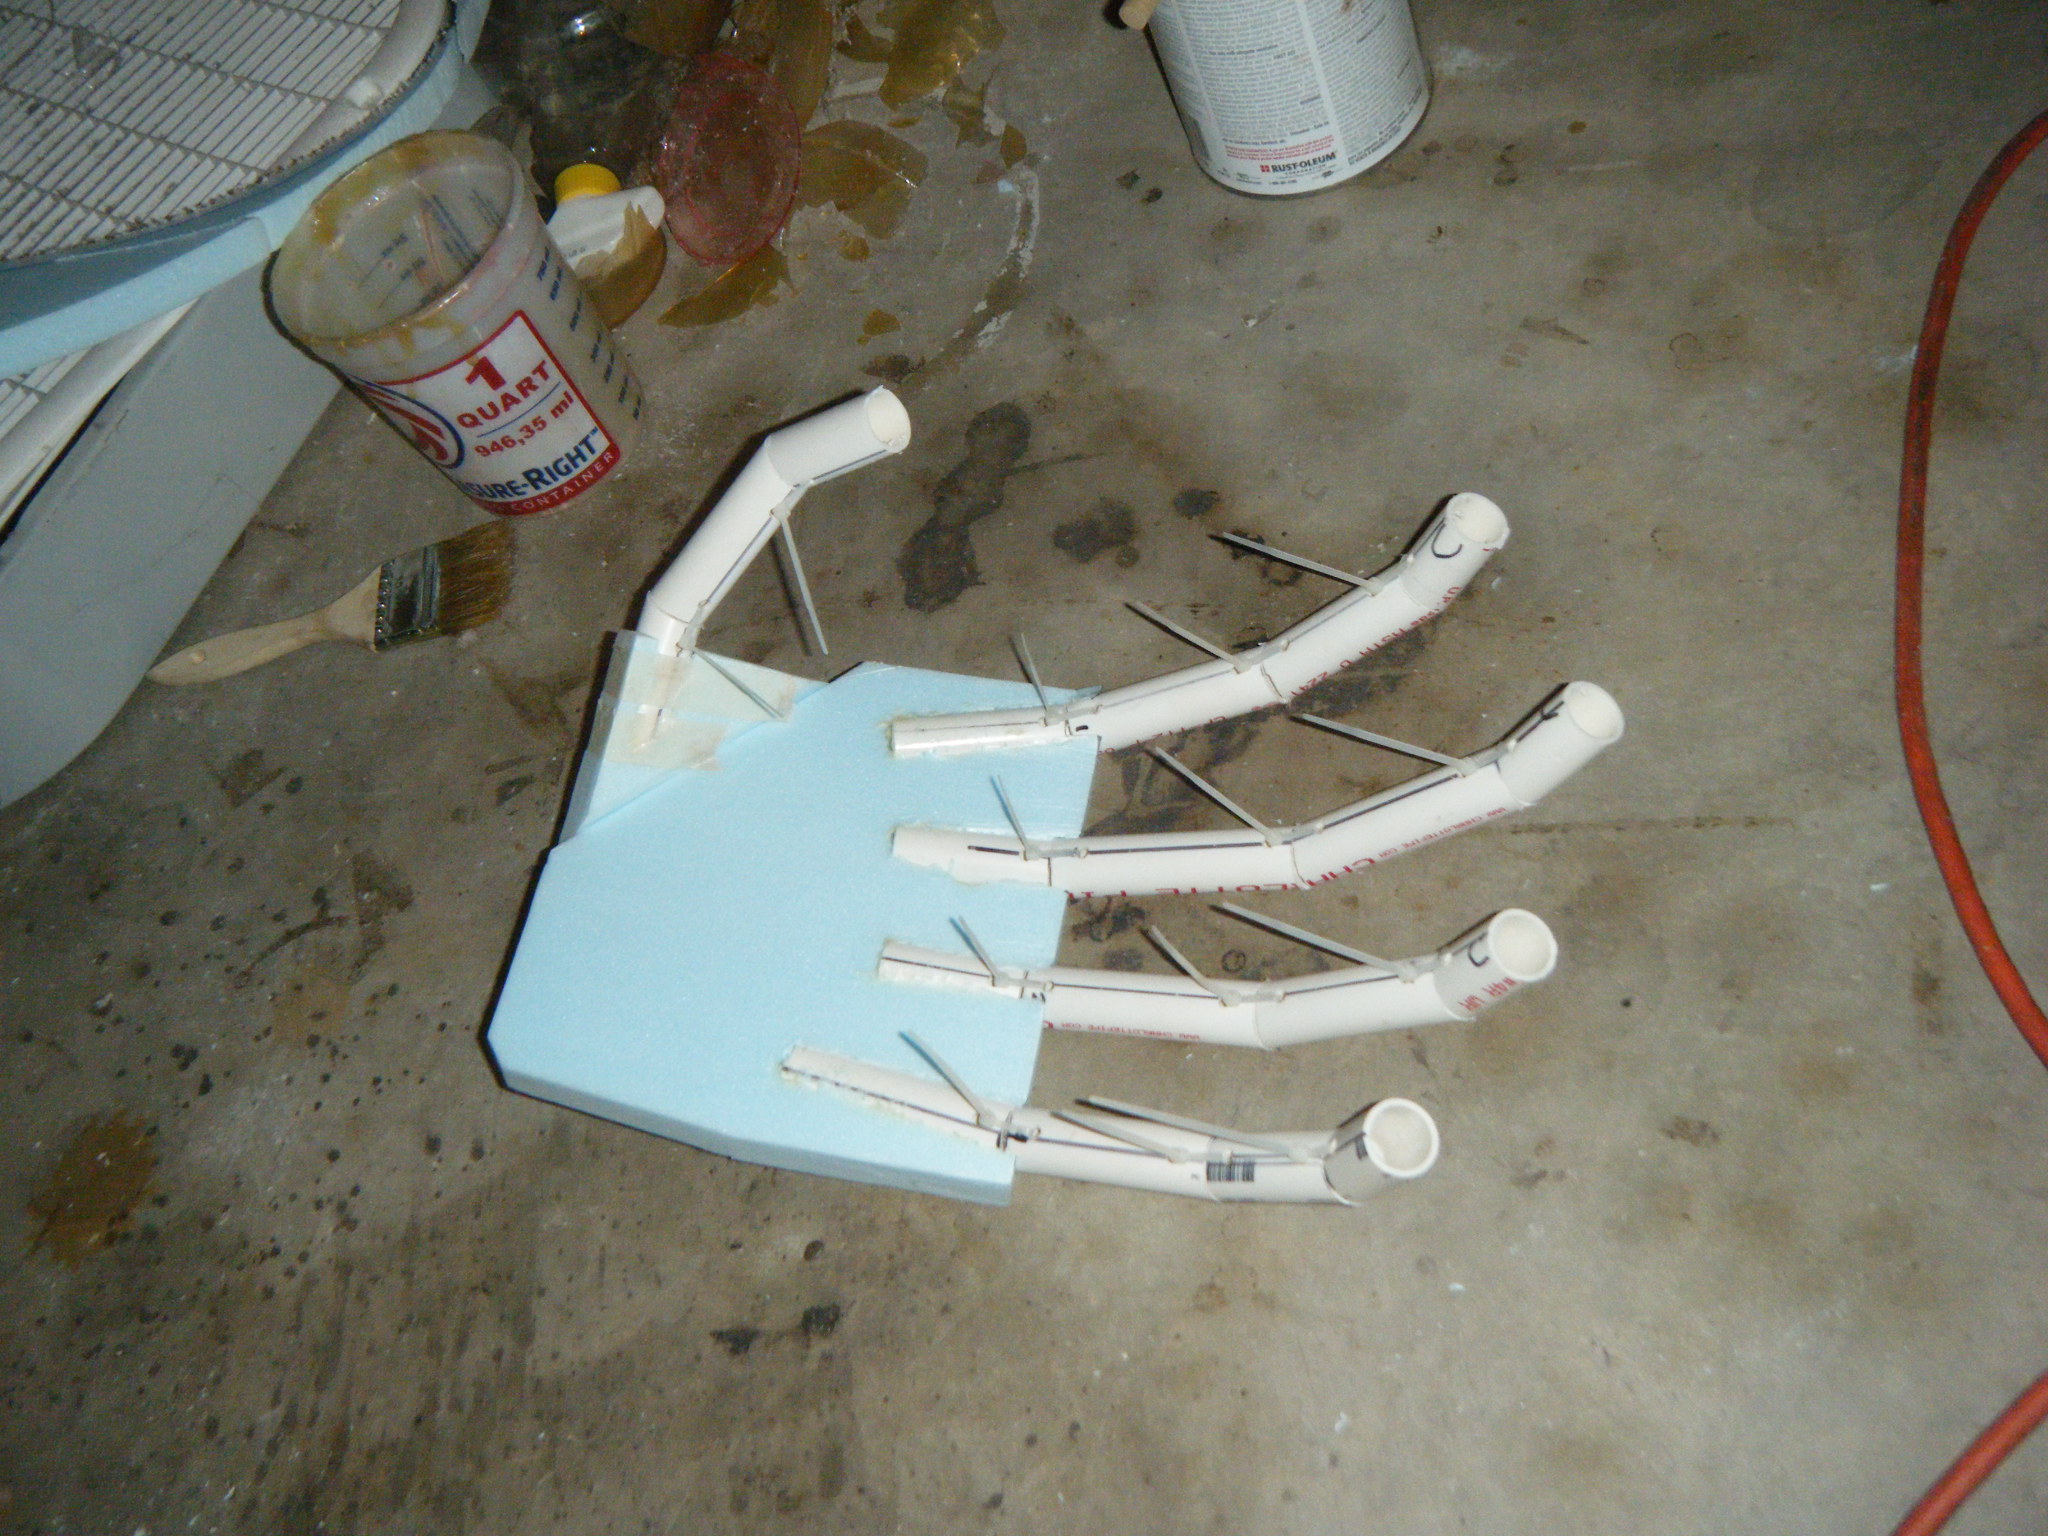
For BD’s left arm, I built a gasket ring from foam board, and a fake hand from foam board, 1/2″ PVC, and zip ties. I suck quite badly with a sewing machine, but I was able to make a passable glove using hot glue and burlap. The hand got glued to the wrist gasket and the basic shape was done. The left hand was also the control switches for my ventilation fans and the LED lights mounted in the face dome, though, so I also installed some rocker switches and electrical wiring.
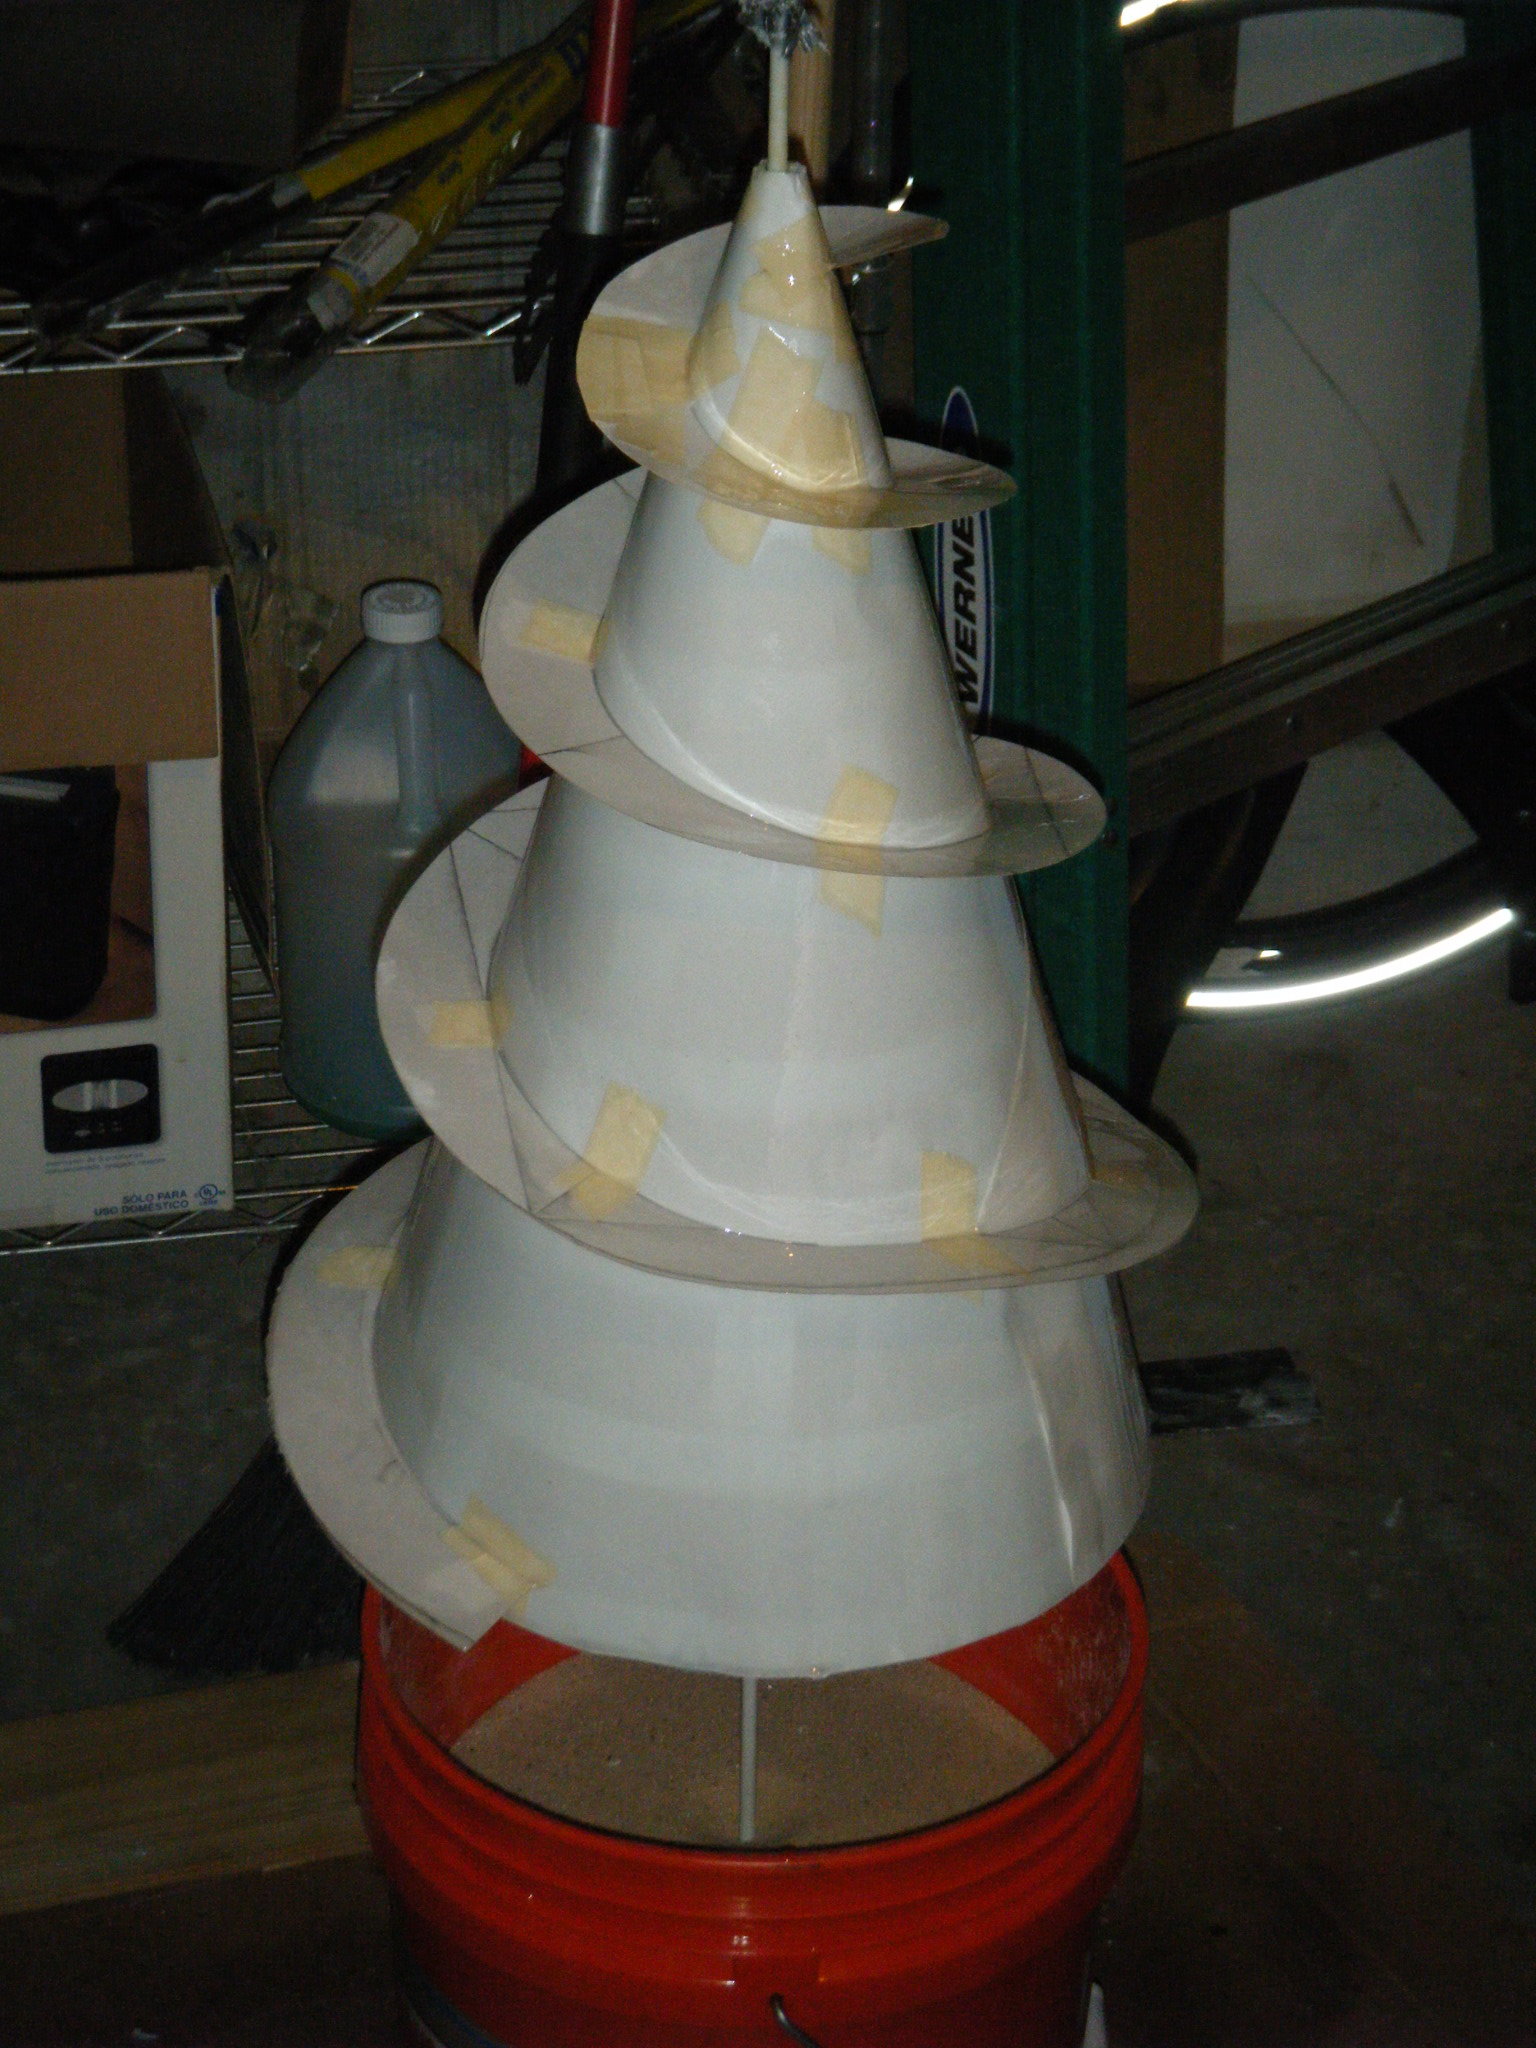
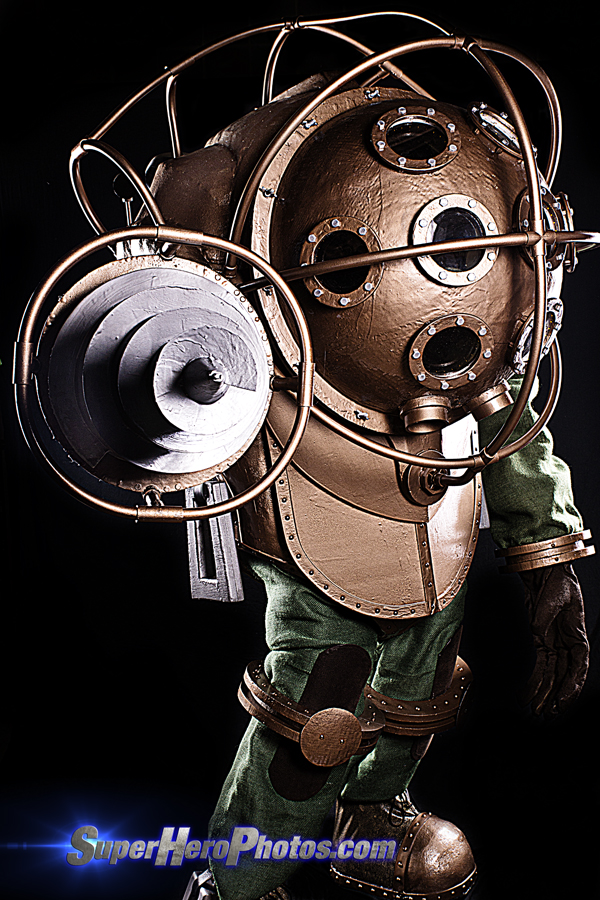
BD’s right arm was significantly more complex. That drill was a tricky piece. I decided to build the auger cone from a skeleton of foam board, and I ran a fiberglass rod down the middle of it. I planned to clamp a power drill onto this rod to spin the auger. The rod had to be glued very firmly in place, or it would break free from the foam. With the main structure of the auger done, I wrapped it in posterboard. The rifling is more posterboard, masking-taped to the cone. The whole thing got a few layers of resin and some hammered steel spray paint. To hold the cone firmly against the PVC forearm but also allow it to spin freely, I got a 6″ lazy susan bearing and mounted one end to the cone. The other end was firmly secured to a foam & PVC base that was itself glued solidly to the PVC forearm. Inside the PVC forearm, I mounted a foam board disc with a cutout to fit the top part of a power drill. The power drill’s chuck clamped onto the fiberglass rod, and a rocker switch in the forearm next to my right hand controlled the power to the drill. I really wish I had photos of this part, because it’s tough to convey in text alone.
For both arms, I cut out sections of the PVC both to reduce weight and to increase ventilation. I also mounted foam board rings around the PVC to bulk up the arms. Most of the Big Daddy costumes I’ve seen have a common problem that the arms look empty – like fabric draped over a skeletal frame. The foam rings were part of my effort to avoid this. The other part was to first glue the burlap to a layer of quilt batting, then wrap the arms in that. I also built shoulder pads from cardboard so it looks like Big Daddy has wide shoulders even though it’s really just empty space inside that arm.
Both arms also had a length of webbing attached. I ran this webbing around the backpacking frame so most of the arm weight could be hanging off the backpack frame rather than supported by my own arms. I used an adjustable buckle on each arm to attach the webbing so the arms remained removable.

The roll cage around the main body shell, in front of the face dome, and also around the drill auger was made from 1/2″ PVC. To bend it, I would find something that already has the arc radius I want (a bucket, for example), or I would cut my own arc from foam board. I’d then cut a piece of PVC to the size I wanted (+ a couple inches), cap one end with masking tape, fill it with sand, cap the other end with masking tape, and bake in my oven at 250F until floppy. The sand filling kept the pipe from collapsing, and also helped it retain heat a bit longer. To form the pipe I’d just pull it out of the oven (with mittens) and hold it around the arc I’d prepared until it cooled (~2 minutes).
Said and done, the roll cage ended up glued together and would disassemble into three pieces. One was all the stuff from shoulder to shoulder. One piece was everything in front of the face dome, and the third piece was a single pipe that connected the two segments. All the pipe was held onto the main body with PVC friction fittings.
There wasn’t a whole lot to the legs, actually. The kneepads were cardboard wrapped in leather, and the knee gaskets were more foam board. The round skid plate on the knee was a leftover bit of the face dome, where I’d cut out holes for the port-holes. I mounted webbing at three points on the knee gasket, and also at three points in each leg hole on the main body. The main body’s webbing attached to the gaskets’ via more adjustable buckles. The leg’s burlap was then velcro’d to the inside of the leg holes. The goal here was to avoid having the leg material supporting the knee gaskets. It worked okay. The bottom of the leg material had a bit more velcro that would stick to the inside of the boots.
Ah, the boots. I had hoped I could stand with my feet on the ground rather than using platforms, but after trying on the main shell, I realized my legs would be way too stubby. My first attempt at platforms involved a wooden contraption with hinges. It flexed just like a real foot, I had excellent balance even on my tiptoes, and it was heavy and fragile. They broke during a trial run. The backup plan was to glue together multiple layers of foam board to provide a platform. To make walking easier, I cut a taper off the front half so the foot could kind of roll forward. I screwed/glued a pair of sandals onto the foam platform, then used a piece of sewer drain as a vertical ankle sort of thing. This was glued directly to the foam platform, around my own ankle. I attached rigid fiberglass strips over my own toes to make that rounded front of the shoe. I covered the front of the shoe with some quilt batting to smooth out the imperfections, then stretchy fabric and resin to give a hard steel-toe kind of feel. Glued some leathery fabric around the back portion of the shoe and up & over the “ankle” pipe, then added some grommets to that leather fabric to provide shoelace holes. Covered the seams with some foam tape, added some upholstery nails, and attached the dive weights, and they actually turned out pretty okay. The best part? I was still wearing sandals, even while in costume.
The electronics. Each port-hole in the face dome had both a ring of yellow and a ring of red LEDs. All the yellow LED strips were wired together in parallel, as were the reds. The yellow and red strips shared a negative circuit but had dedicated positive circuits coming from the SPDT rocker switch mounted next to my hand within the left forearm. This allowed me to easily flip the port-hole lights from yellow to red (or off, for that matter). The power source was a 9-volt stuck with velcro to the inside of the main shell near my left armpit.
The face dome also contained 2x 80mm computer case fans inside those pipes at the bottom. These were powered by 2x 9-volts in a parallel circuit, also in my left armpit. I had backup 9-volts in my left armpit too. The power switch for these fans was a SPST rocker switch in the left forearm, right next to the SPDT switch for the lights. I don’t know why I bothered installing a rocker switch for the fans – I never turned them off.
The drill was powered by its own lithium ion battery pack – I just extended the wiring so I could mount the battery pack inside the main body shell. I drilled a tiny hole through the housing and trigger for the drill so I could slide a small nail into the hole to keep the switch locked in the on position. This meant the only thing interrupting the power was my own SPST rocker switch inside the right forearm. I was rather pleasantly surprised when I cut into that power drill, that the electronics inside were actually very simple and modular, which made it easy to separate the power source from the motor & chuck assembly.
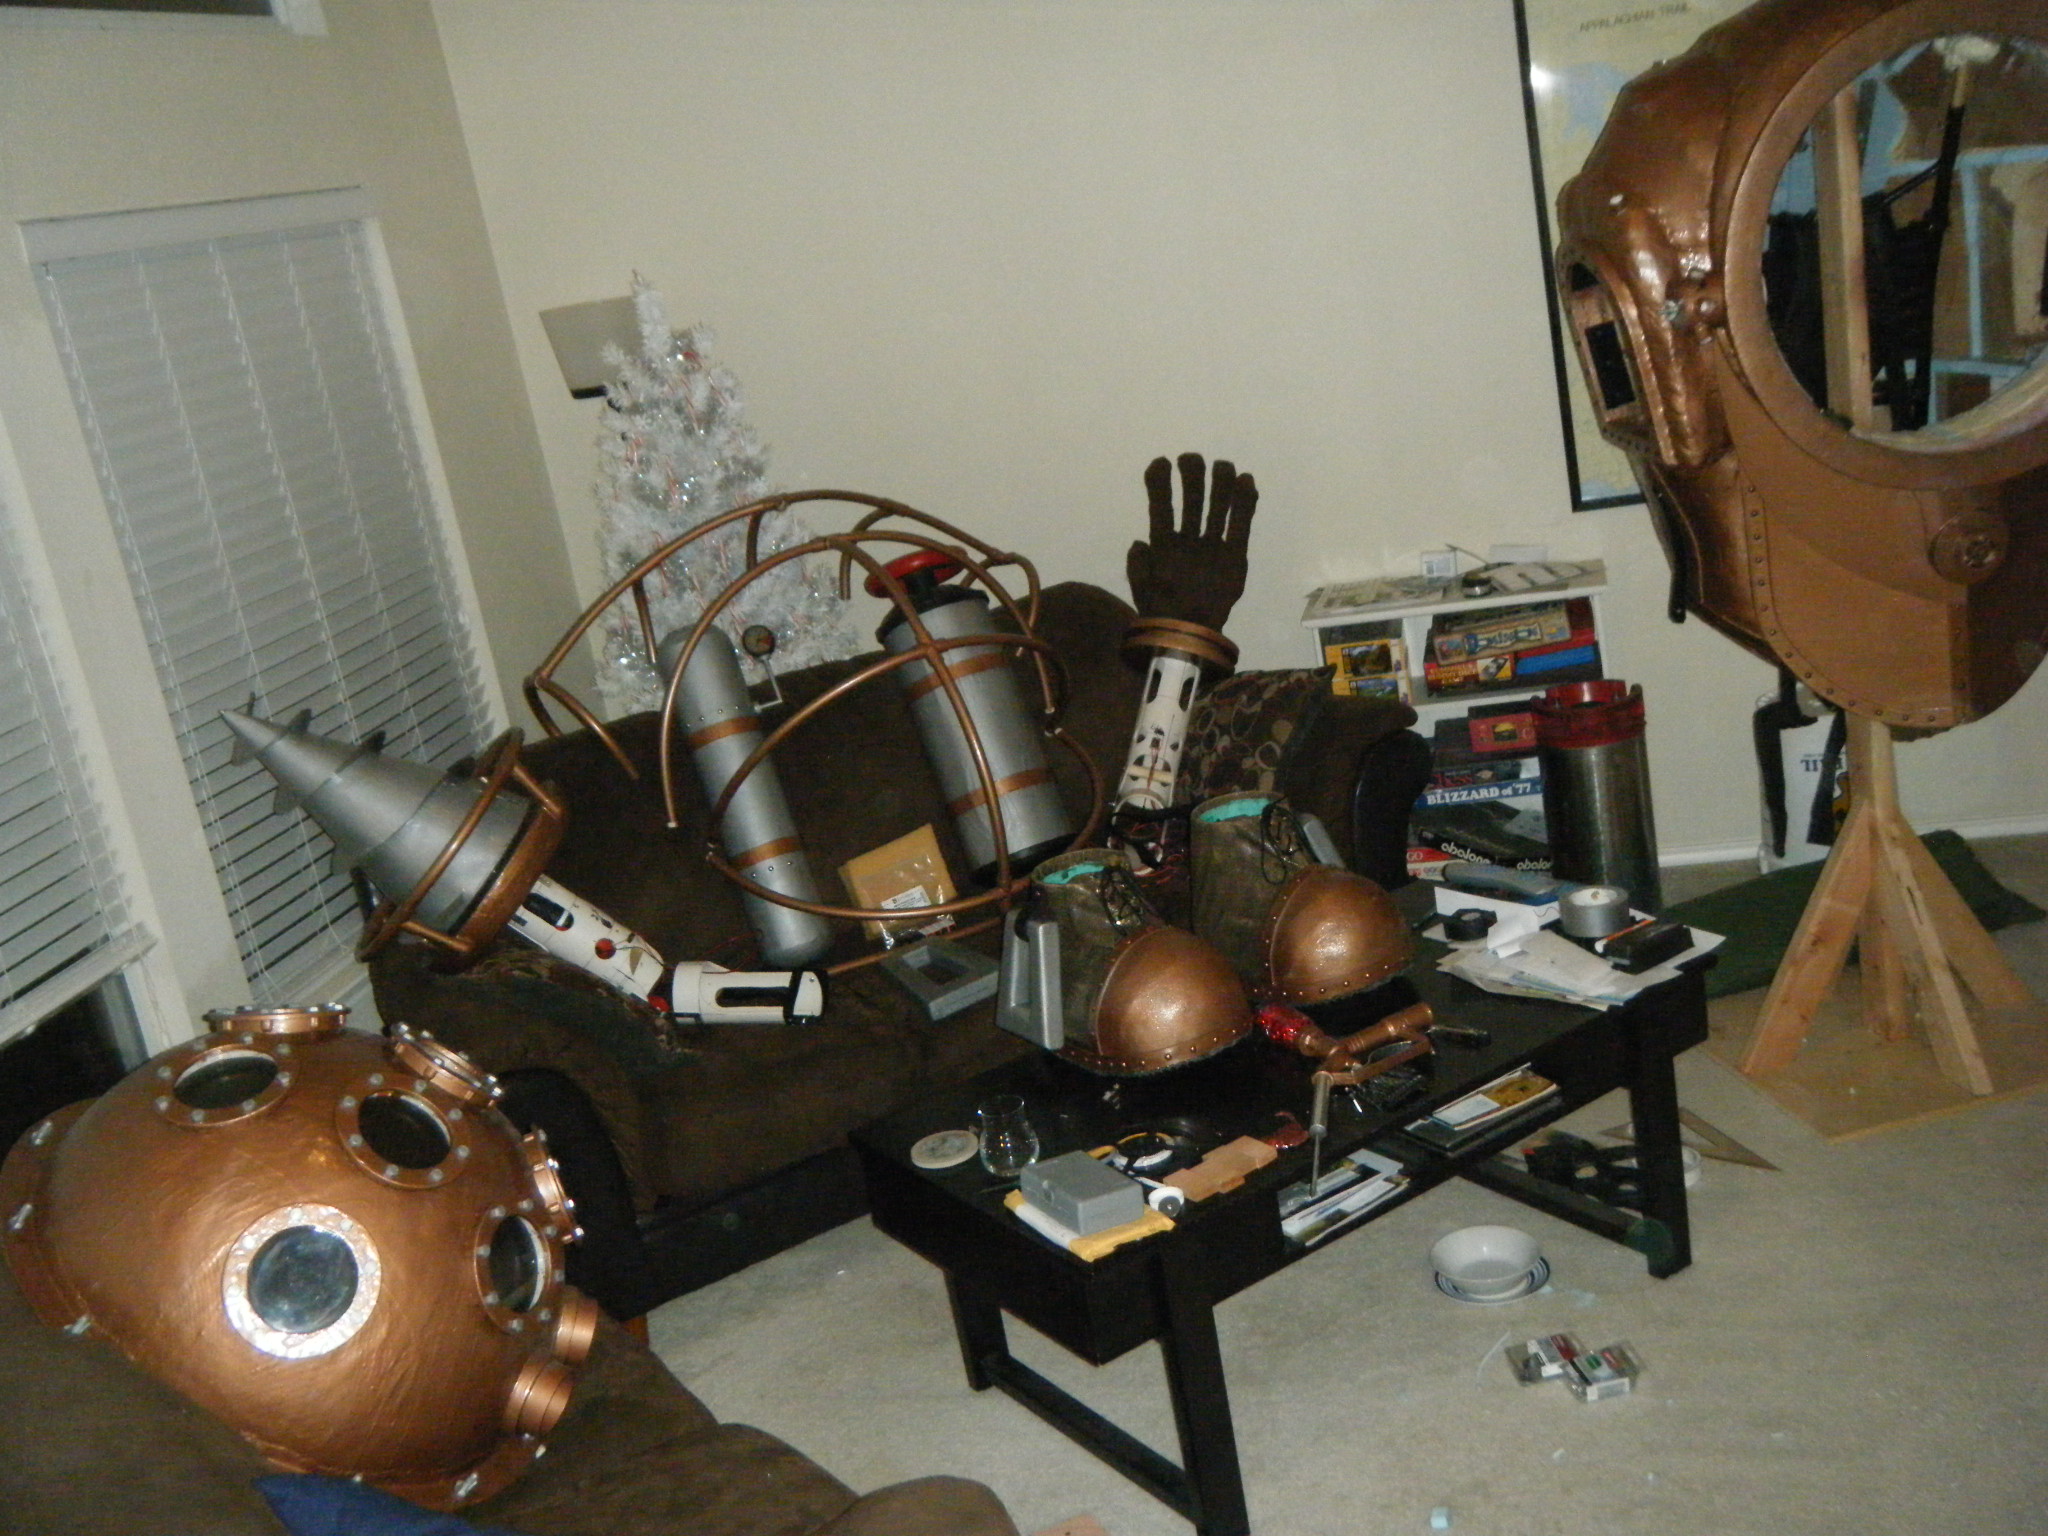
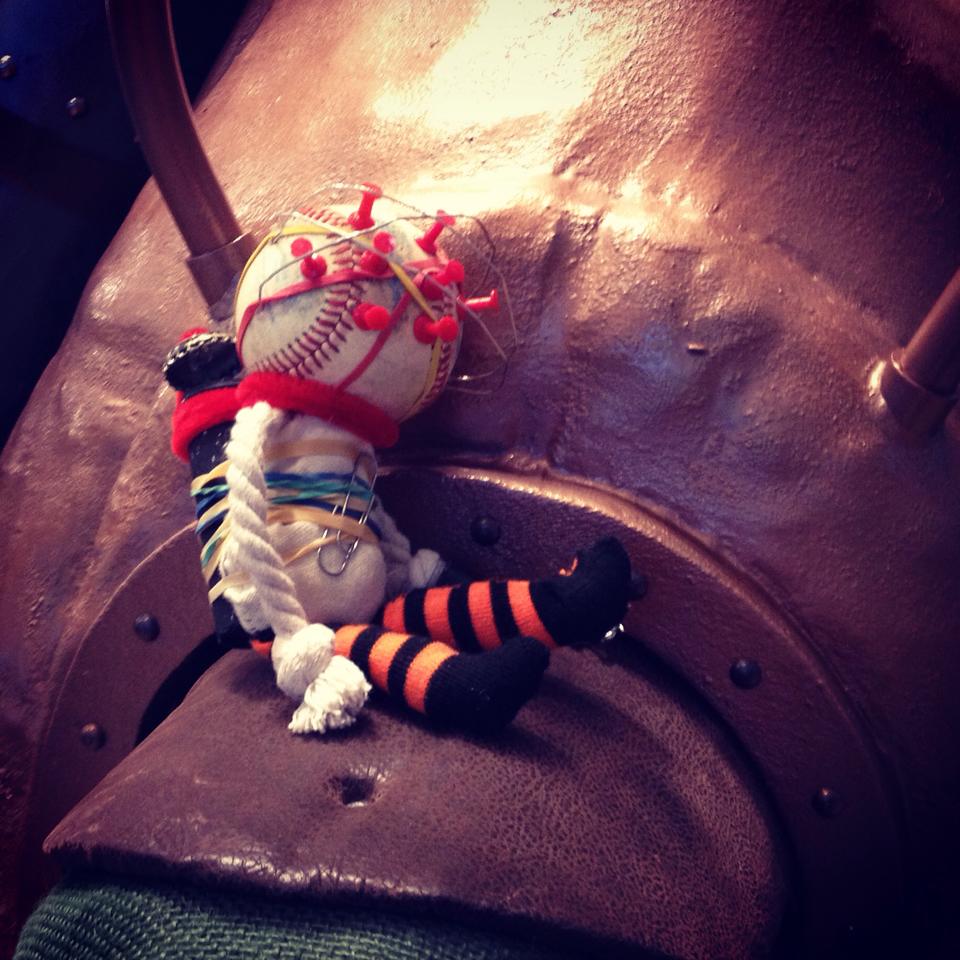
The ADAM extractor is my favourite piece, I think. I started with a gas pump nozzle that I picked up on eBay for about $30. I cut some pieces off of it, added a PVC tube at the bottom, built up the bottle apparatus, used a very large nail as the spike, painted this thing bronze. I found some “red ice gems” on amazon that reflect the red LED strip very nicely. The lights are powered by a 9-volt in handle extension at the bottom. I’m currently building a frame for this piece so it can be displayed proudly in the hallway.
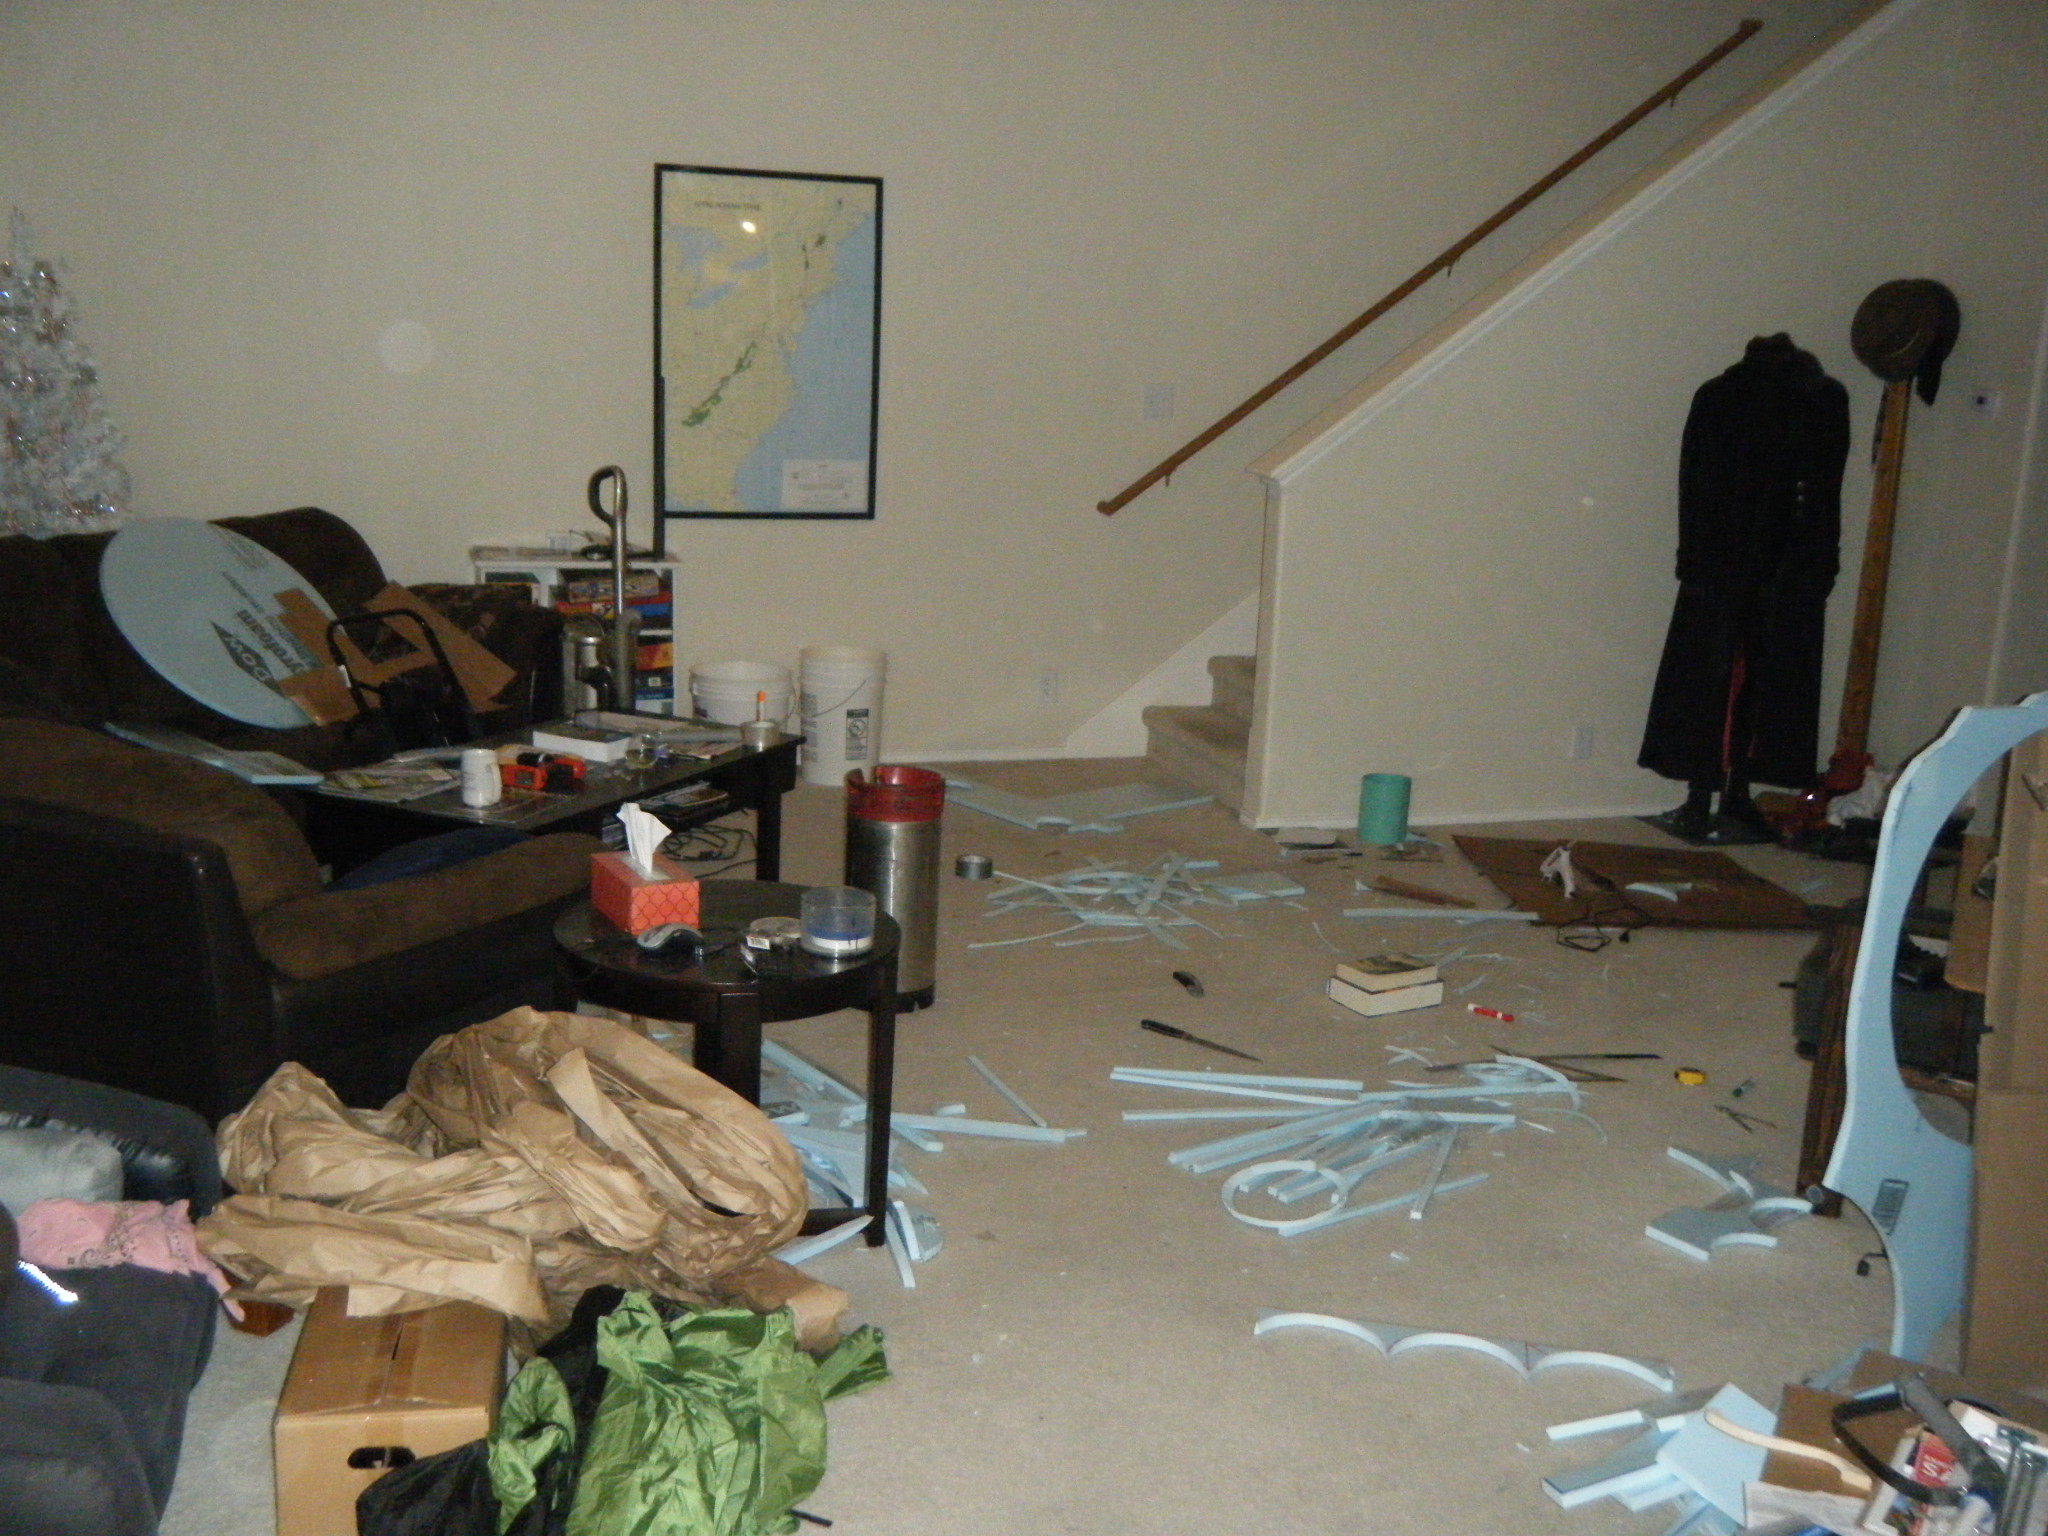
Start to finish, it took me the vast majority of my free time for 4 months. I didn’t keep track of how much I spent on this thing, but that’s only because I’m happier not knowing. I guarantee you it was way too expensive. This is by far the largest build I’ve done, and I’m not sure I want to try topping it. Just look at how much space this thing fills in my living room:
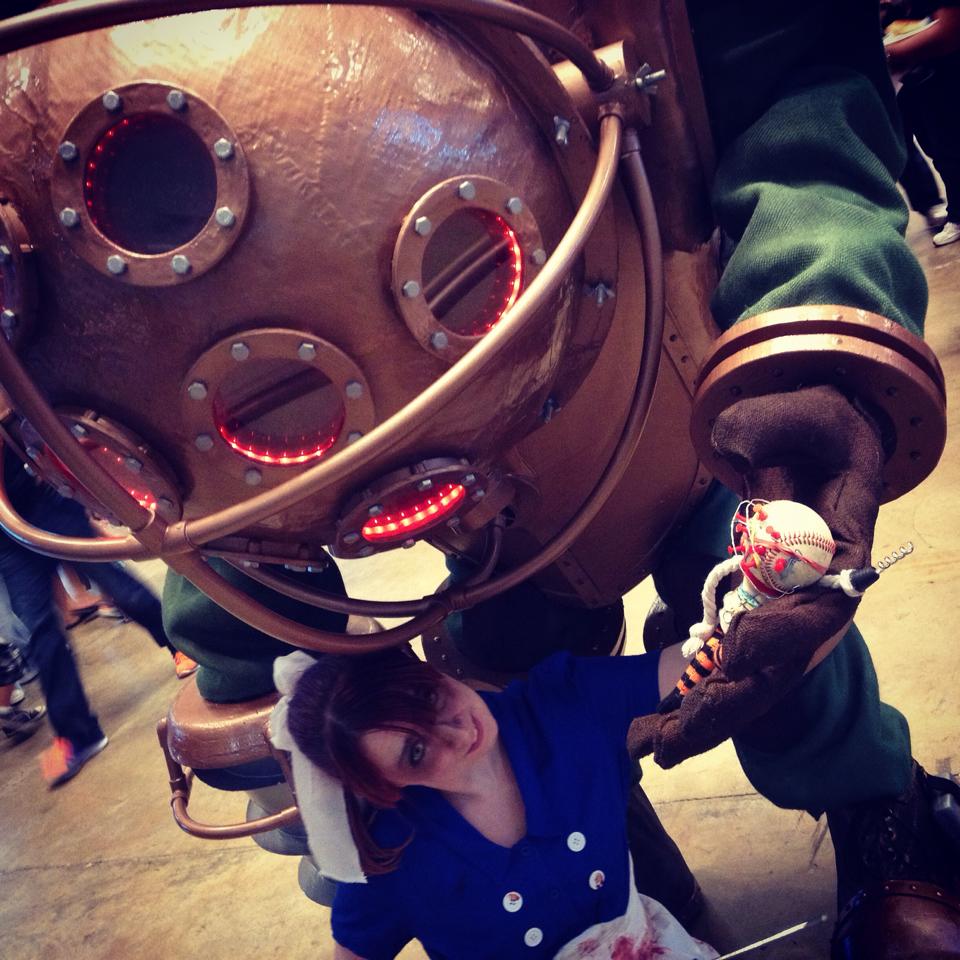
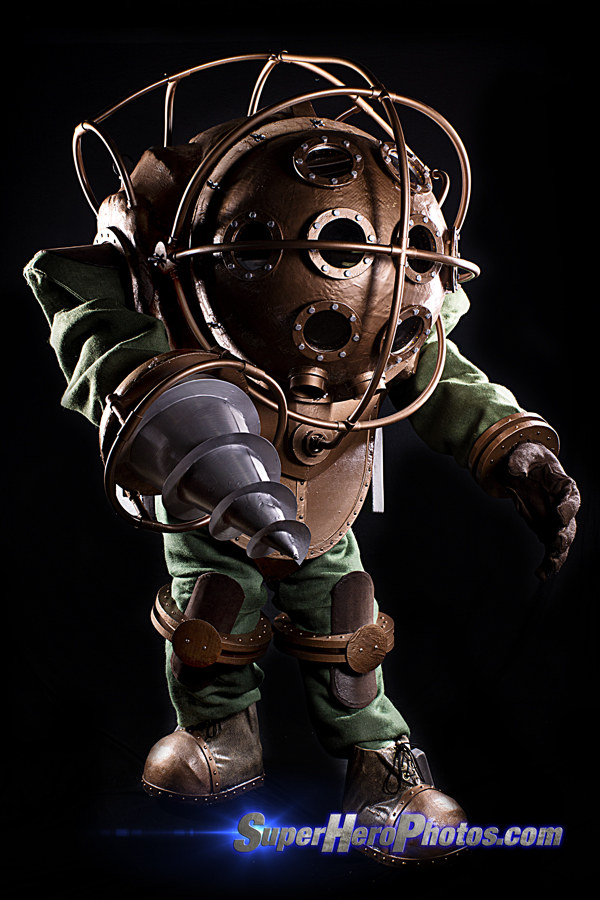
Here are photos of the finished product. I wasn’t able to take photos/video of myself for obvious reasons, and I haven’t yet gotten all the media from others. Eventually though, I do hope to have some video up here. I’ll add more photos & videos as I track ’em down.
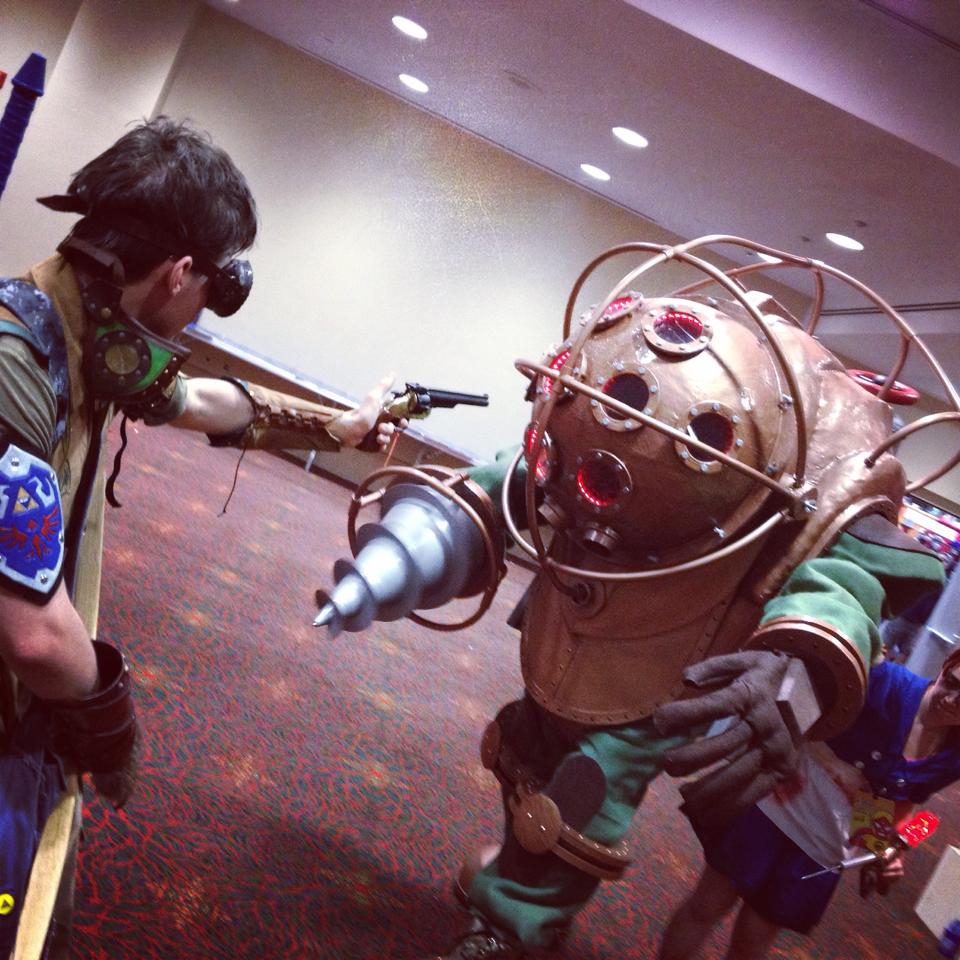
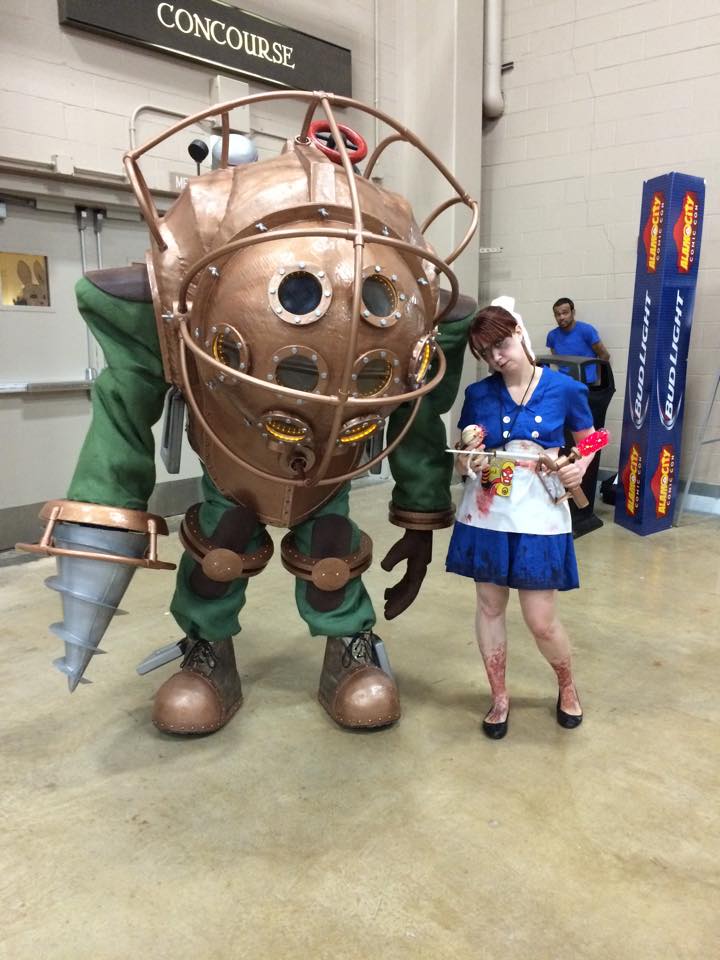
I’m 6’1″ barefoot. The main body shell added somewhere between 6-12″. The shoes added another 6″, and the roll cage another 6″. Standing upright in this costume, I towered about 8 feet tall. It was very challenging getting through some doorways. I don’t know how much this weighs total, but it’s a lot. I might weigh the pieces soon and find out. I wore it for 7 hours solid at Comic Con (San Antonio), and it was miserable. By the end of that day I was feeling nauseas, dizzy, and pretty sore.
My main regret is that I ran out of time before I was able to do any blood or weathering effects. I might revisit this costume sometime in the future and try to do a more polished version (and cut down on weight while I’m at it).
I would enjoy hearing from others, particularly anyone looking to build their own. Drop me a line if you have any questions.

You never cease to amaze me. I’m very proud to say, this is my son!
And the fact that you could still wear sandals is just perfect.
Mom
An amazing project. Incredibly impressive.
Can’t wait to hear how it worked for Halloween!!